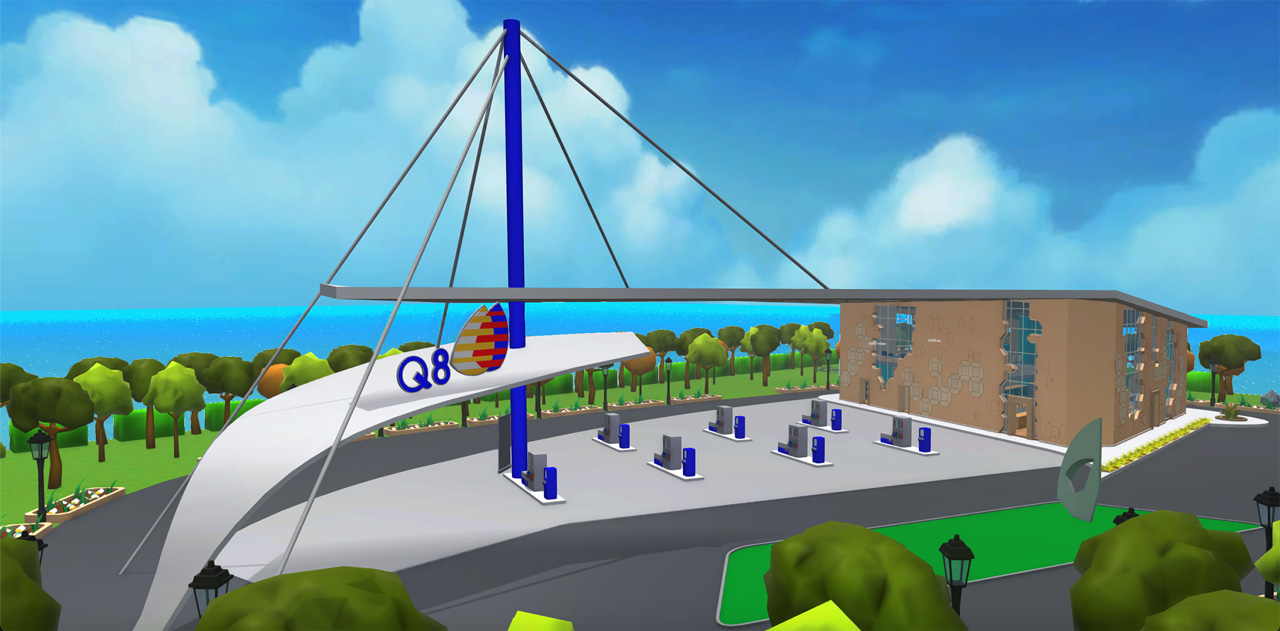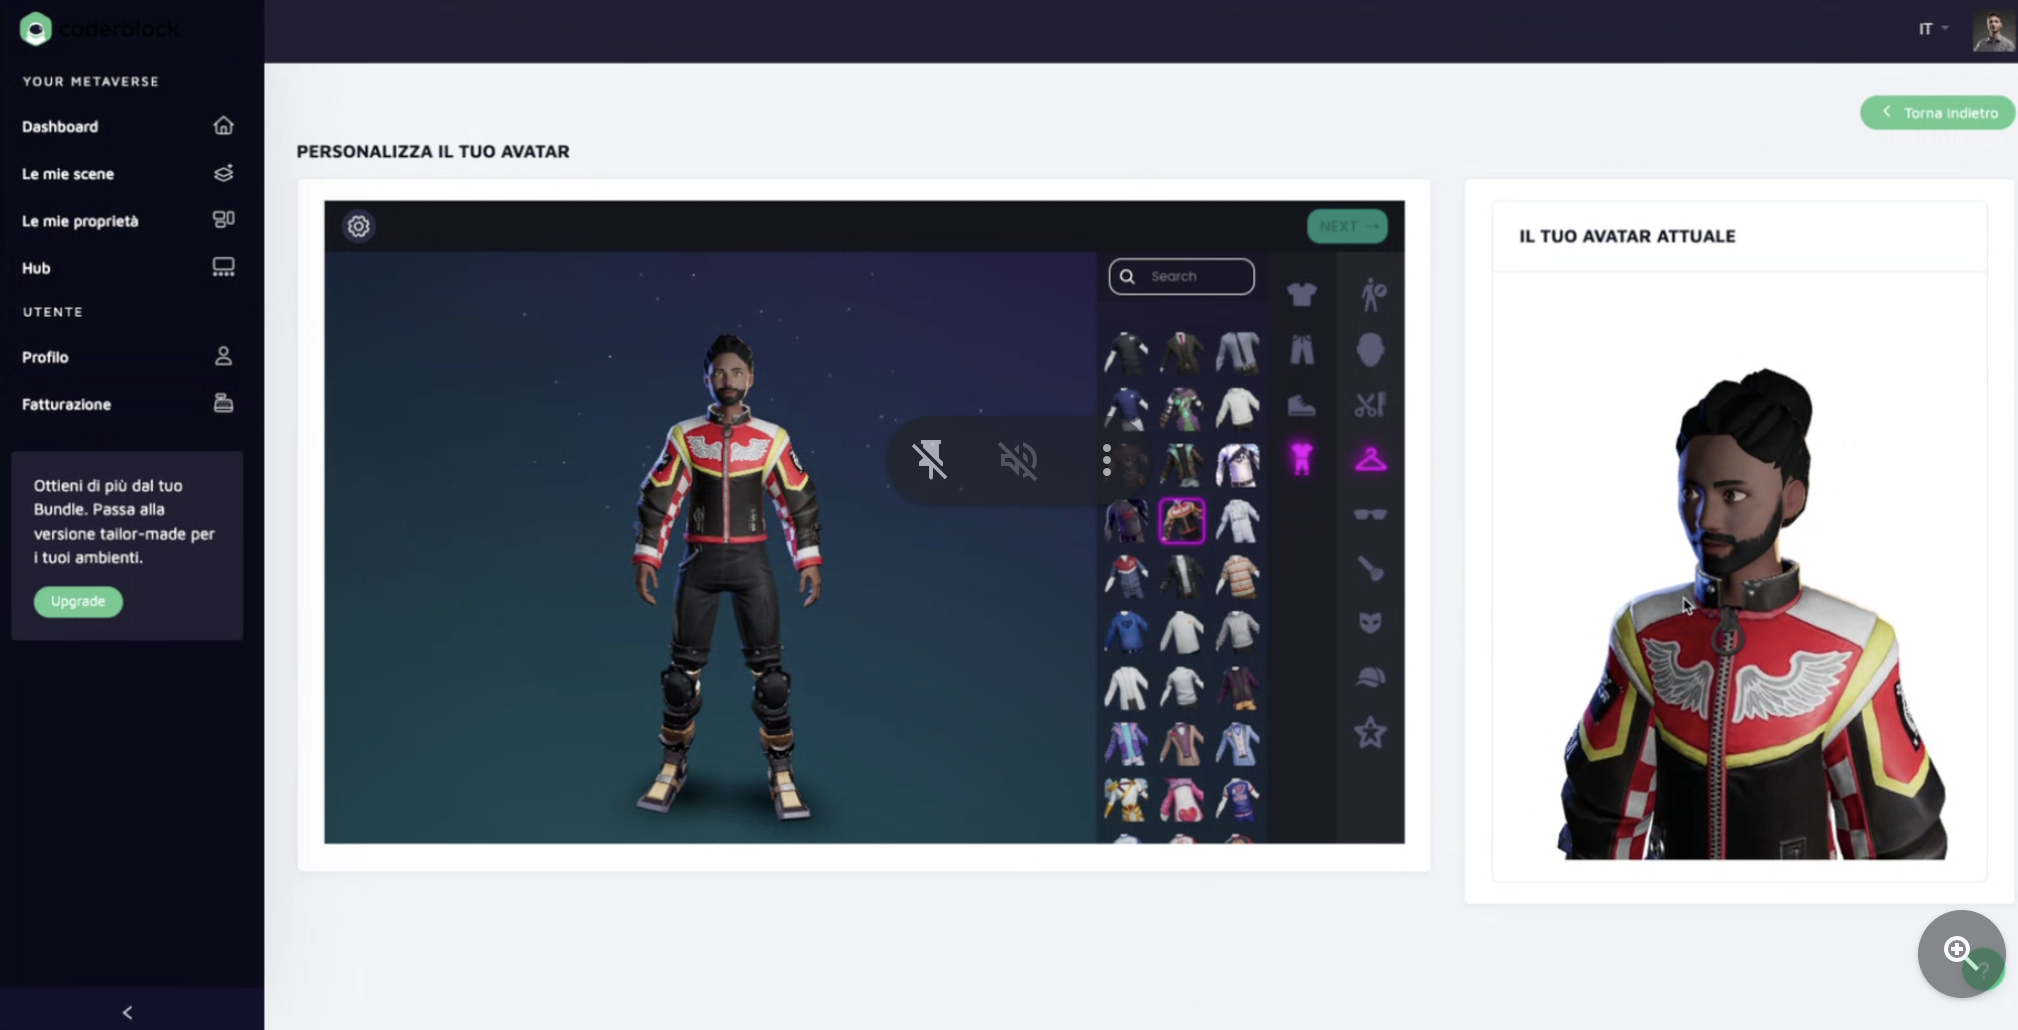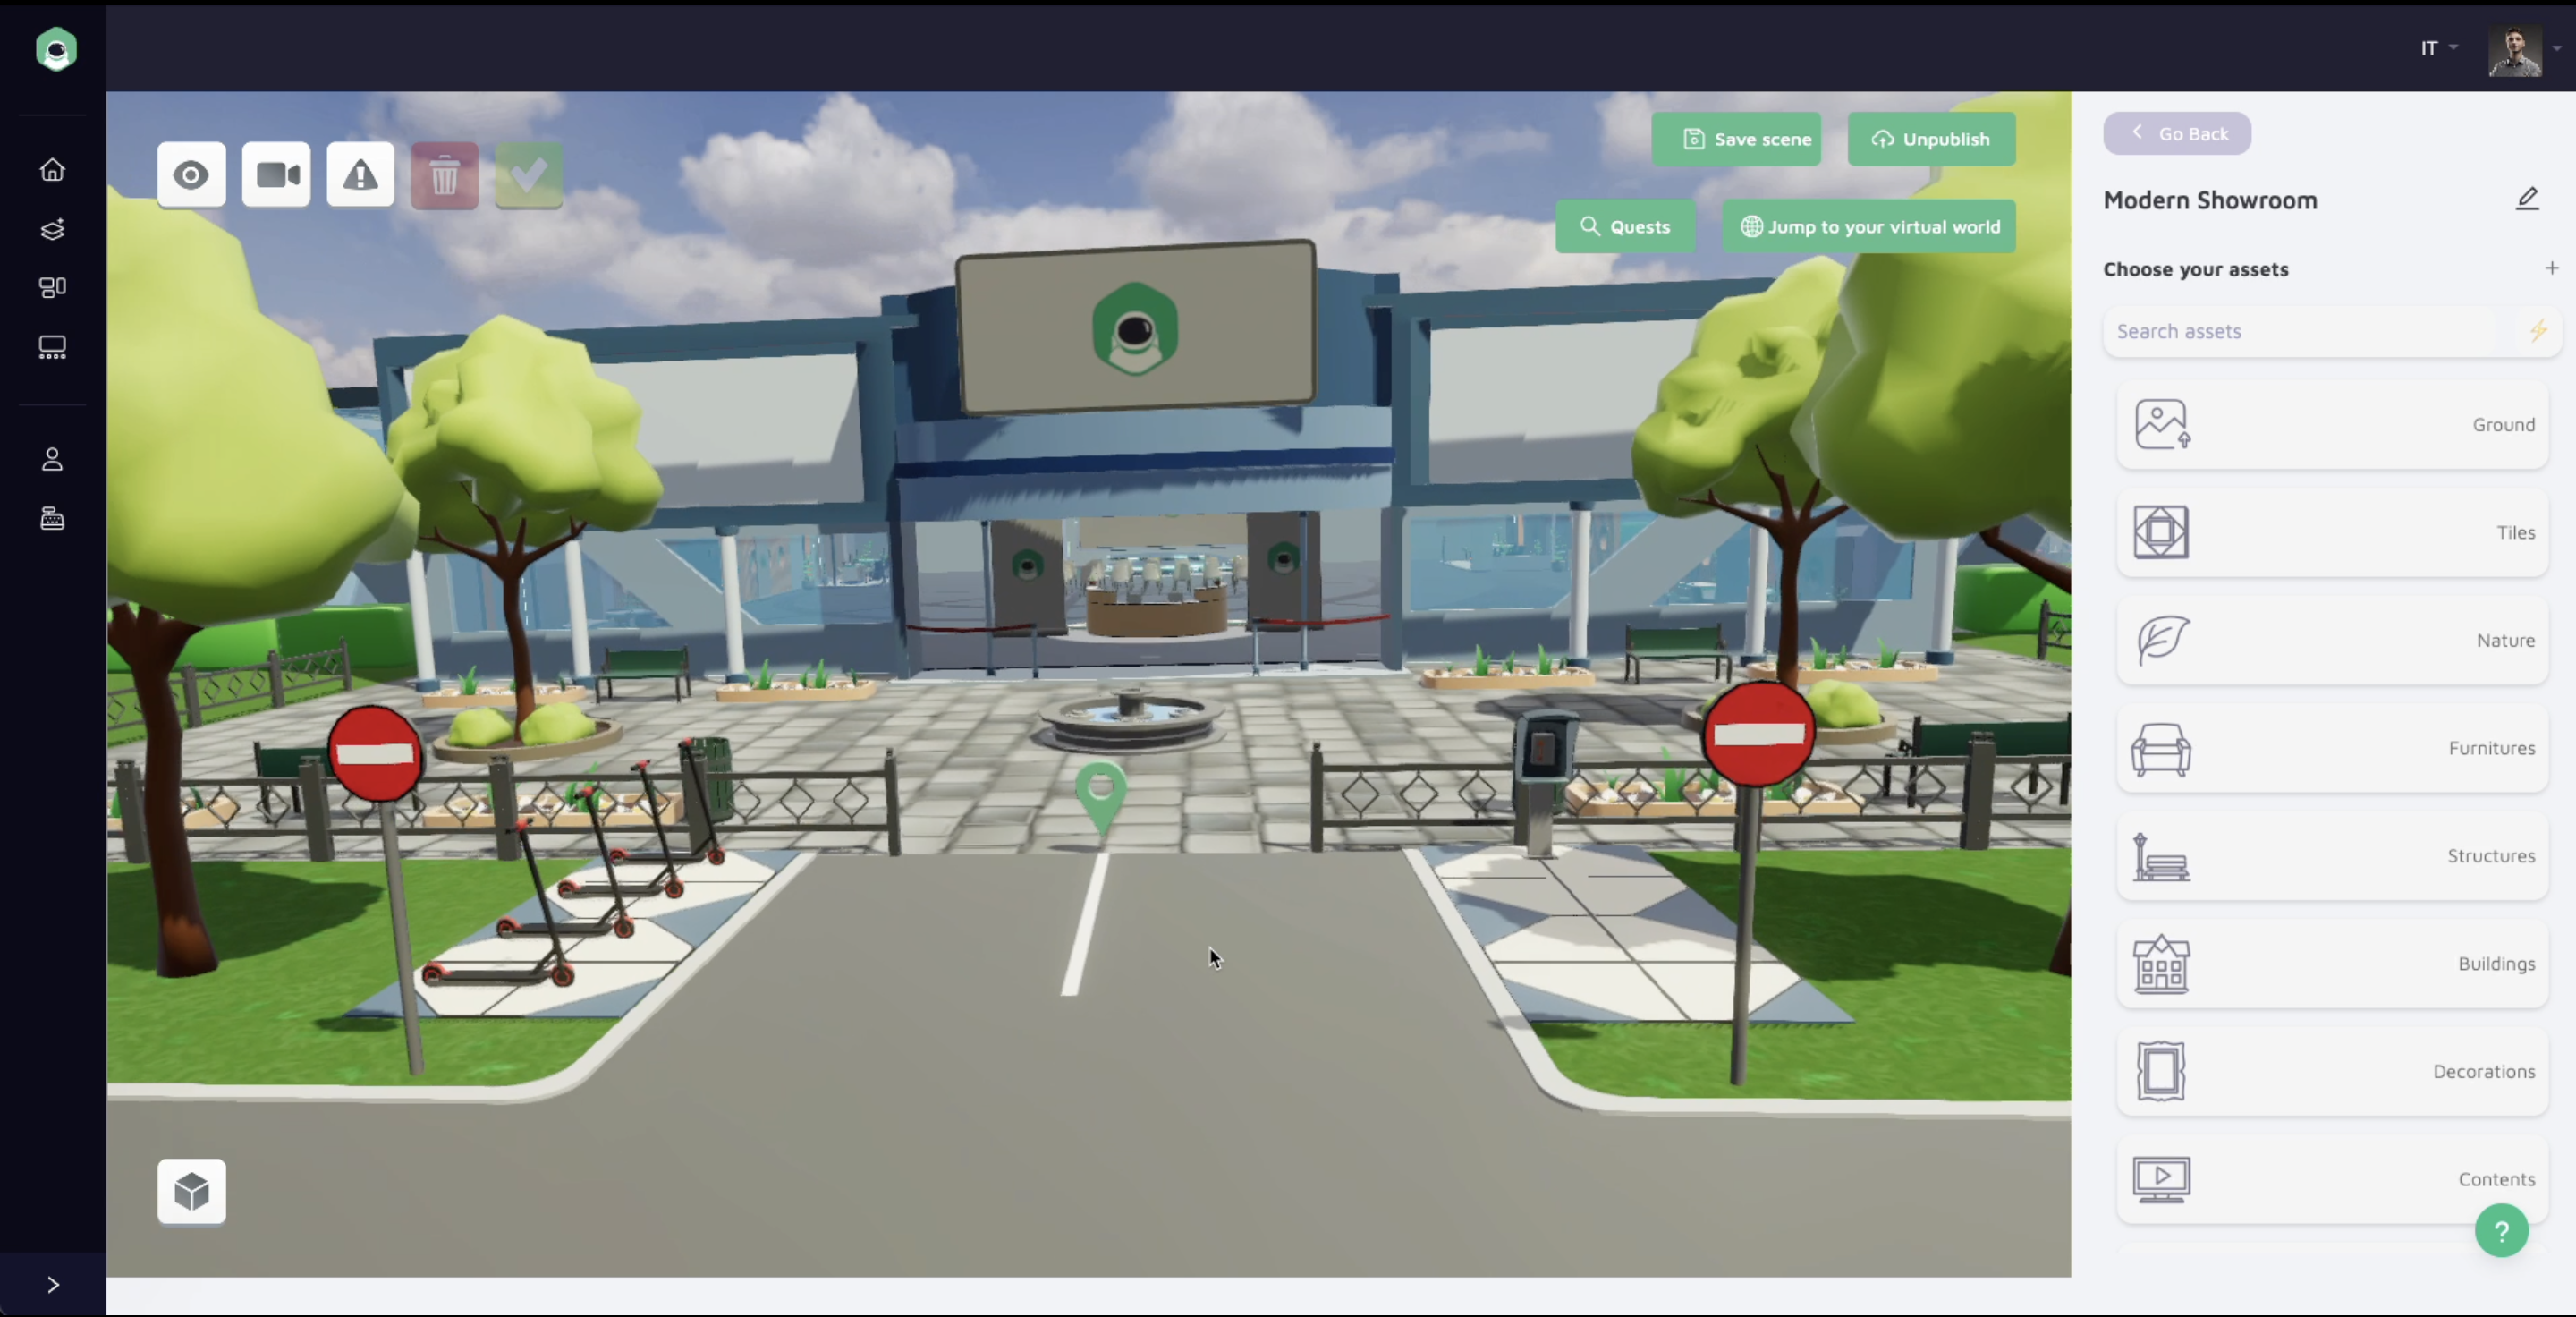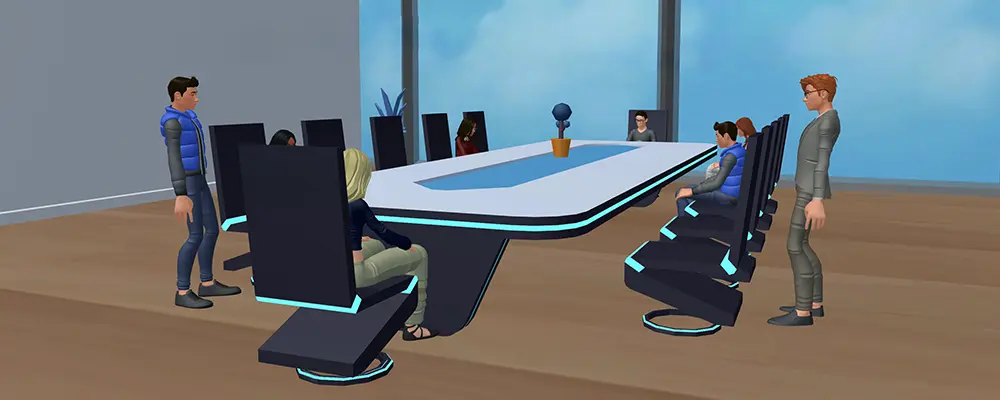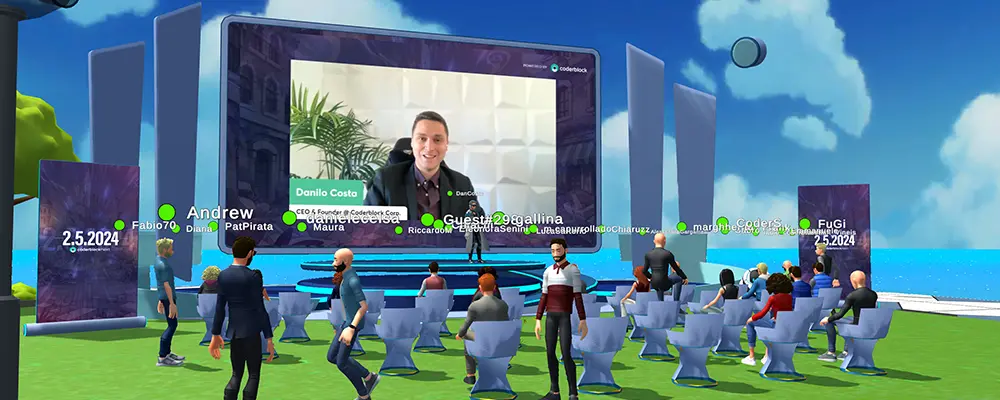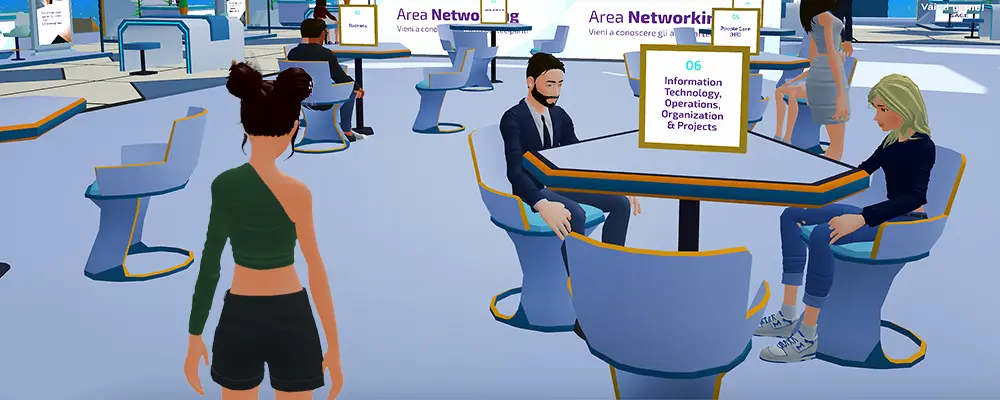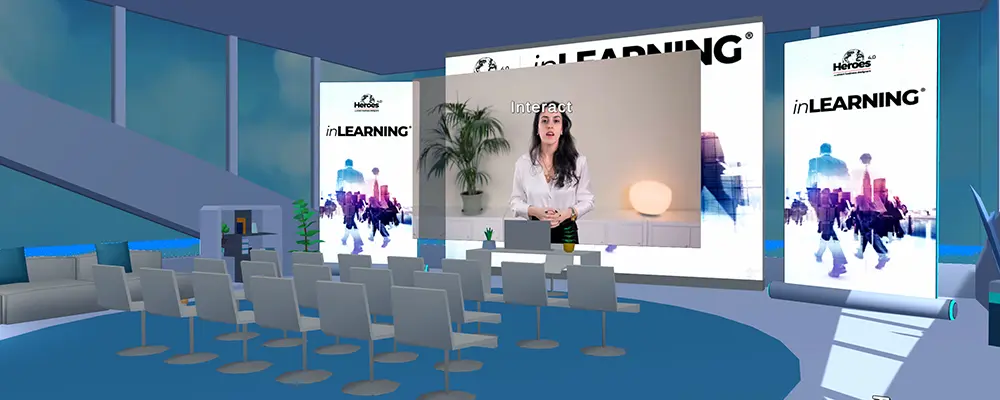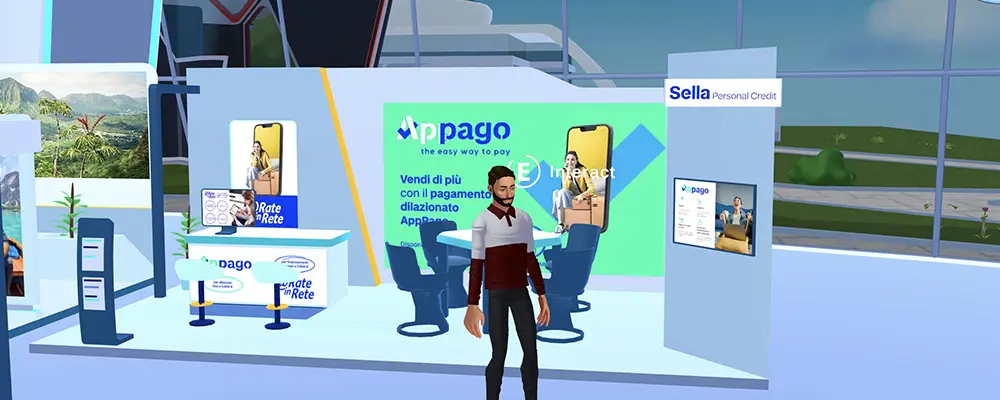
# Welcome to Coderblock Studio!

We are pleased to welcome you to **Coderblock Studio**: a suite that allows you to create, manage and monitor the results of your virtual experiences.

It is a simple and intuitive platform that allows you to build entire **virtual worlds**. Coderblock Studio is accessible **online** (via browser) to anyone who wants to create buildings, scenarios and virtual experiences, **without requiring specific skills in 3D modeling or software development**.

### Spaces

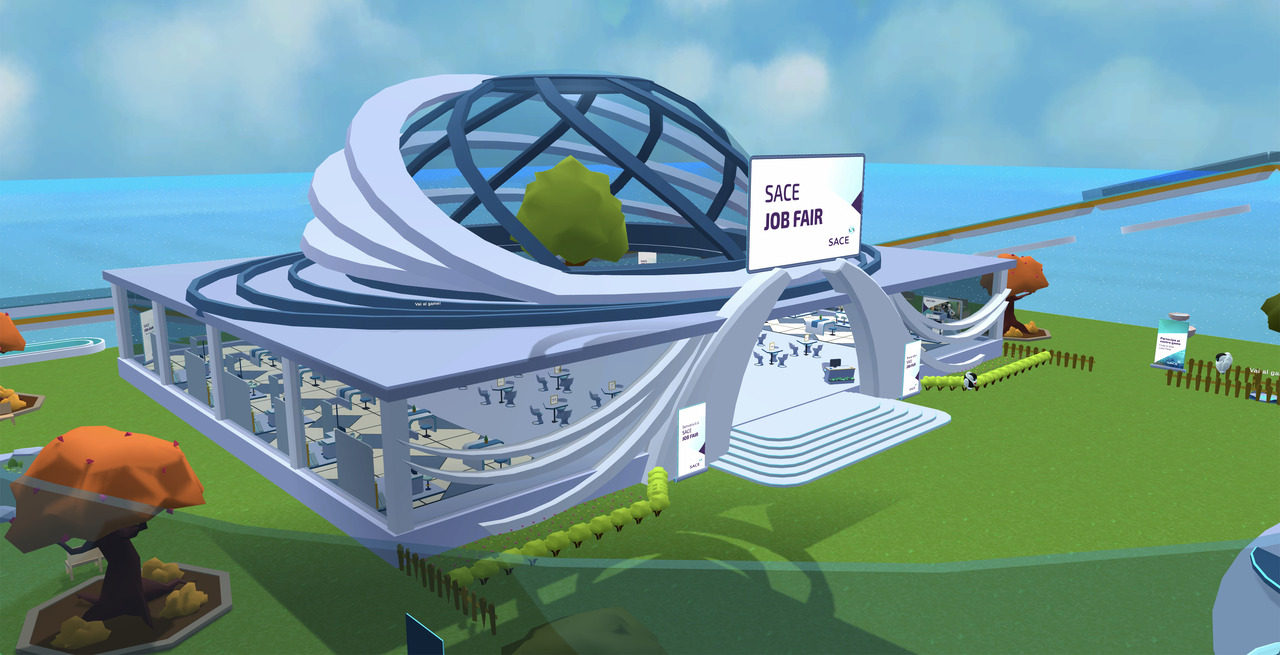
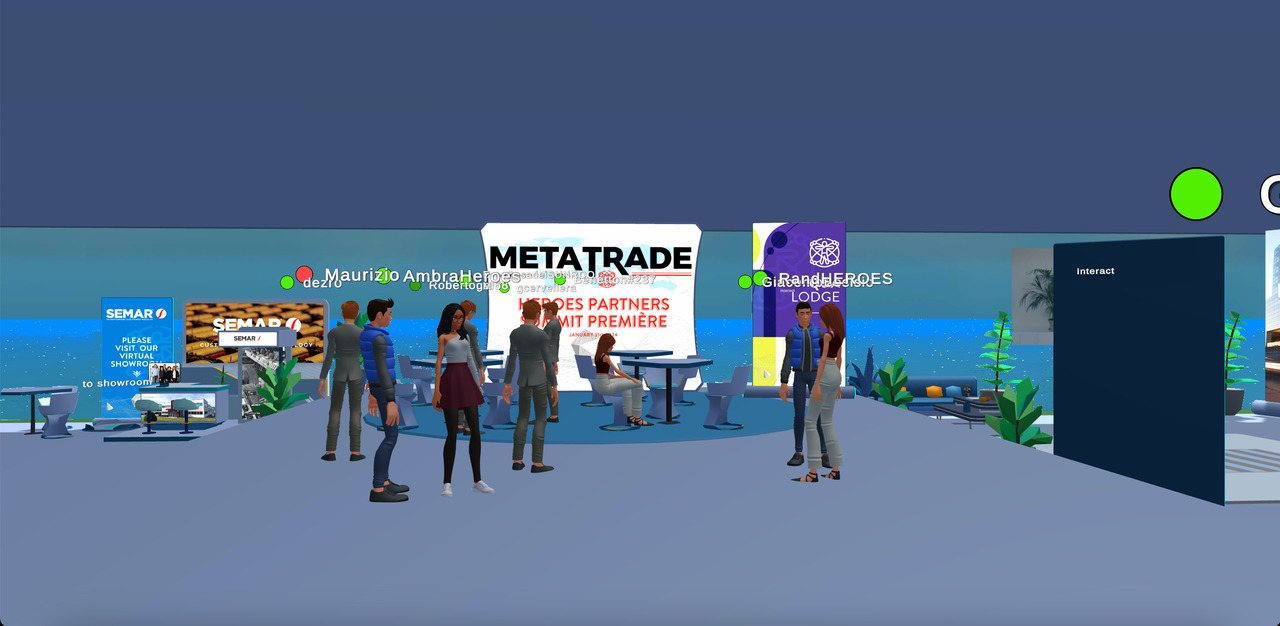
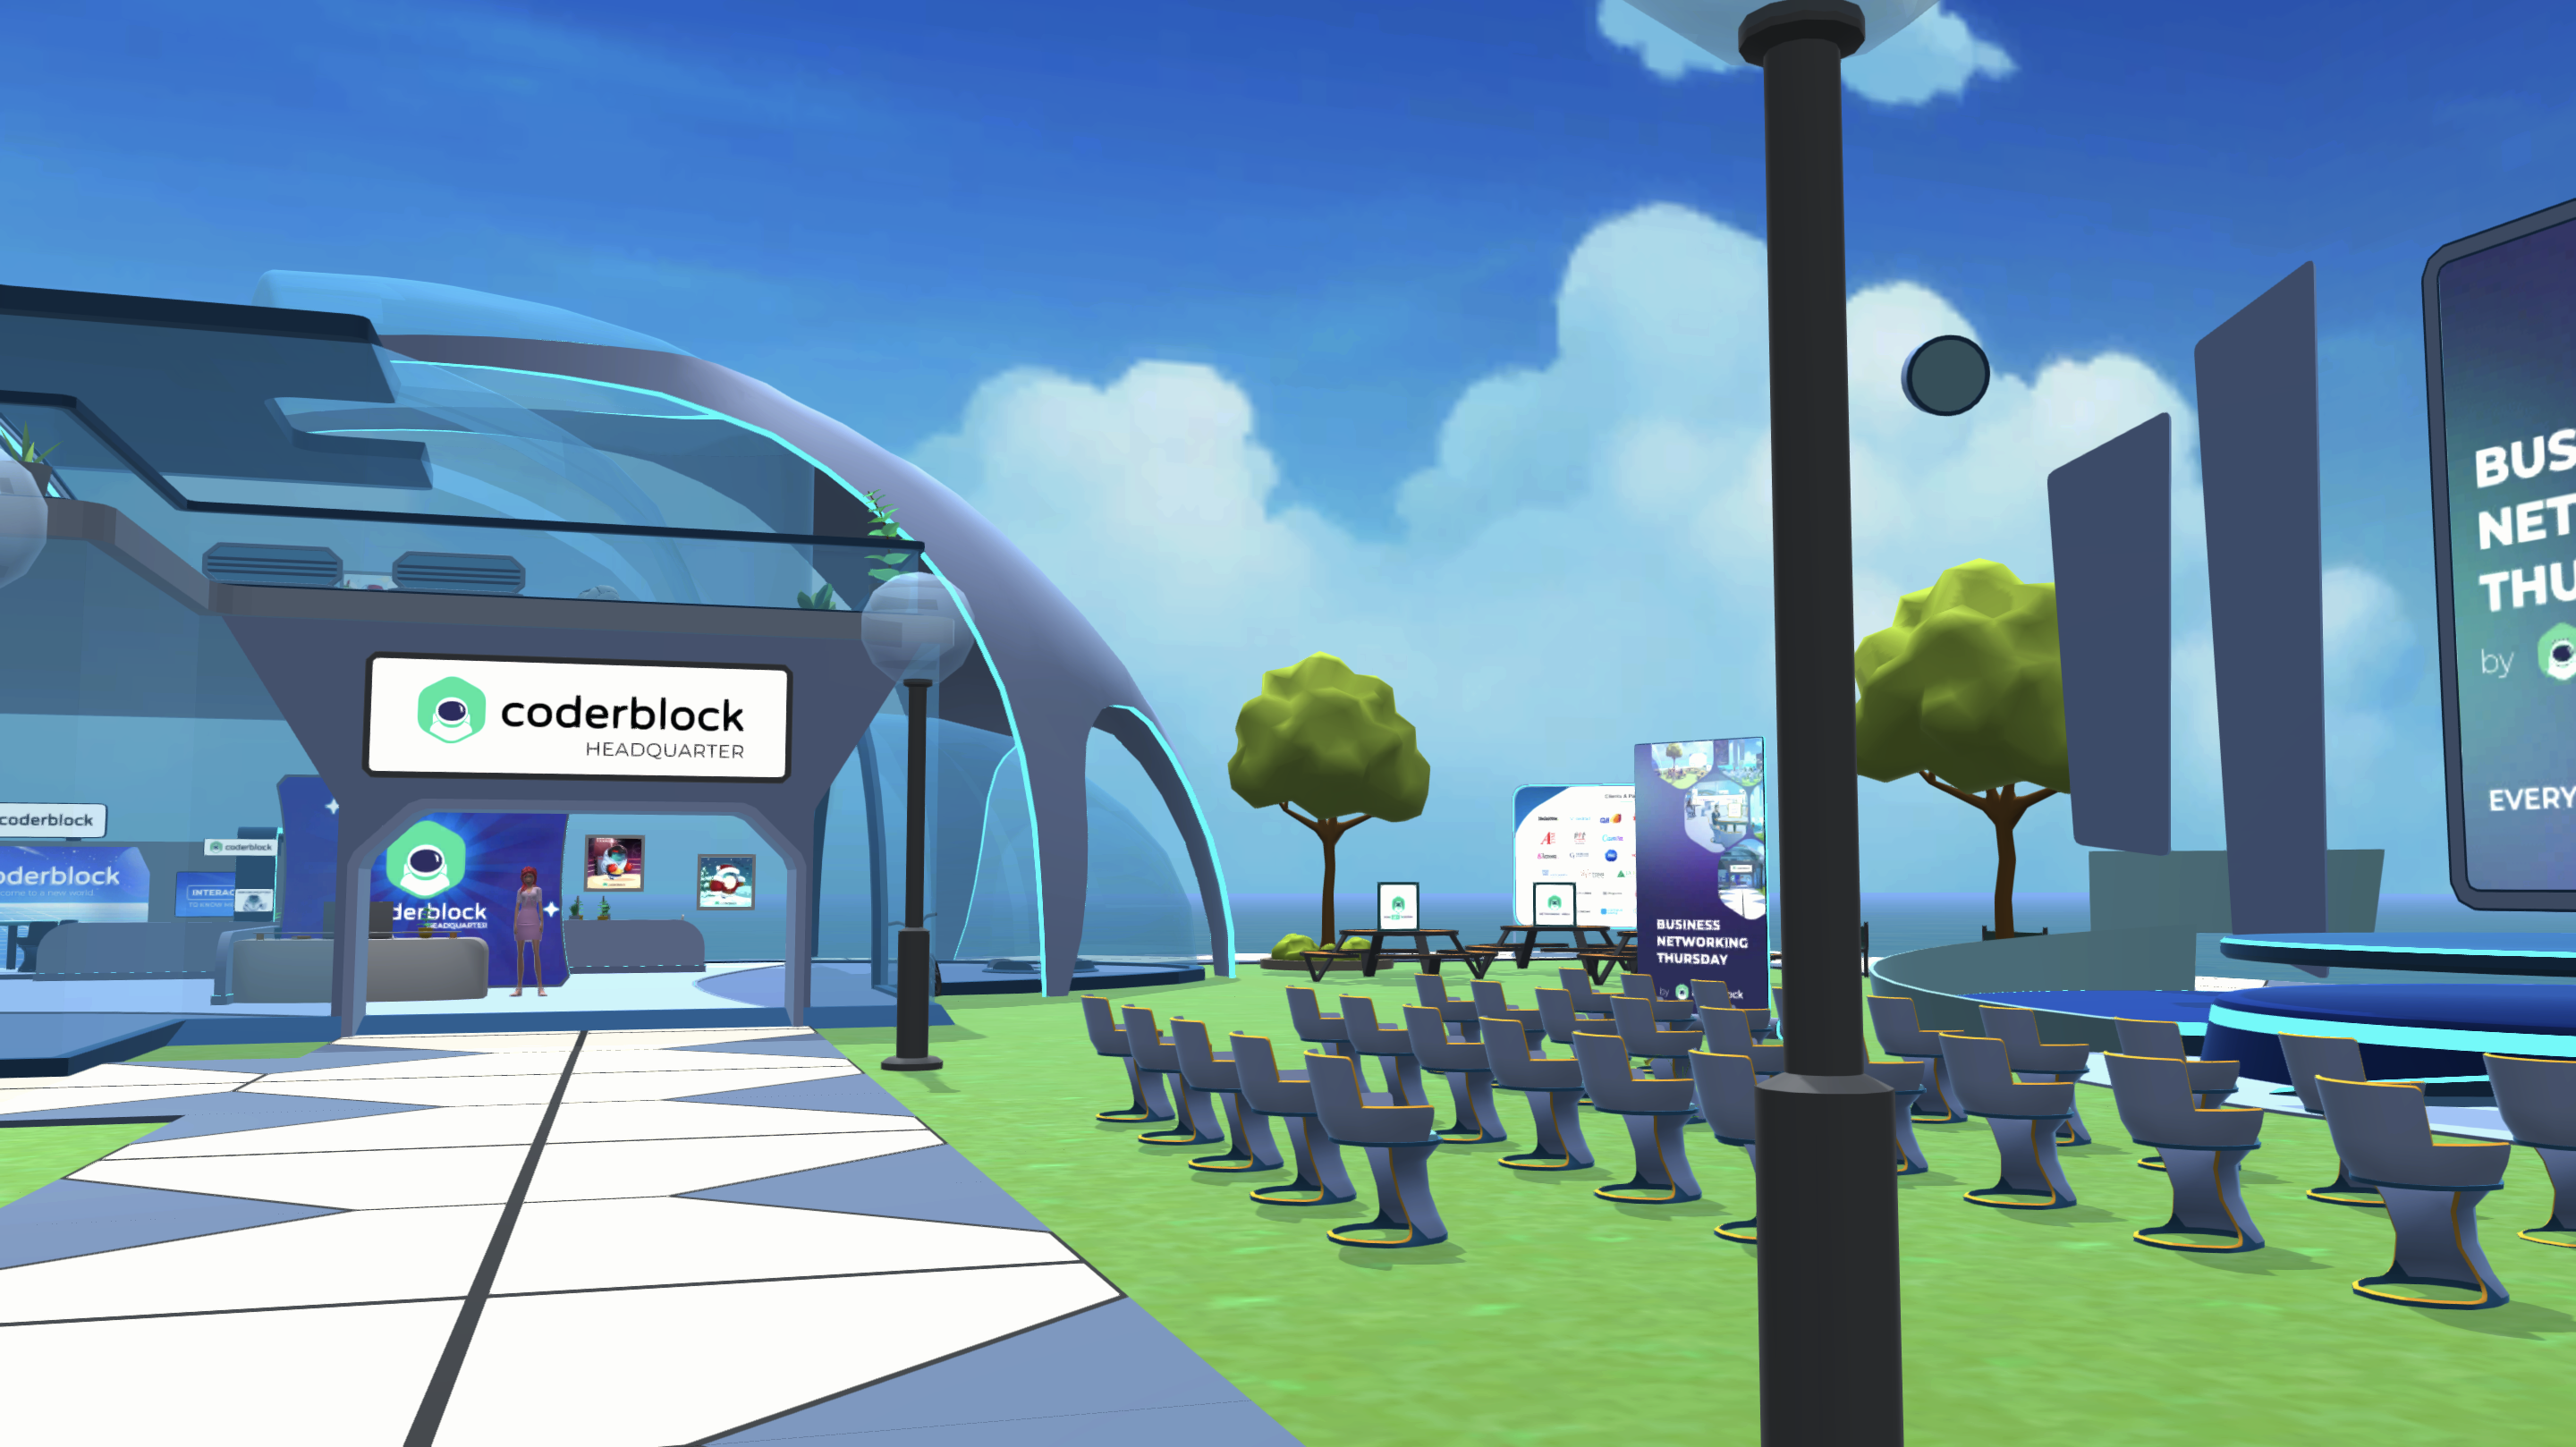
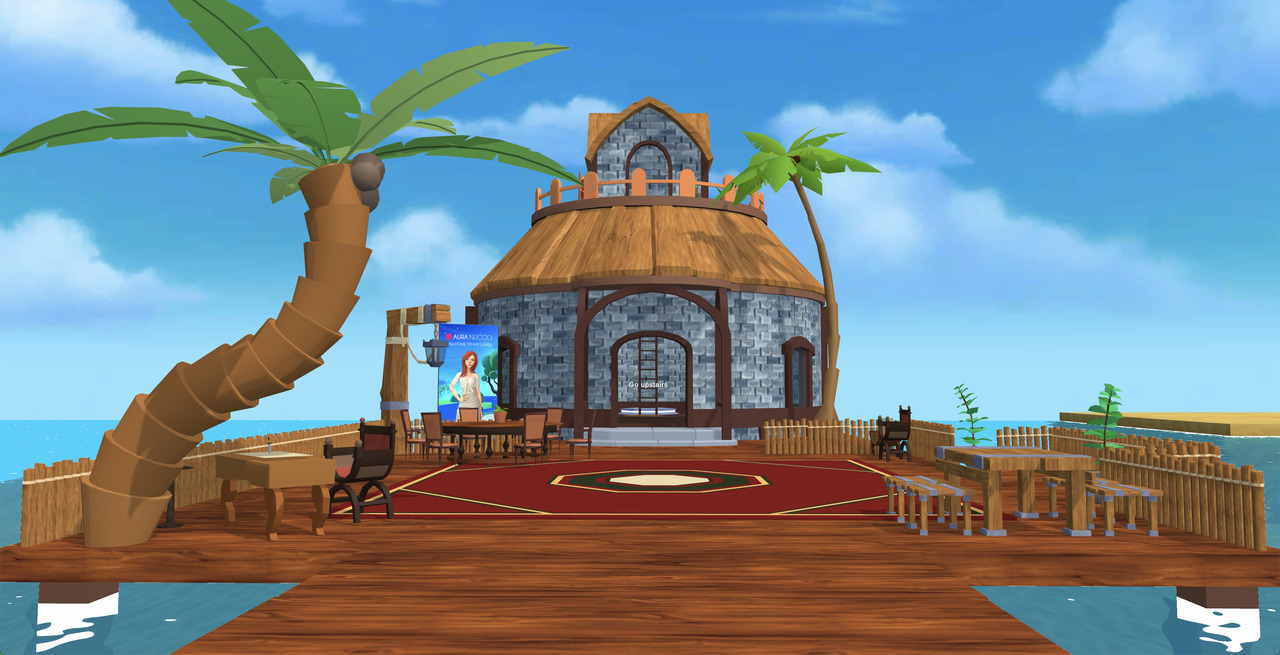
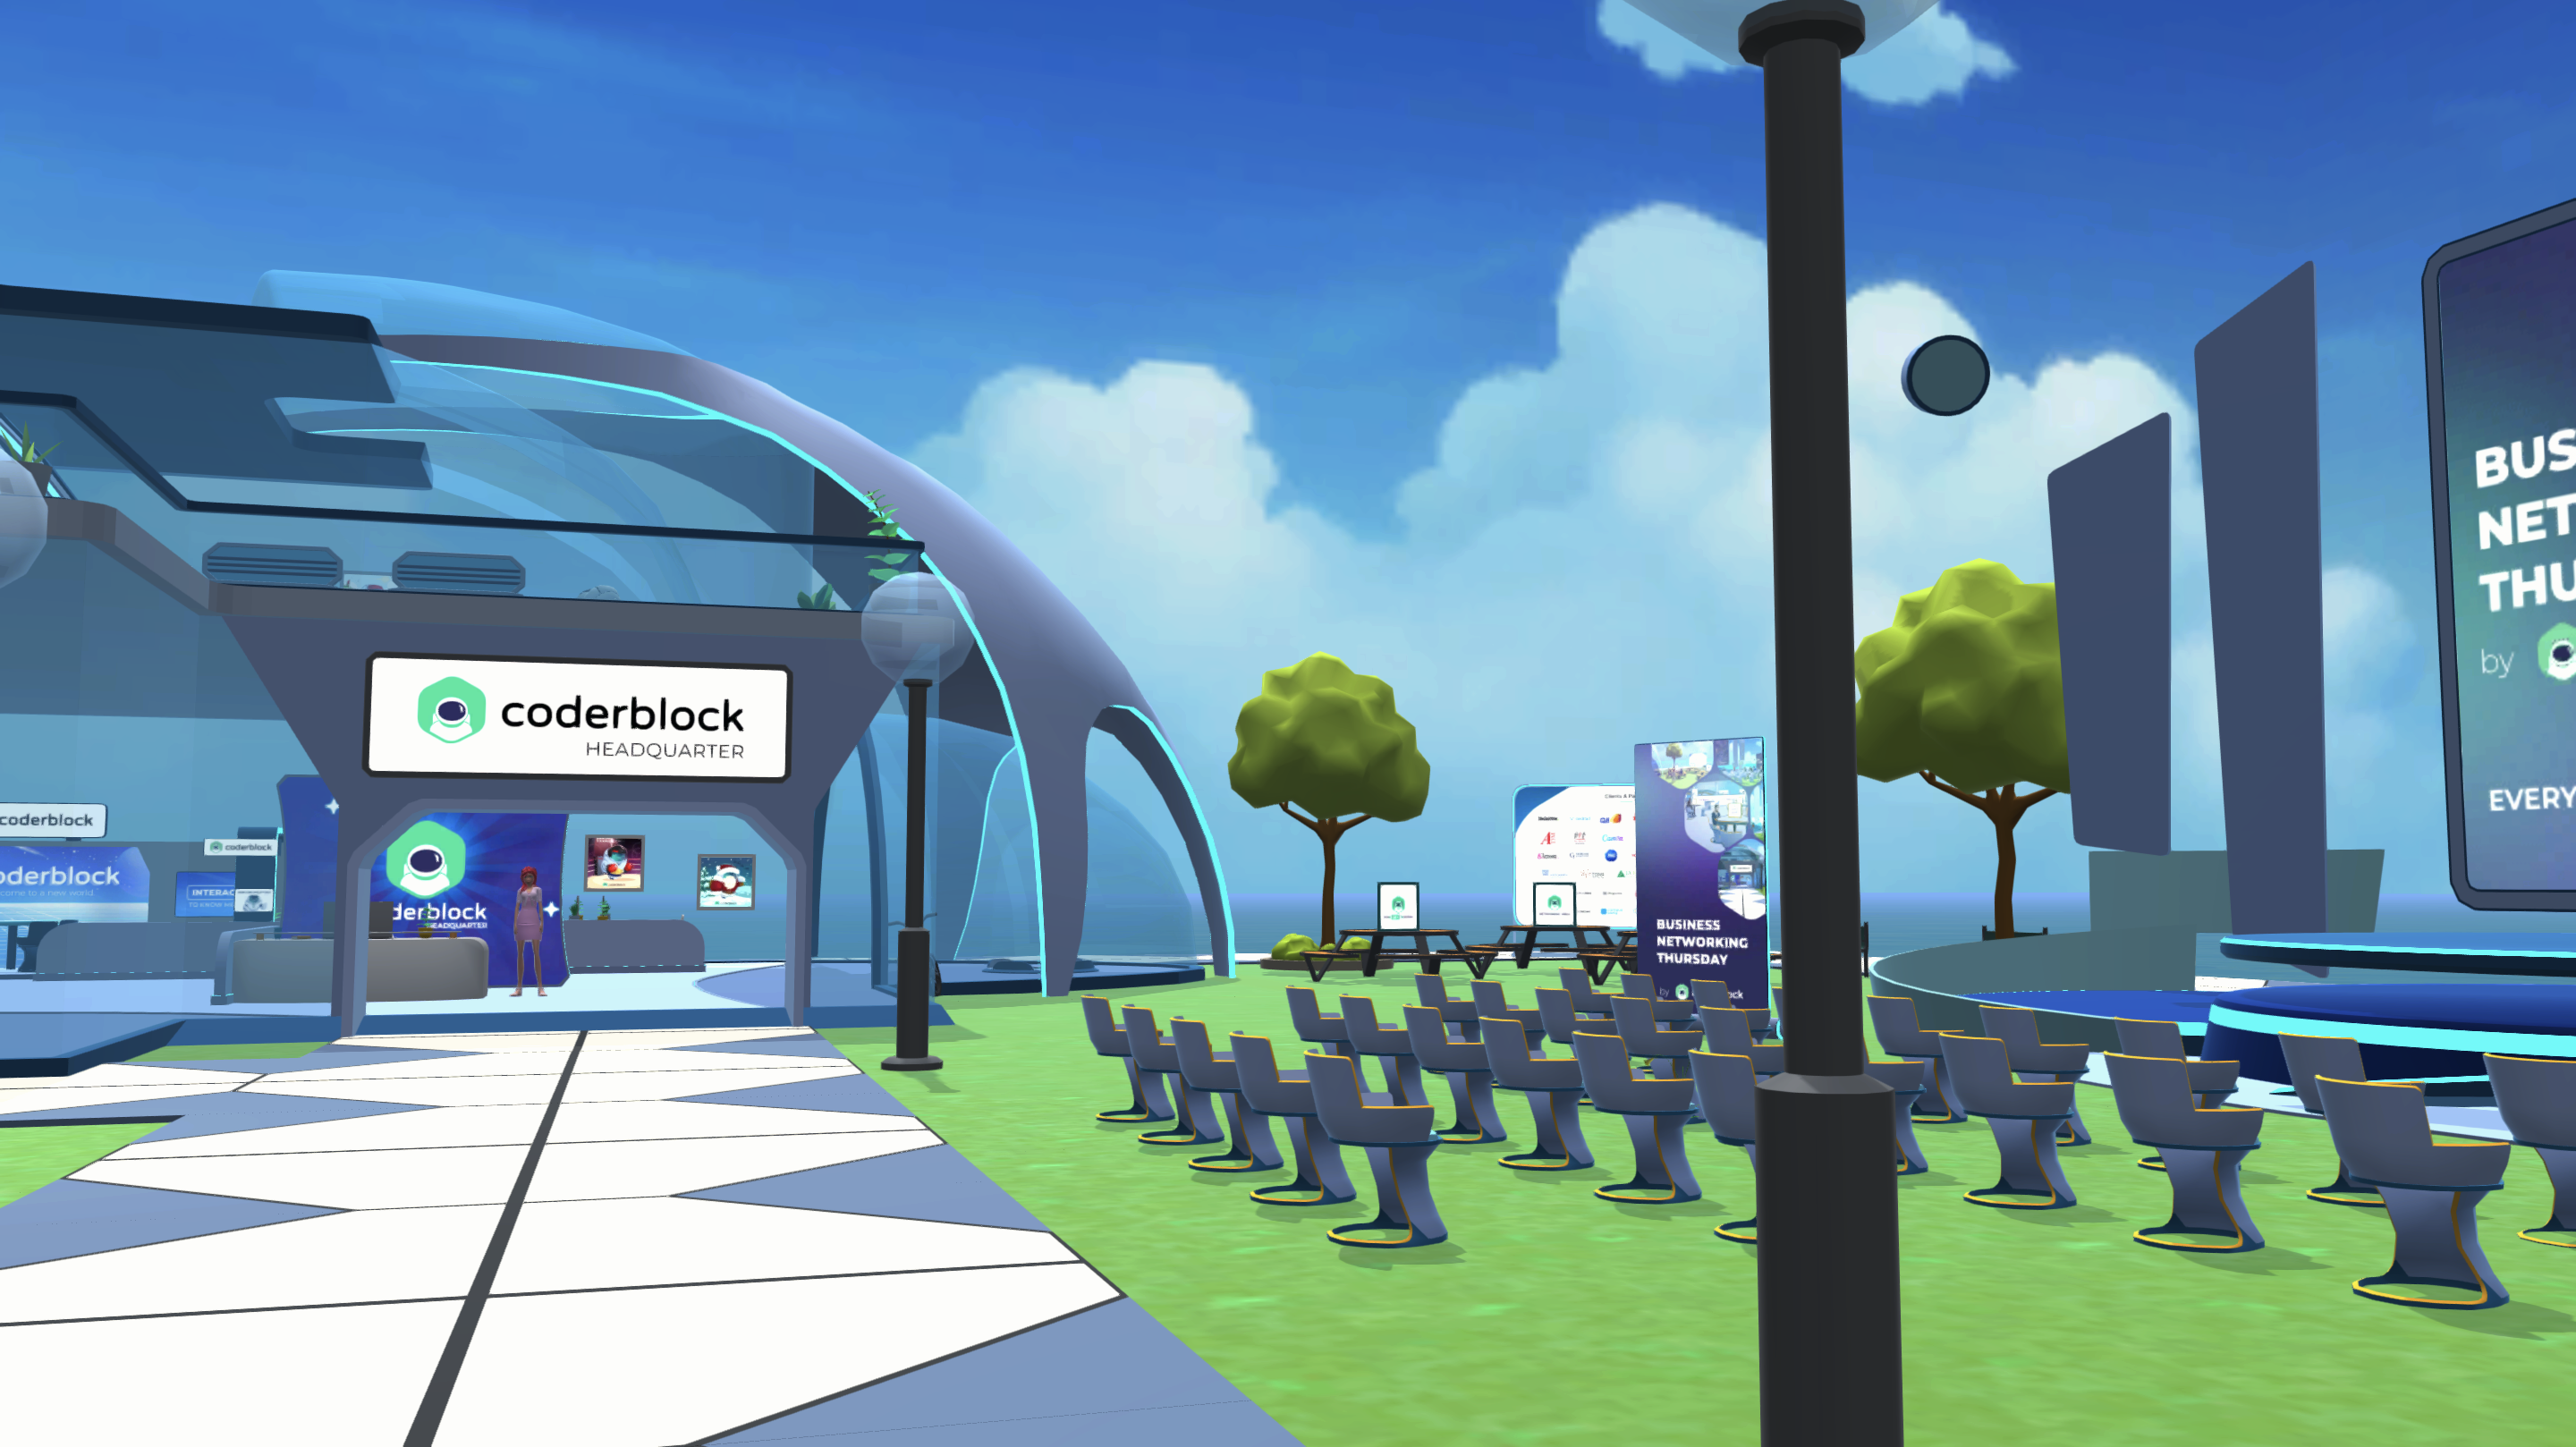
**Spaces** are **3D scenes**, **virtual microcosms** for your avatar to explore and interact with. You can simulate existing physical environments or create them from scratch for a variety of uses: meet friends, host private or sponsored events, set up an office for collaboration or client meetings, share Spaces with your community members, or organise training courses.

Unlike Lands, which are located within the Open World map, **Spaces** are **small, separate worlds that are not connected to each other**, but can **be shared via a URL**. \
\
If you're a creator (or want to be), **there's a real opportunity to earn from your creations**. Beyond the business uses associated with the scenes, your creations become products that can be sold, providing a potential source of income.

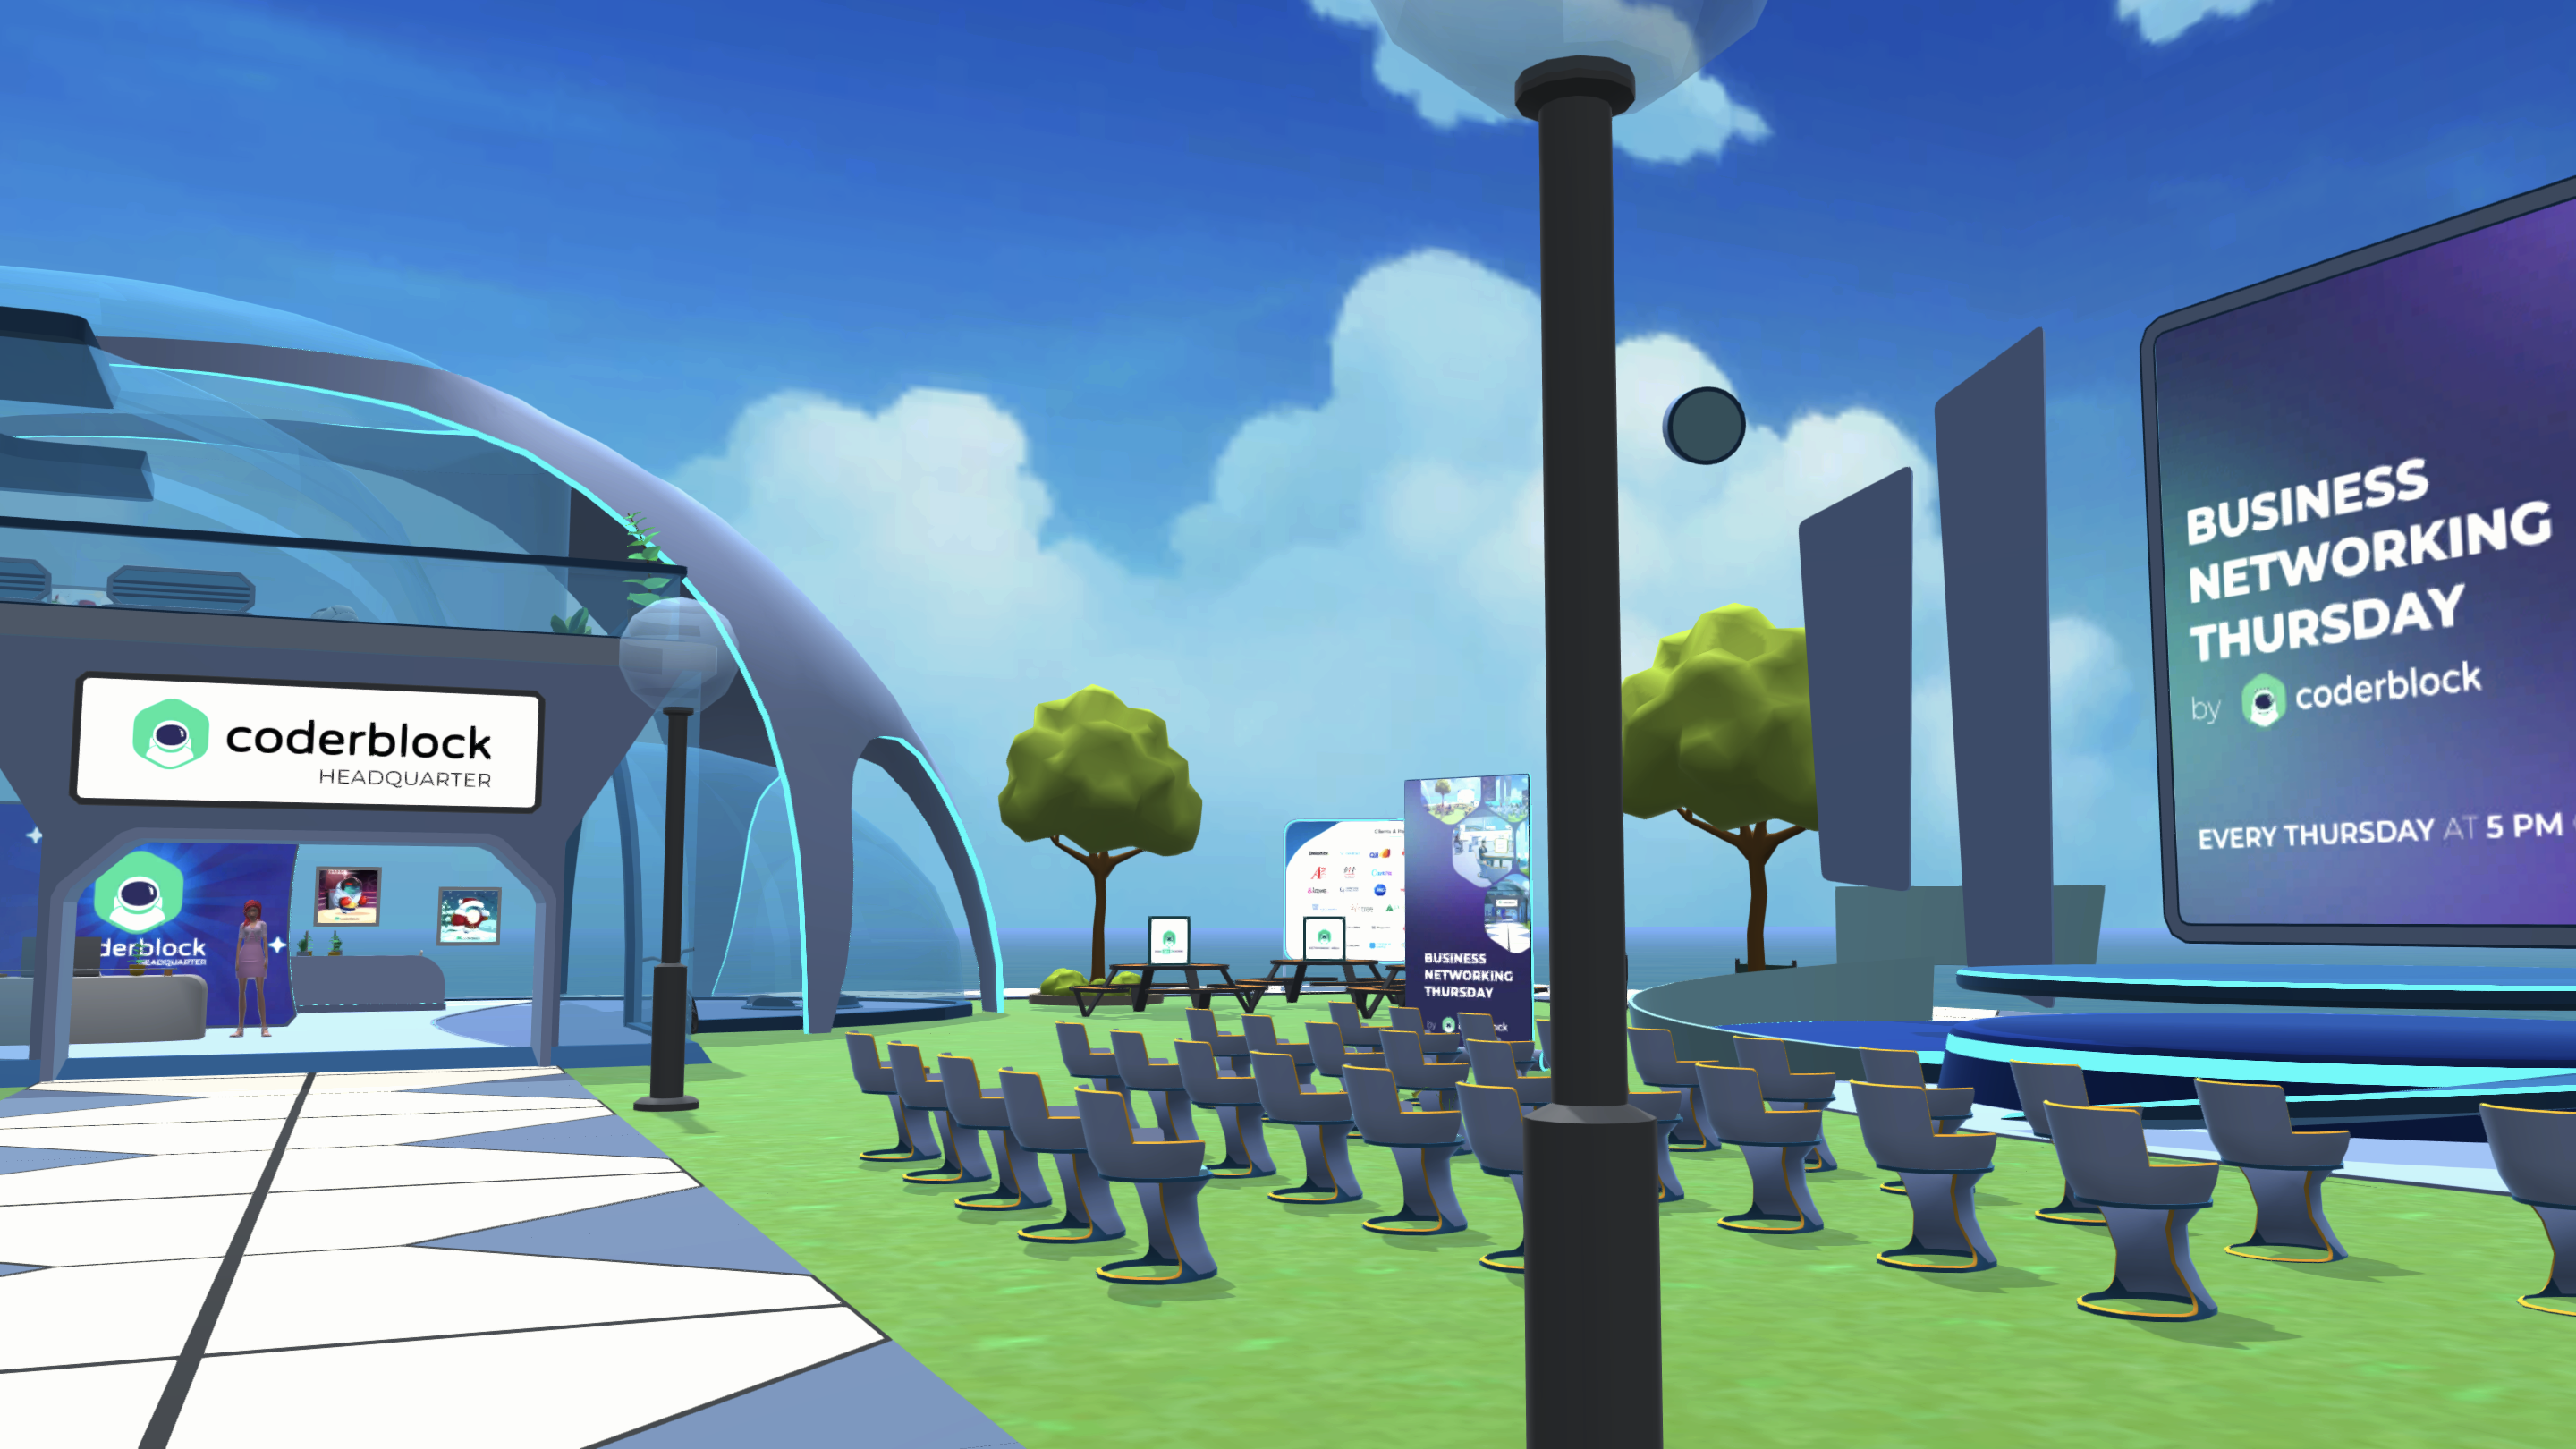
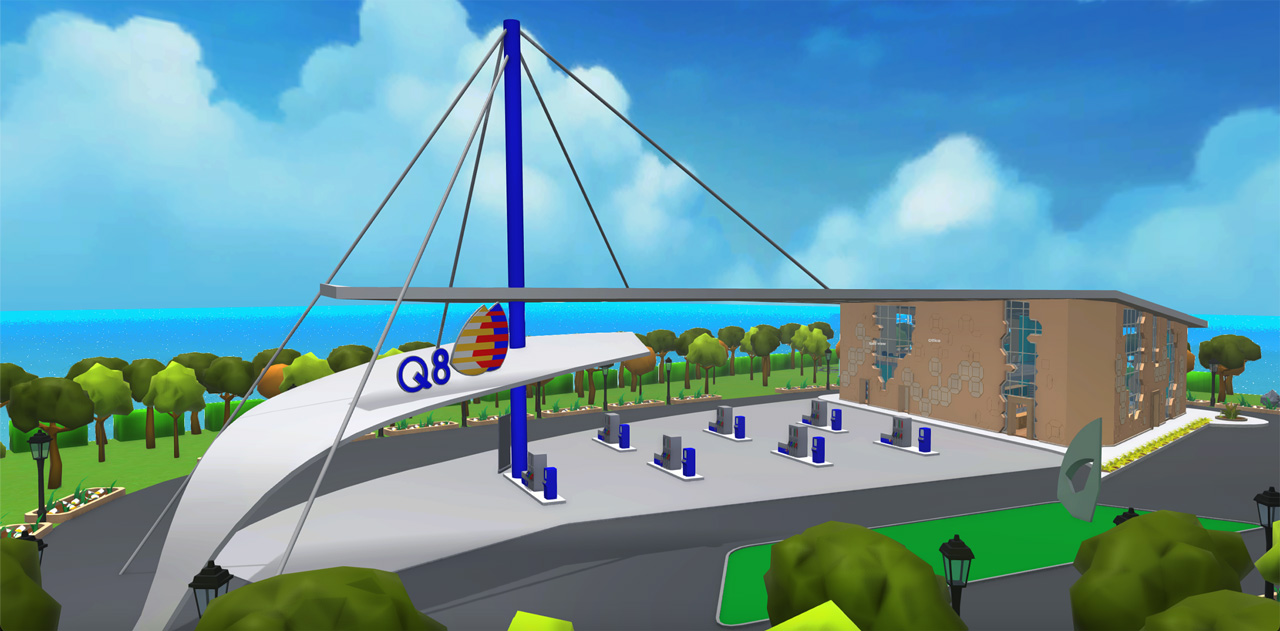
<figure><img src="https://content.gitbook.com/content/vALqBsUIqL1aZ2BmaieV/blobs/Yn3xof7EuBf8his7NT7O/Screenshot%202024-06-28%20alle%2010.15.27.png" alt=""><figcaption><p>Coderblock Headquarter.</p></figcaption></figure>

### Builder Tool

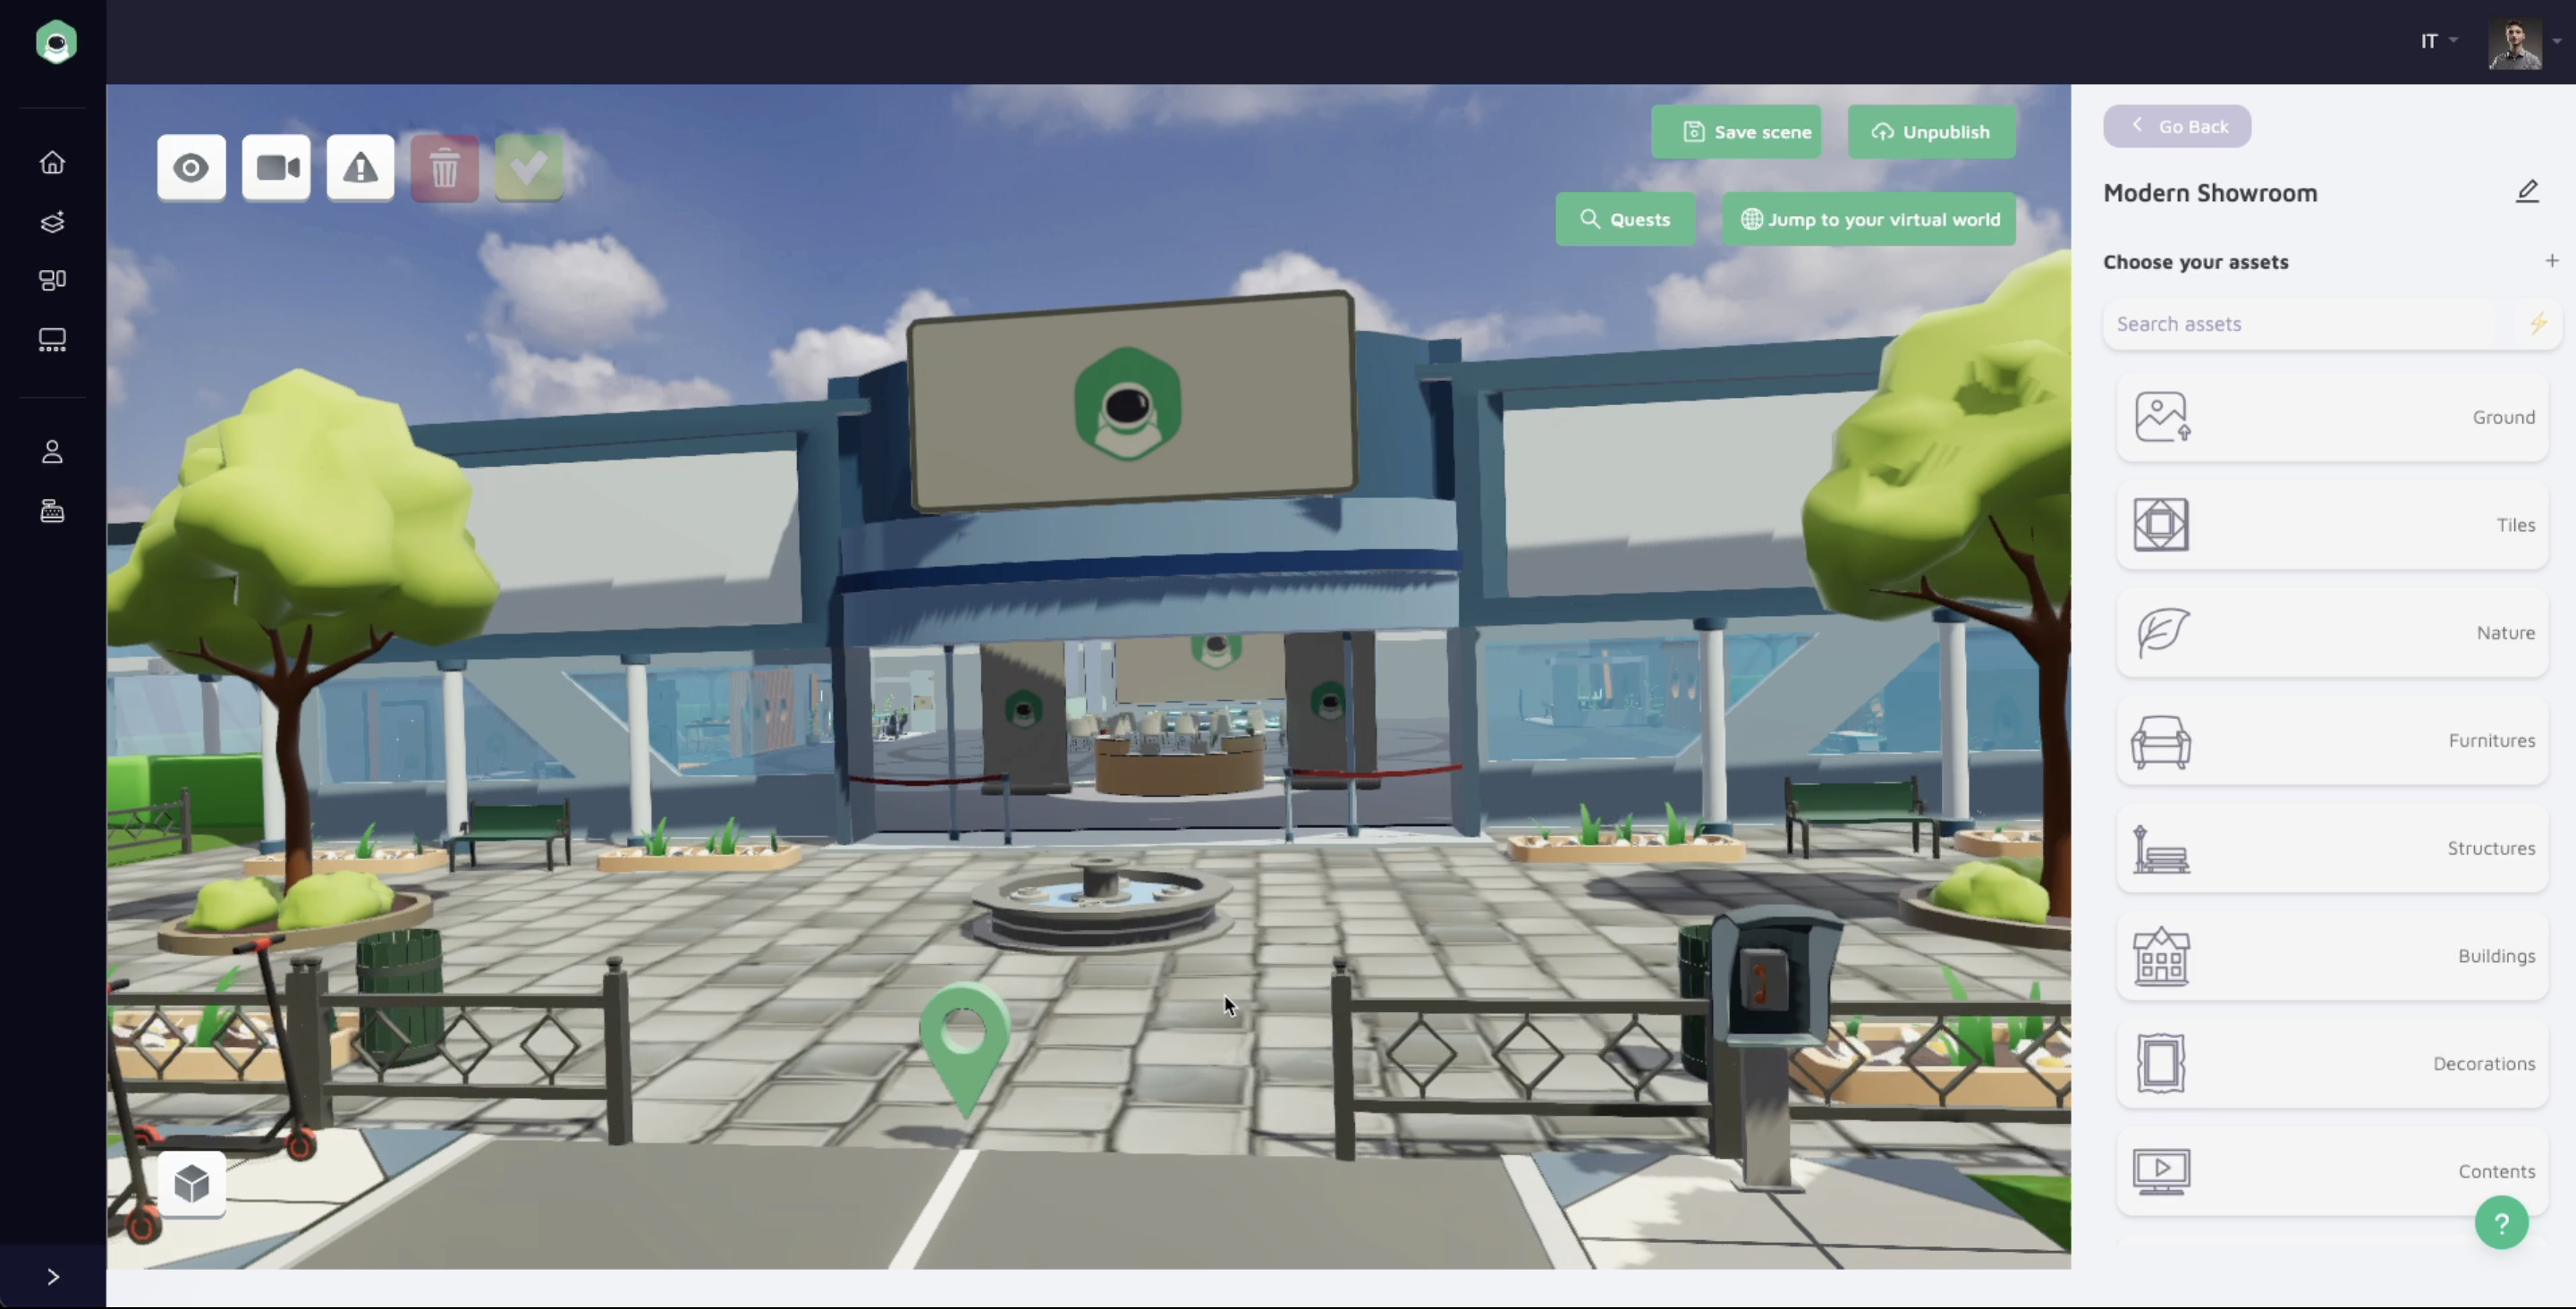
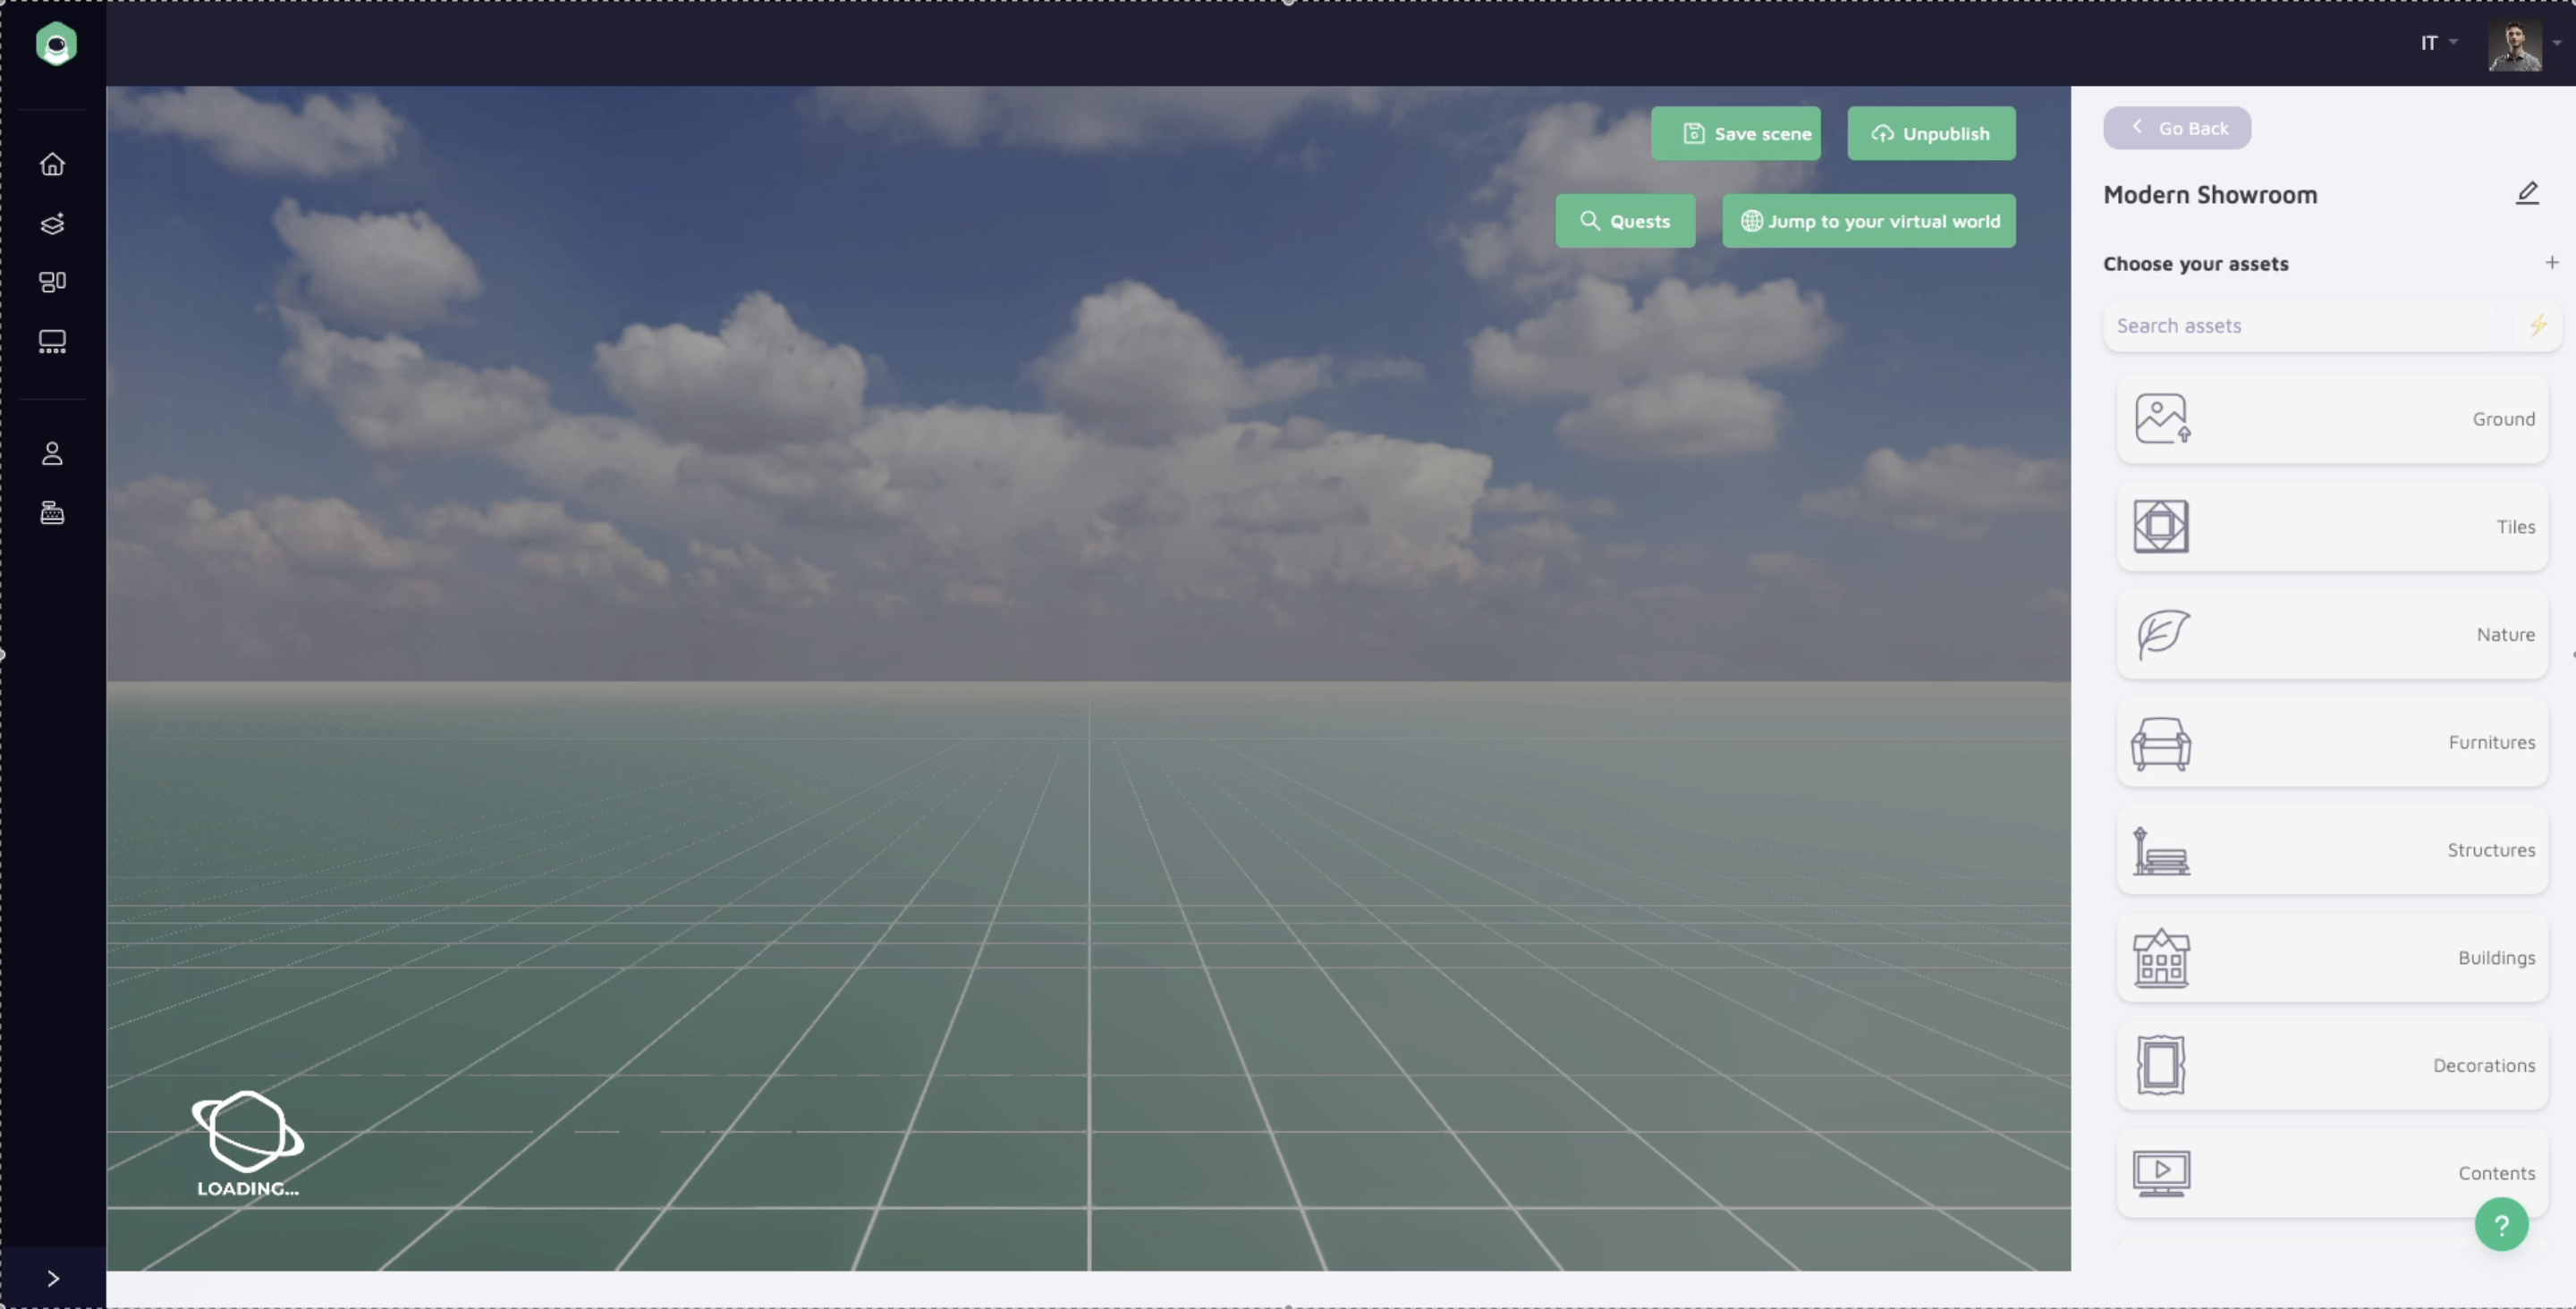
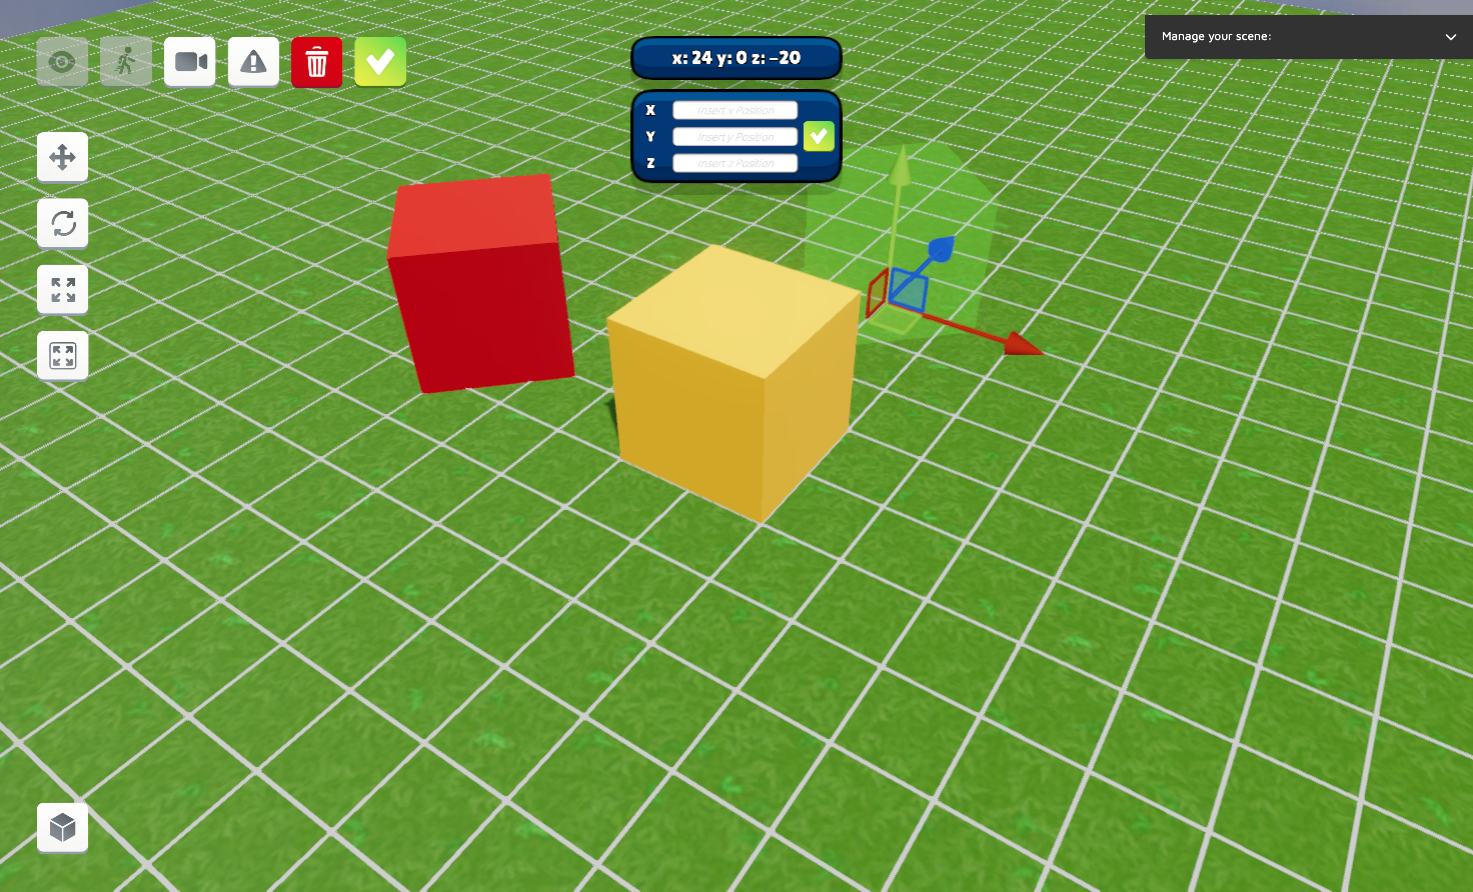
[**Builder Tool**](/coderblock-studio/builder-tool)  is Coderblock Studio's flagship feature: an **online visual editor** where you can build, design and customize your virtual worlds. It allows you to gain skills and become a digital architect without any specific graphics or 3D modeling knowledge. \
\
As mentioned, it's **accessible to anyone** who wants to learn how to create scenes and virtual experiences in just a few steps. It doesn't require any downloads and is available to all Landowners (owners of land in Coderblock) and Coderblock Studio's subscribers.

<figure><img src="https://content.gitbook.com/content/vALqBsUIqL1aZ2BmaieV/blobs/laVuqDyhi82ytqhUHZnl/Screenshot%20grafica%20Builder.png" alt=""><figcaption><p>Our Builder Tool. Ready to create wonderful experiences? </p></figcaption></figure>
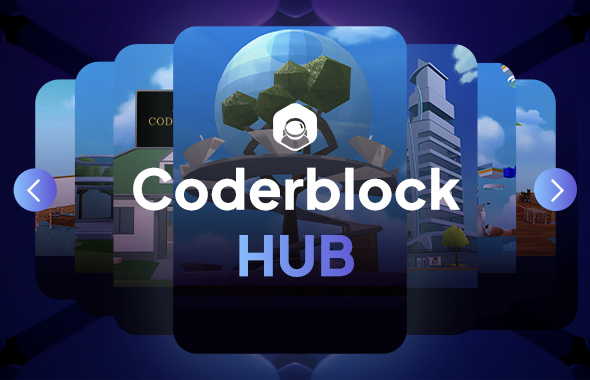
### Coderblock Hub

A shared space to **showcase your virtual experiences**, a **marketplace** to **sell your creations**: this and more is **Coderblock Hub**. It's the perfect matchmaking platform between creators and brands. On the one hand, you can sell your scenes for others to buy and use in their environments; on the other hand, Coderblock Hub is the ideal place to increase **brand visibility** and **reach new audiences** by sharing customized virtual experiences.

<figure><img src="https://1025404586-files.gitbook.io/~/files/v0/b/gitbook-x-prod.appspot.com/o/spaces%2FvALqBsUIqL1aZ2BmaieV%2Fuploads%2FuWpGVuT1y8282mlwEreO%2Fimage.png?alt=media&amp;token=05801b00-6aac-43fe-92fc-4034b28f4935" alt=""><figcaption><p>The public showcase for your virtual experiences.</p></figcaption></figure>


# Coderblock World

**Coderblock** is a **SaaS platform** that allows you to **create and explore virtual worlds** in a simple and intuitive way: you don't need to install anything on your PC or use VR headsets or other external devices.

The Coderblock experience is designed to be **user-friendly**: the platform is accessible to everyone, regardless of skill level. Just open your browser, **create your avatar and start exploring and interacting with other users and the content** available.

Here's what you can do on Coderblock:

* **Create your own alter-ego**

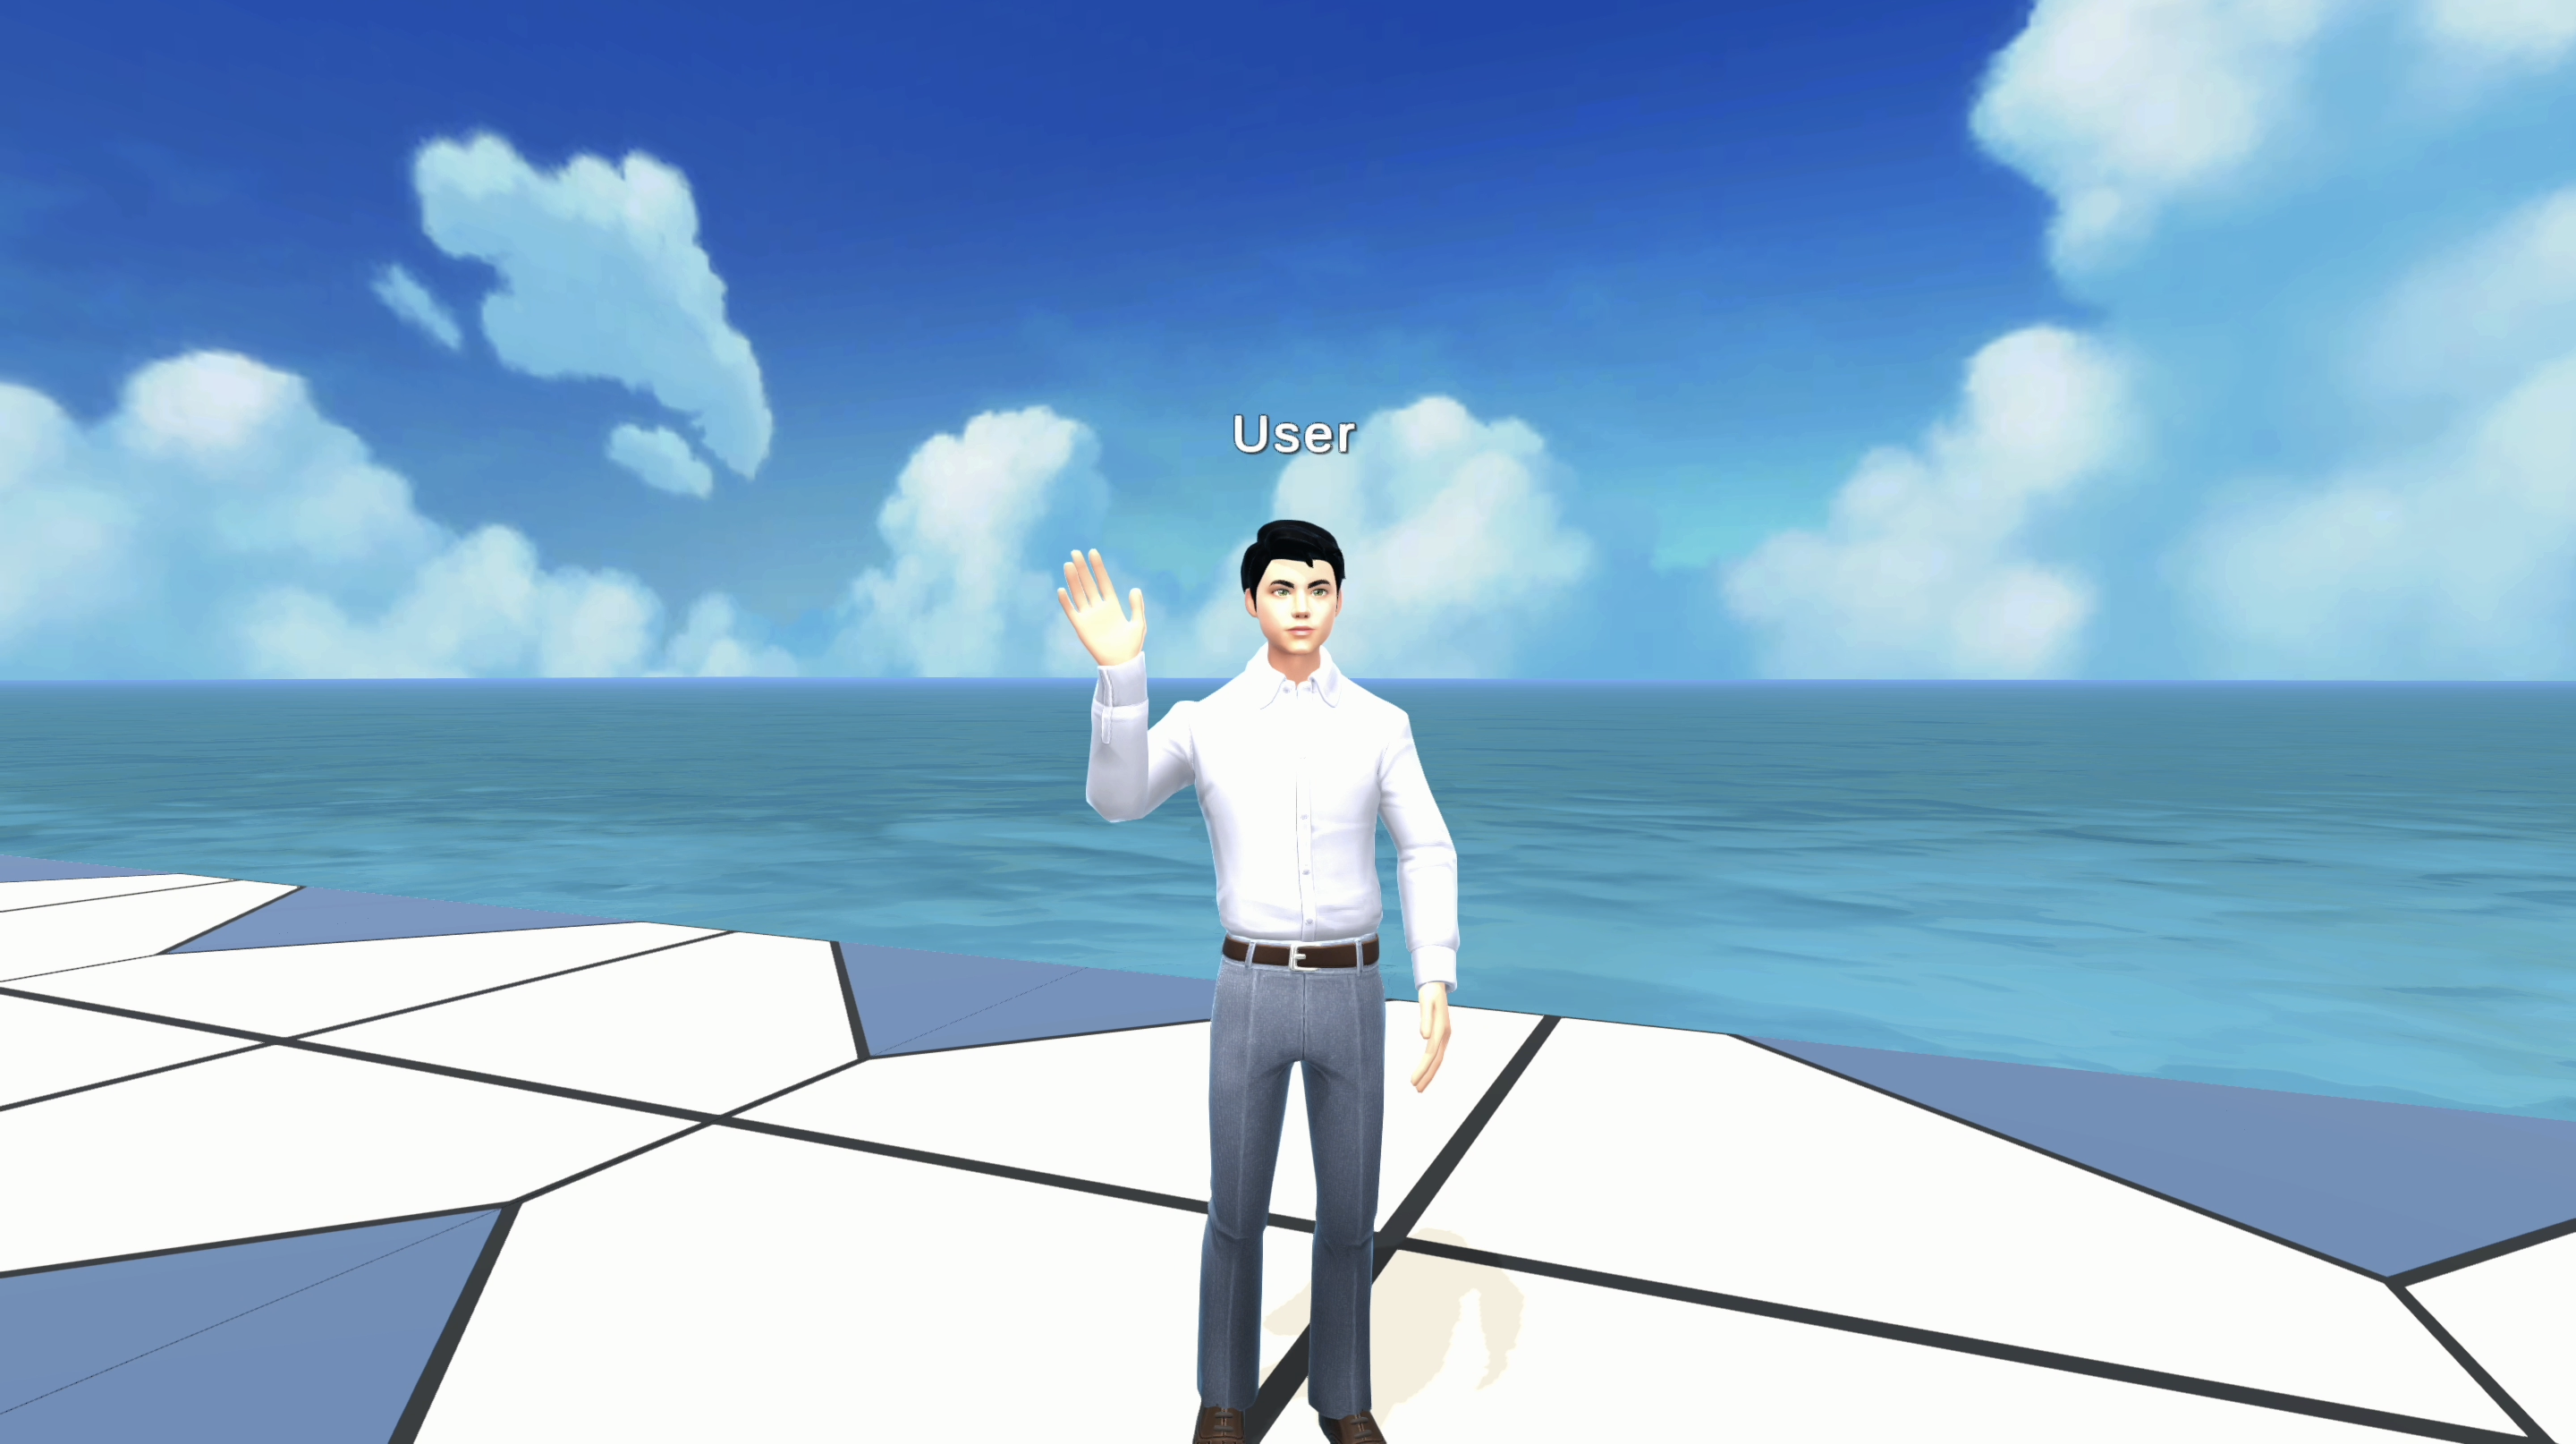
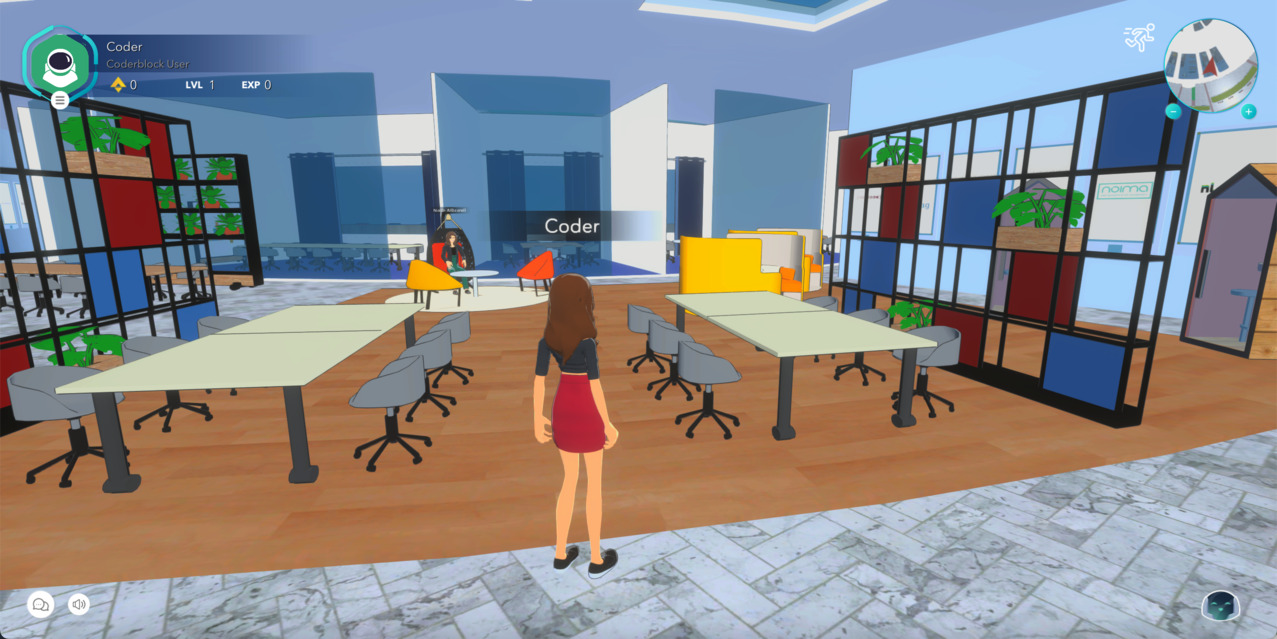
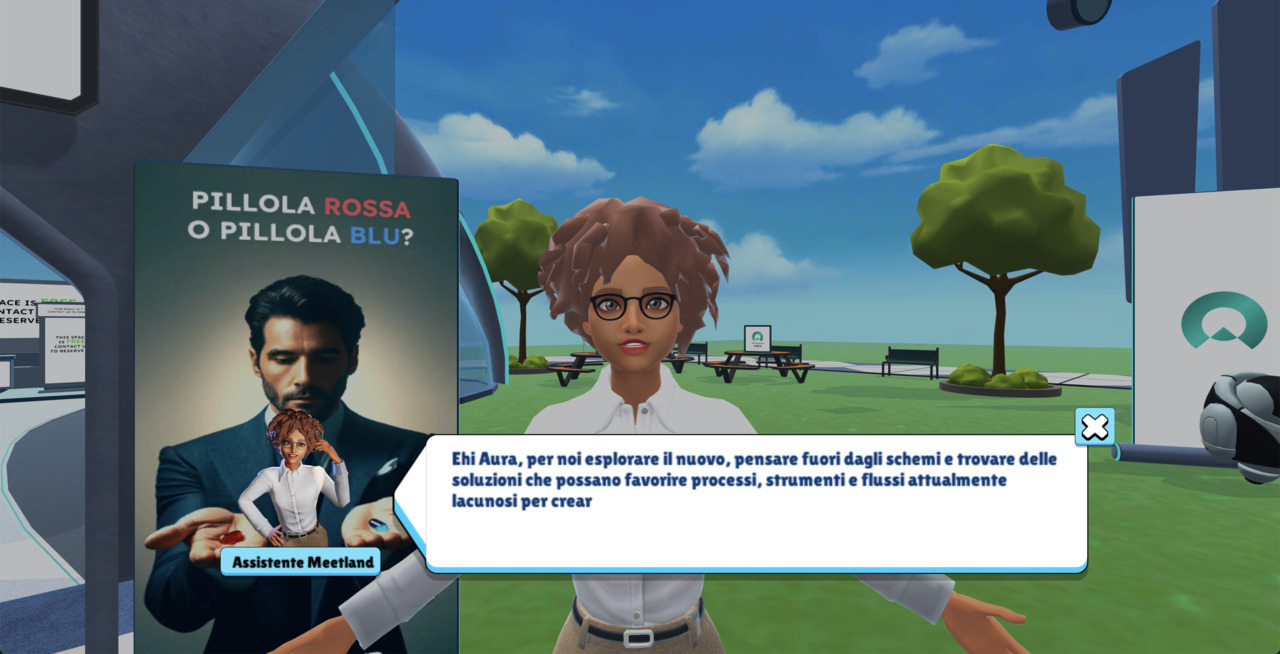
**Create your avatar from your own photo** and begin your journey into the virtual world. It will be your digital representation in the metaverse, allowing you to attend events, explore new worlds and engage in games and adventures. You can **interact** with objects or other avatars, and chat or video call with anyone in your virtual environment.

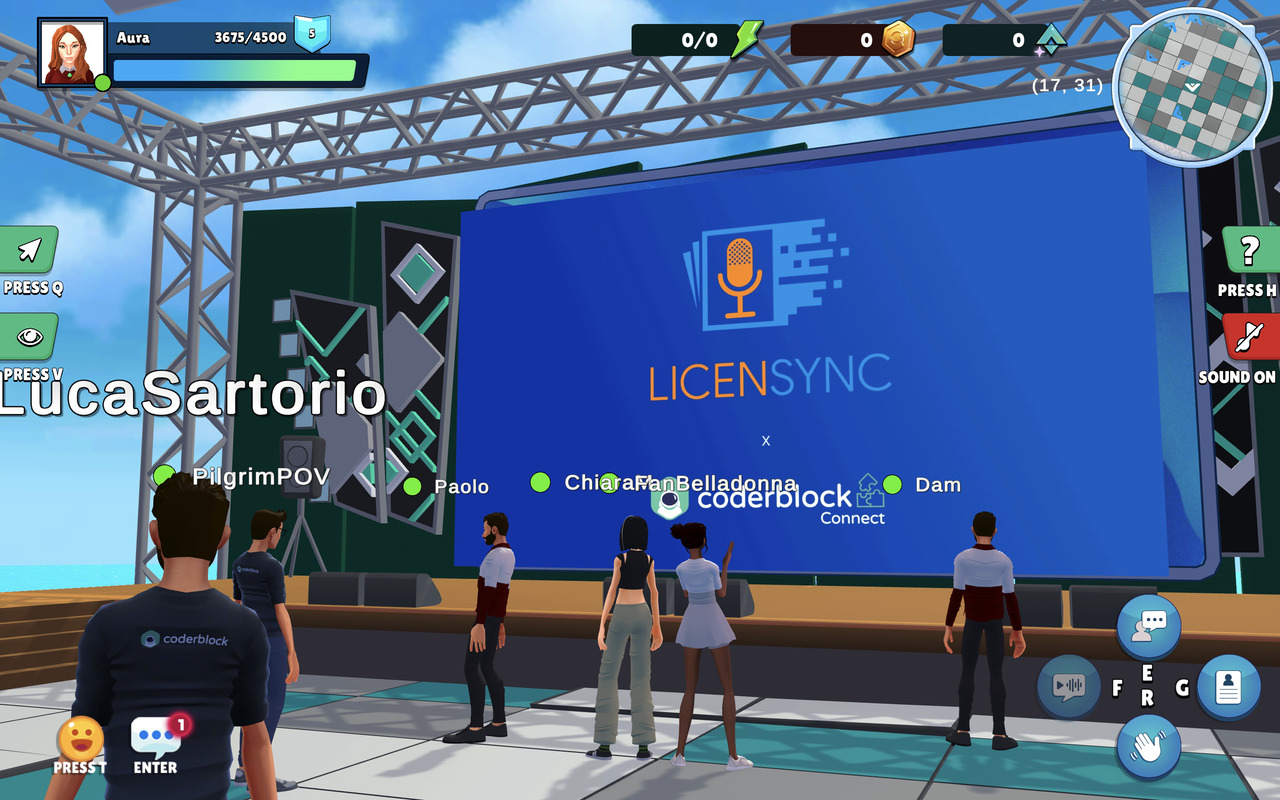
<figure><img src="https://content.gitbook.com/content/vALqBsUIqL1aZ2BmaieV/blobs/BvYT1qllrkeK5RidINRC/Screenshot%202024-06-28%20alle%2010.00.13.png" alt=""><figcaption><p>Your alter-ego in virtual world!</p></figcaption></figure>

* **Explore virtual worlds**

**Move** around 3D environments and **explore new worlds**. Each experience can be unique and tailored to your needs.

{% embed url="<https://www.youtube.com/watch?v=_BtfFBml1nc>" %}
Moving around the virtual world has never been easier.
{% endembed %}

* **Attend events wherever you are**

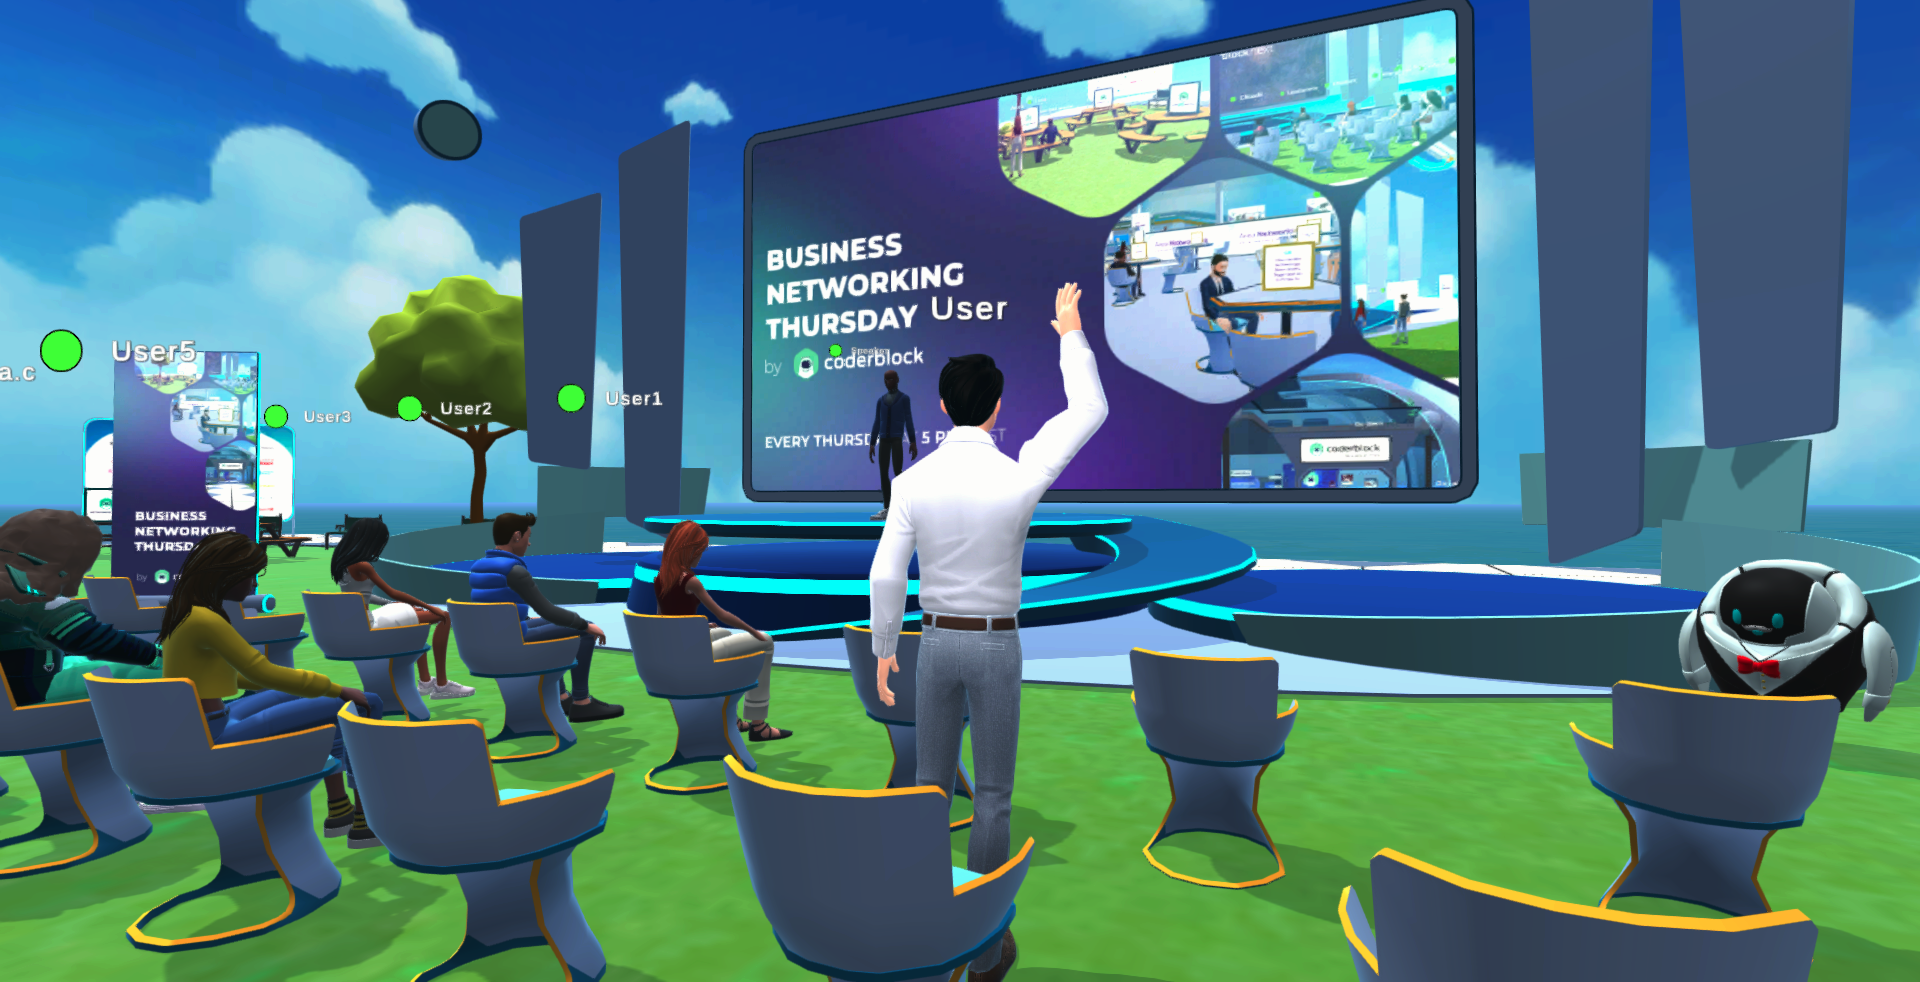
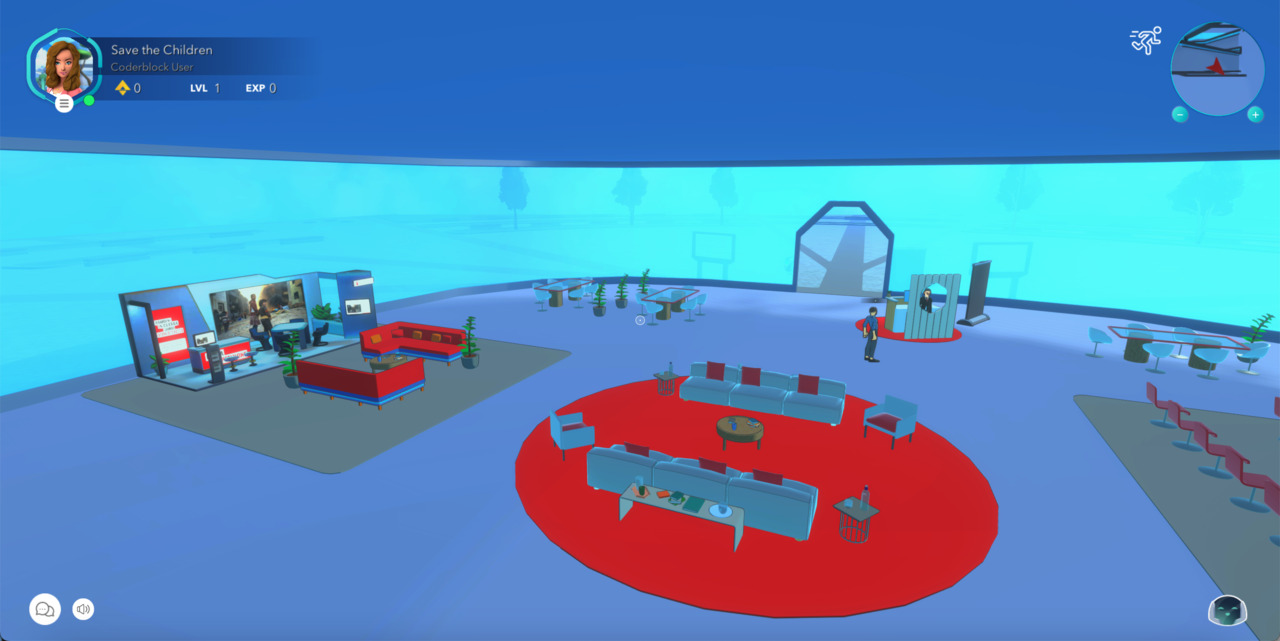
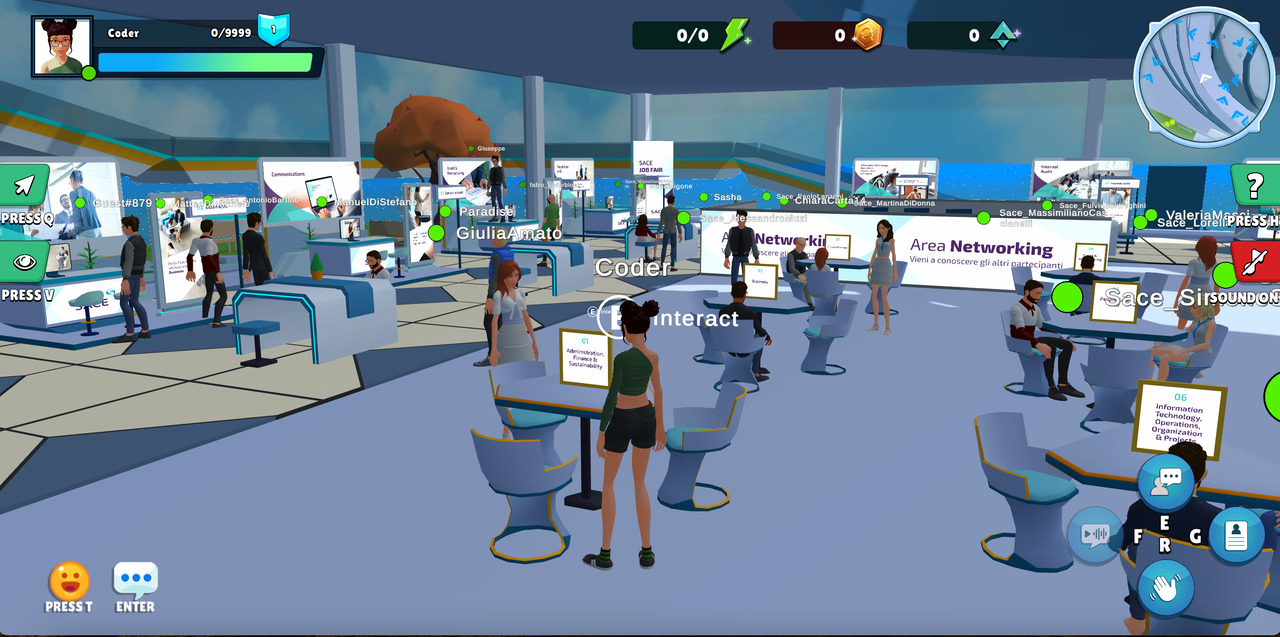
No matter where you are. With your virtual alter-ego you'll be able to be part of **events, trade shows or webinars** with just a few clicks.

<figure><img src="https://content.gitbook.com/content/vALqBsUIqL1aZ2BmaieV/blobs/xjawN8xfjs0aBPToe0J0/Screenshot%202024-06-27%20alle%2017.05.25.png" alt=""><figcaption></figcaption></figure>

* **Interact with objects**

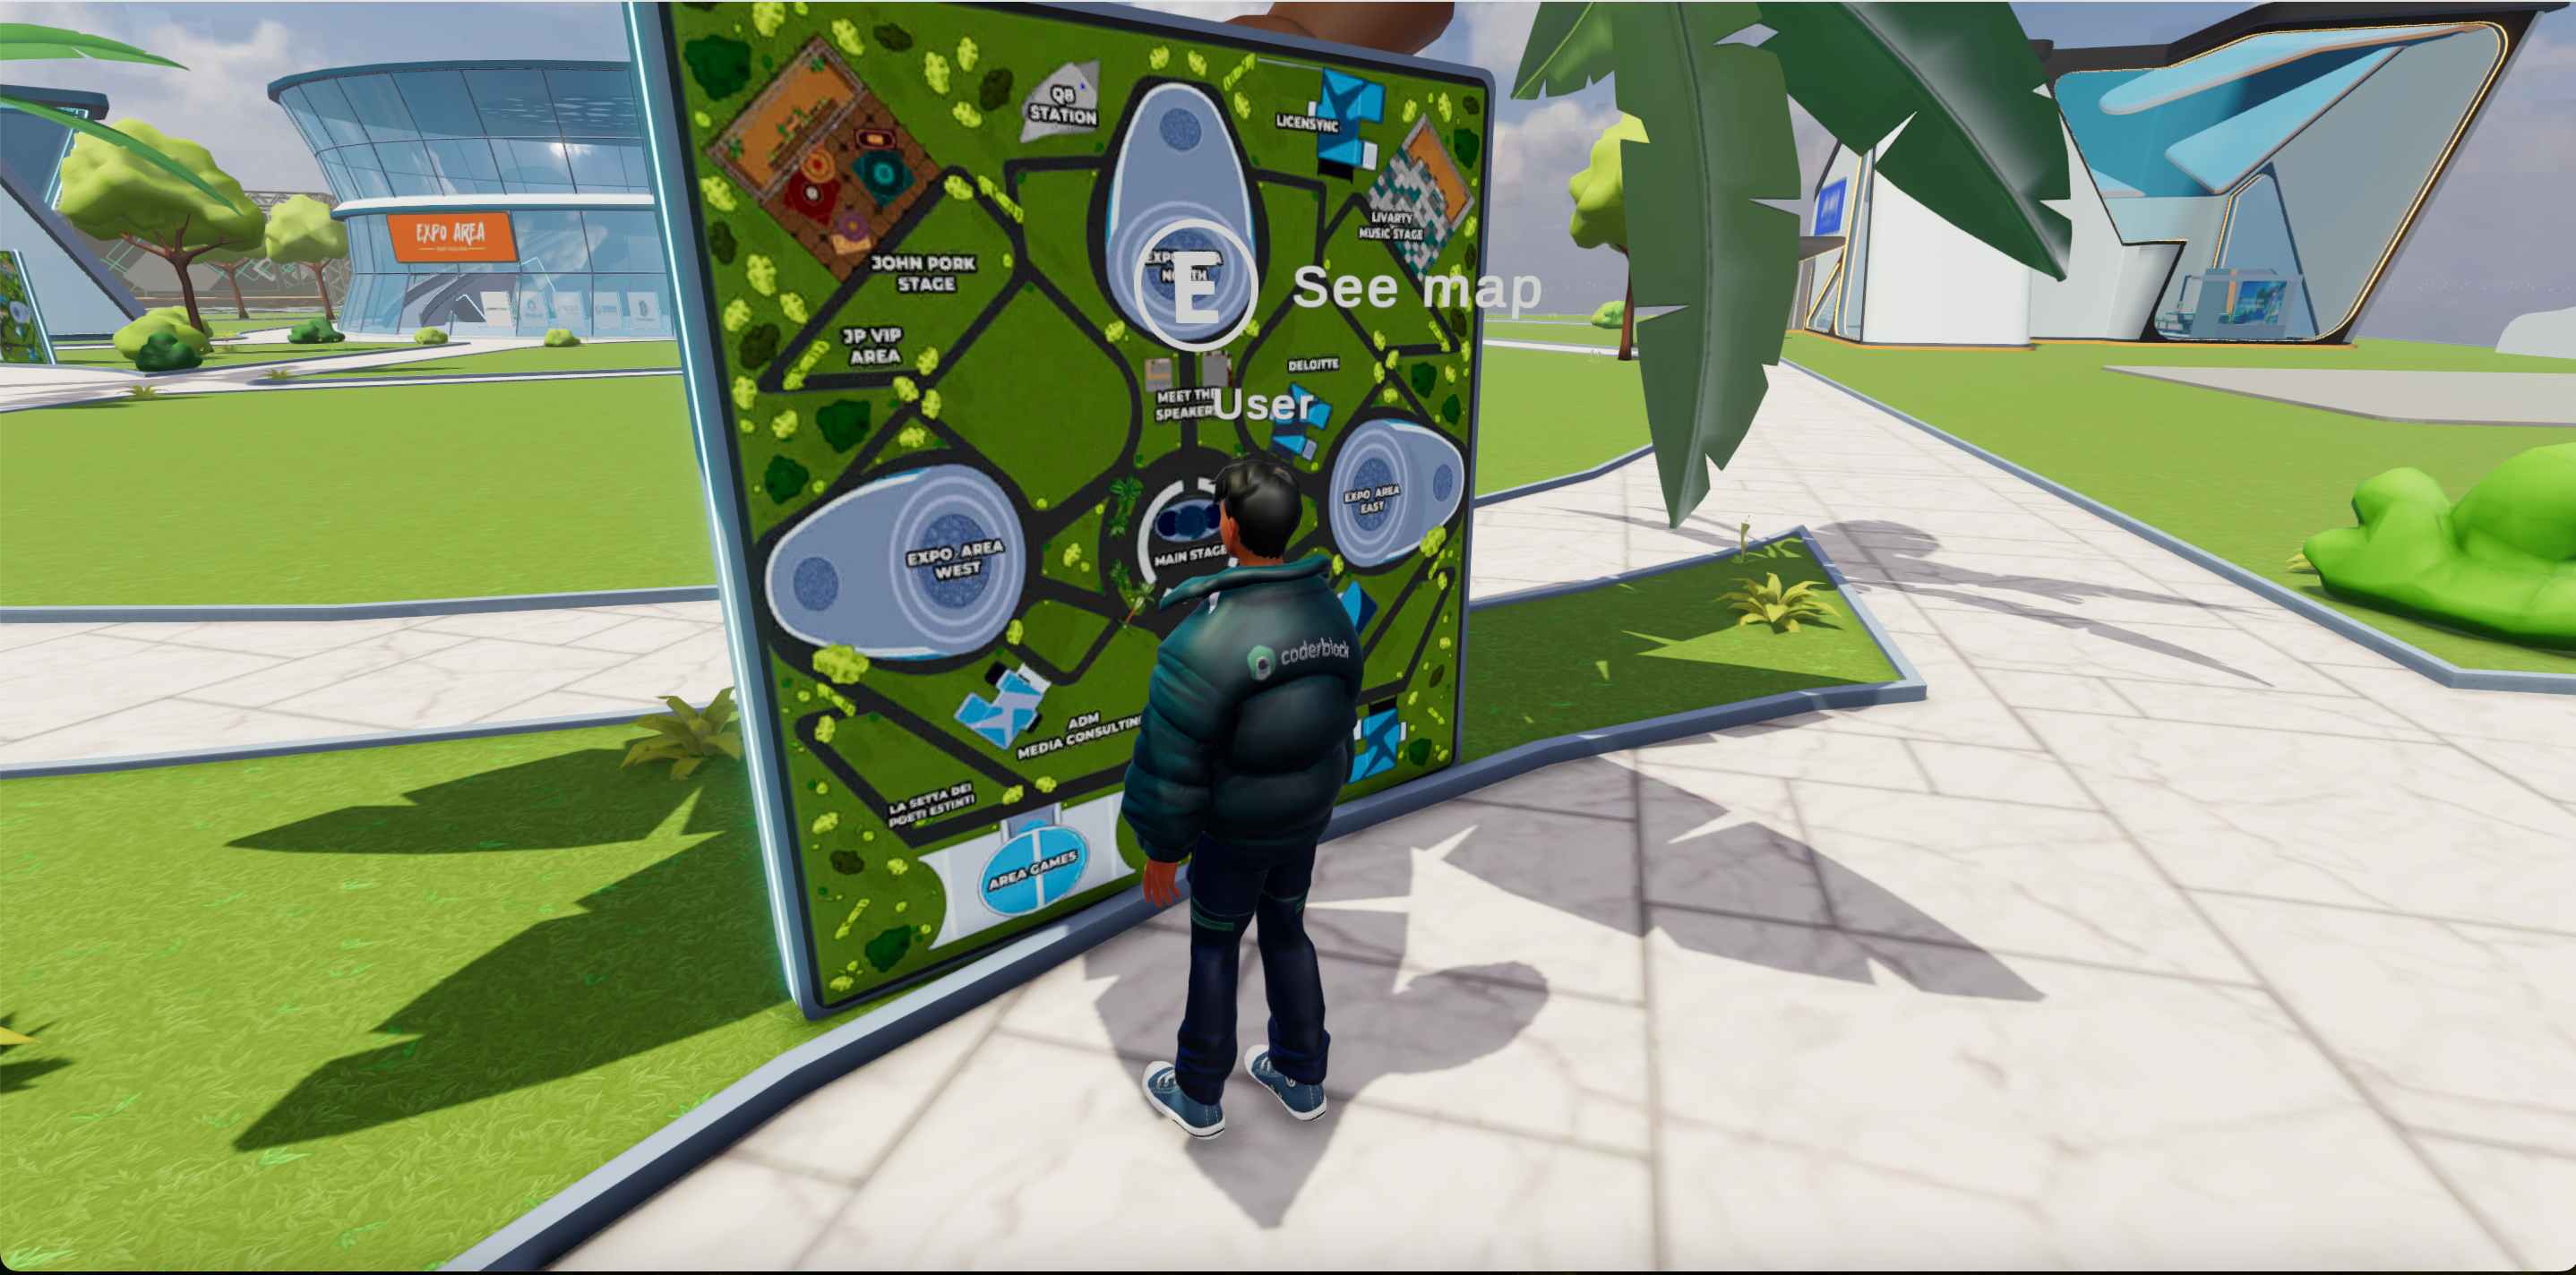
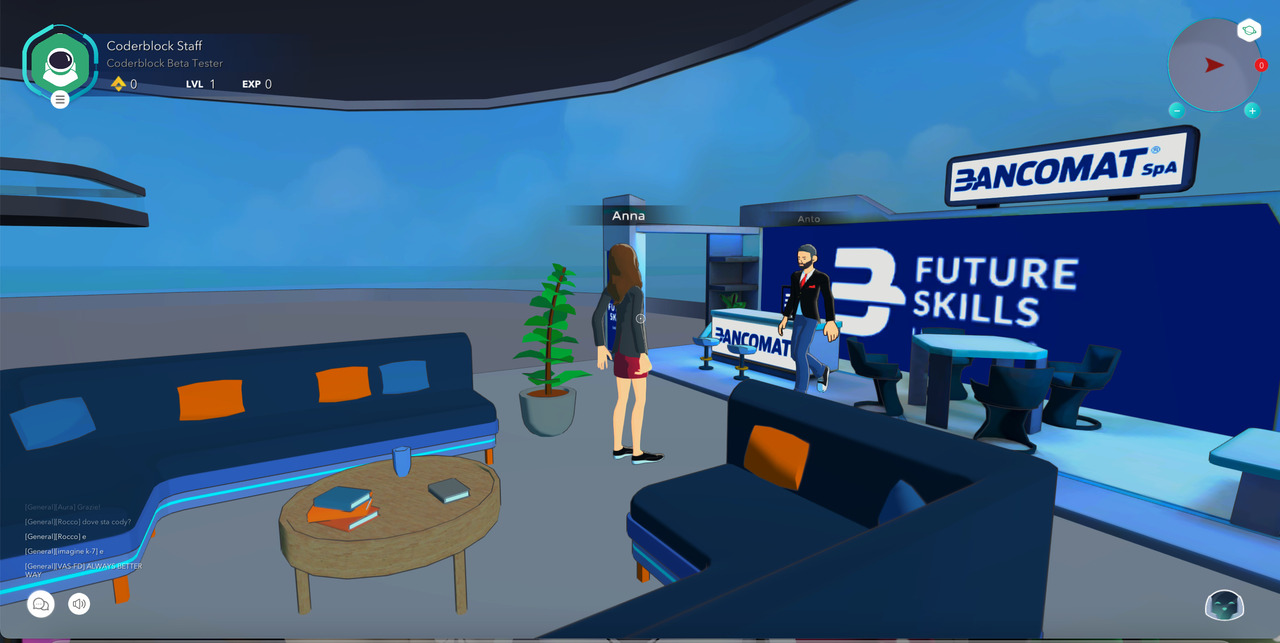
The **experience** becomes **even more immersive** when you can interact with objects. For example, you can use your avatar to turn on lights, sit on a bench or interact with multimedia content such as billboards, roll-ups, advertisements or simple in-game objects.

<figure><img src="https://1025404586-files.gitbook.io/~/files/v0/b/gitbook-x-prod.appspot.com/o/spaces%2FvALqBsUIqL1aZ2BmaieV%2Fuploads%2FI7BUn4SU497mfOkXLmv4%2FScreenshot%202024-07-02%20alle%2010.31.05.png?alt=media&amp;token=7149fd3c-83b7-48dd-8dcb-aad05628afaa" alt=""><figcaption><p>Interact with objects with <strong>E</strong>!</p></figcaption></figure>


# Support

At Coderblock we are committed to ensuring a smooth and satisfying experience, providing clear answers and effective solutions for all our users. \
\
Here are a number of resources you can use to find support:

<table data-view="cards"><thead><tr><th></th><th></th><th></th><th data-hidden data-card-target data-type="content-ref"></th></tr></thead><tbody><tr><td></td><td><strong>Discover the F.A.Q.</strong> <br><br>Find answers to frequently asked questions.</td><td></td><td><a href="/f.a.q./frequently-asked-questions">F.A.Q.</a></td></tr><tr><td></td><td><strong>Join us on Discord</strong> <br><br>Ask the community for help or open a ticket with our team.</td><td></td><td><a href="https://discord.com/invite/coderblock">https://discord.com/invite/coderblock</a></td></tr><tr><td></td><td><strong>Contact us by e-mail</strong></td><td>Send an email to support@coderblock and wait for a response from our team.</td><td><a href="mailto:support@coderblock.com">mailto:support@coderblock.com</a></td></tr><tr><td></td><td><p><strong>Fill in the form</strong> <br></p><p>Send a request to our team using the support form.</p></td><td></td><td><a href="https://coderblock.typeform.com/support-it?typeform-source=app.gitbook.com">https://coderblock.typeform.com/support-it?typeform-source=app.gitbook.com</a></td></tr></tbody></table>


# Italian Doc Guide

To switch to the Italian Documentation, click [HERE](https://docs-it.coderblock.com)


# Coderblock Studio

**Coderblock Studio**: an intuitive, browser-based platform that lets you **build entire virtual journeys with just a few clicks**. It's a comprehensive suite to manage your virtual experiences 360° and harness the potential of **Artificial Intelligence** to achieve your goals.

By choosing one of our subscription plans, you can **experiment, start building, share and monetize** your creations.

Use the **Builder Tool** to quickly and easily create virtual spaces, build experiences within them, publish them and share them with users. Increase **visibility** on the Coderblock Hub storefront, **monitor data with Analytics dashboards** and integrate **Artificial Intelligence** solutions to maximize your results.

Coderblock Studio is **accessible** to anyone who wants to learn how to build a virtual scene in a few simple steps. The online editor requires no downloads and no special graphics or modeling skills. Its intuitive layout makes it easy to select, move, position, scale and combine objects.


# Subscription plans

We have a range of subscription plans to **suit all needs**, designed to meet the objectives of both structured businesses and creators focused on monetization.

<table data-view="cards"><thead><tr><th></th><th></th><th></th><th data-hidden data-card-target data-type="content-ref"></th></tr></thead><tbody><tr><td></td><td><strong>Plans for companies</strong></td><td></td><td><a href="/coderblock-studio/subscription-plans/plans-for-companies">Plans for companies</a></td></tr><tr><td></td><td><strong>Plans for Creators</strong></td><td></td><td><a href="/coderblock-studio/subscription-plans/plans-for-creators">Plans for Creators</a></td></tr></tbody></table>


# Plans for companies

By purchasing a subscription plan, you can **experiment with your business** in the metaverse **on a budget**.

You also get access to the **Coderblock Hub**, an official showcase that you can use as a new acquisition channel for your customers and to increase your brand visibility.

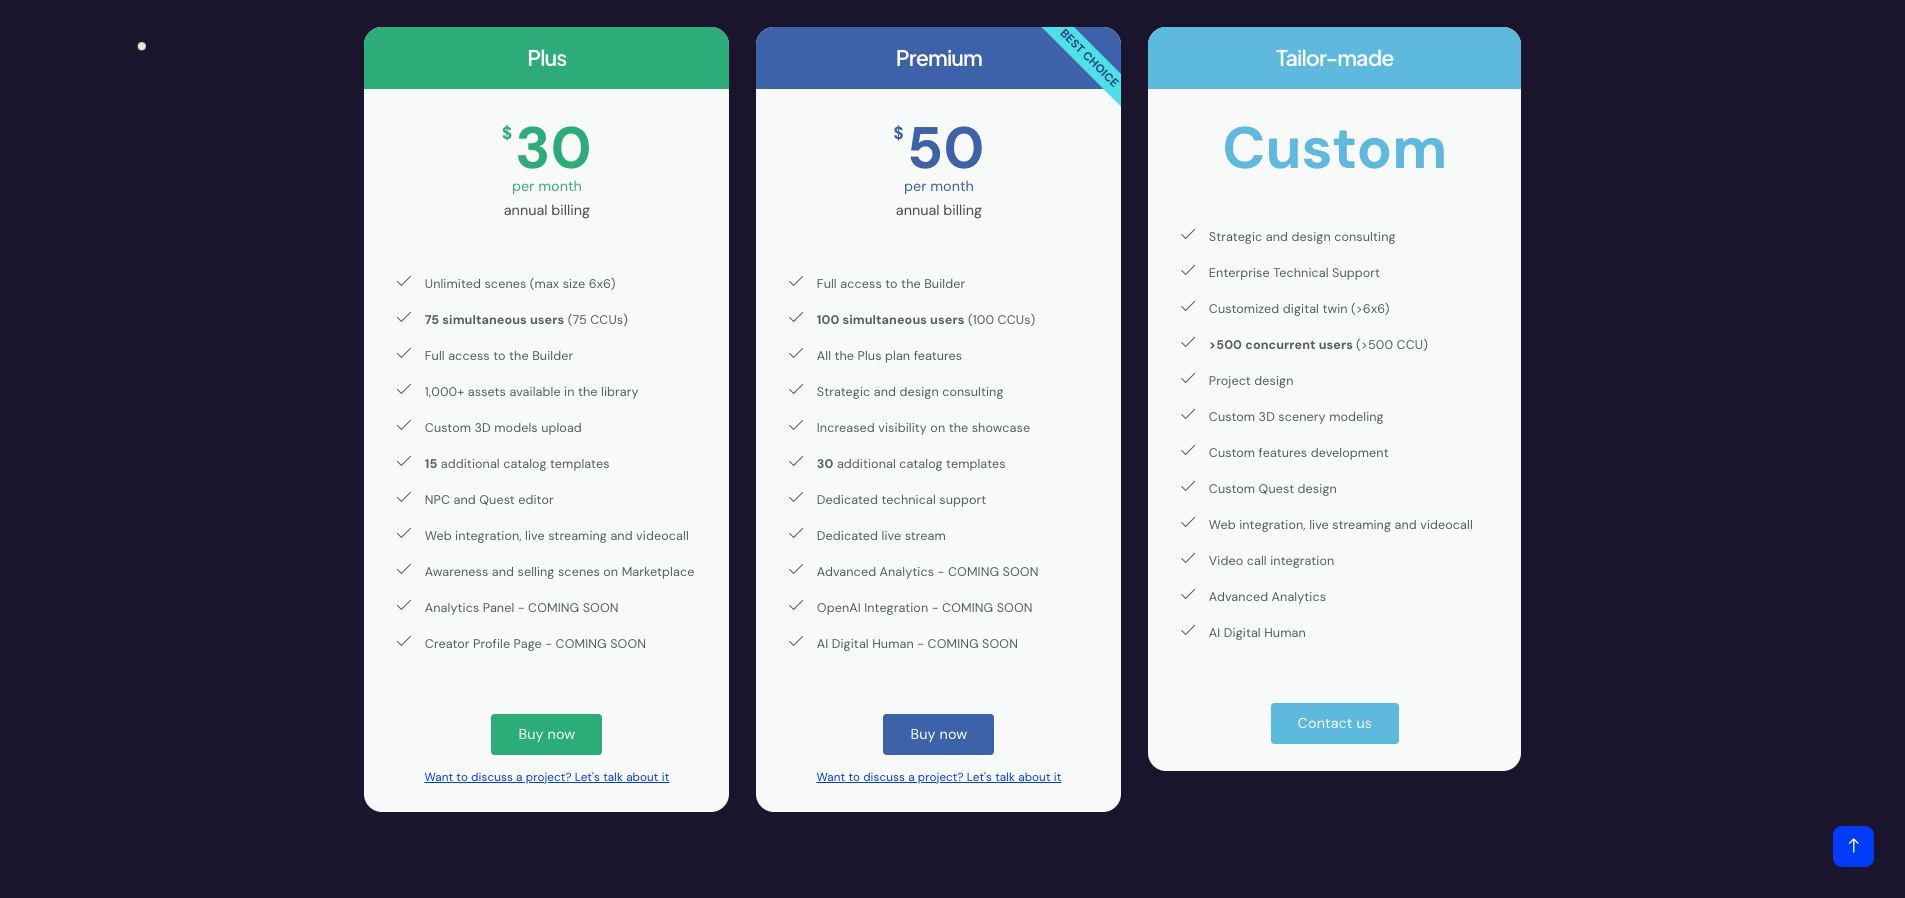
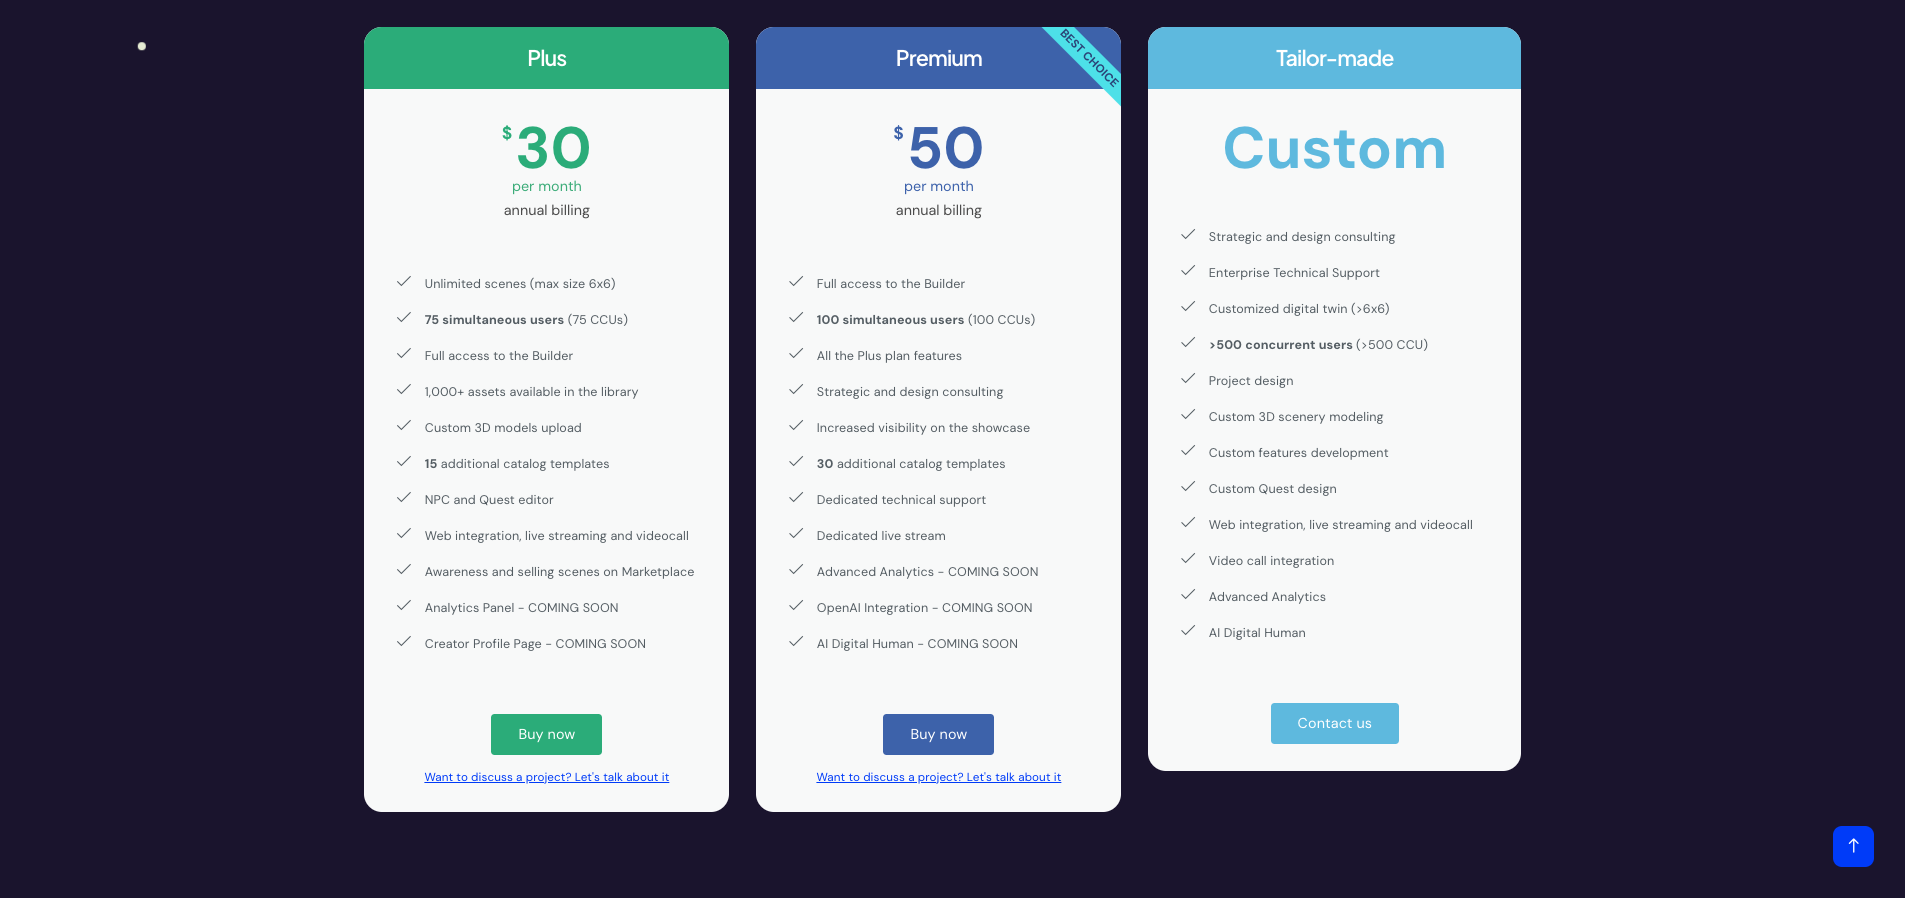
<figure><img src="https://1025404586-files.gitbook.io/~/files/v0/b/gitbook-x-prod.appspot.com/o/spaces%2FvALqBsUIqL1aZ2BmaieV%2Fuploads%2FcJOgkiB90SKuWe61oZoO%2FScreenshot%202024-07-02%20alle%2010.34.37.png?alt=media&amp;token=cd685bdb-5ff9-49f3-b437-146b13f0f2d0" alt=""><figcaption><p><a href="https://www.coderblock.com/en/business/">Subscription Plans</a></p></figcaption></figure>


# Plus

With the **Plus** plan, you can start **experimenting in the metaverse** with full access to the Builder tool and the ability to use **15 templates** to model your business experiences. This allows you to create **stunning branded experiences and engage your audience** in innovative ways.

<figure><img src="https://1025404586-files.gitbook.io/~/files/v0/b/gitbook-x-prod.appspot.com/o/spaces%2FvALqBsUIqL1aZ2BmaieV%2Fuploads%2FlVTwDLaeCI90aW8IQ6P0%2FScreenshot_2024-07-02_alle_10.40.38-removebg-preview.png?alt=media&amp;token=d485e2d7-a4a5-425c-9990-ed70843e54e3" alt=""><figcaption><p>Plus plan</p></figcaption></figure>


# Premium

When you purchase the Premium Plan, in addition to all the content and extra features of the Plus Plan, you'll have the ability to harness the power of artificial intelligence in your virtual world. This includes the use of our Digital Humans and other internal Metaverse applications.

In addition, the Premium plan includes strategic and project consulting, which is invaluable when your organisation needs guidance and direction on the experiences you need to build to meet your pre-defined business objectives. You'll also get access to dedicated technical support.

<figure><img src="https://1025404586-files.gitbook.io/~/files/v0/b/gitbook-x-prod.appspot.com/o/spaces%2FvALqBsUIqL1aZ2BmaieV%2Fuploads%2FbfbwS2WAKIOqdqesyKXp%2Fpremium.png?alt=media&amp;token=9c3b402b-f93a-49ca-a691-9db417ac0544" alt="" width="375"><figcaption><p><a href="https://pay.coderblock.com/b/8wM7vY9MdbobeysfZ4?prefilled_promo_code=CBVL40B2B&#x26;_gl=1*1grs77*_gcl_au*NTc2NzcwLjE3MTgxODMzOTc.">Premium Plan</a></p></figcaption></figure>


# Custom

The Custom plan involves the creation of a completely bespoke experience: our team is at your disposal to create worlds tailored to your business needs.&#x20;

Based on your requirements, our team will develop a meticulously planned project that will be implemented internally as a turnkey solution.

From a digital twin of a specific corporate headquarters to an entire branded metaverse with custom gamification adventures and integration of advanced AI solutions, each concept is brought to life with a bespoke solution designed just for you.

<figure><img src="https://1025404586-files.gitbook.io/~/files/v0/b/gitbook-x-prod.appspot.com/o/spaces%2FvALqBsUIqL1aZ2BmaieV%2Fuploads%2FdcDRaeIen4Aq14OBOPE4%2FProgetto%20senza%20titolo%20(4).png?alt=media&amp;token=fe1dc15e-9d84-4b4d-9f0f-a0e67beeca40" alt="" width="375"><figcaption><p>Custom Plan</p></figcaption></figure>


# Plans for Creators

Interested in **exploring the metaverse**, creating **unique experiences** and **monetizing** your **creativity**? Choose the plan that suits you best!

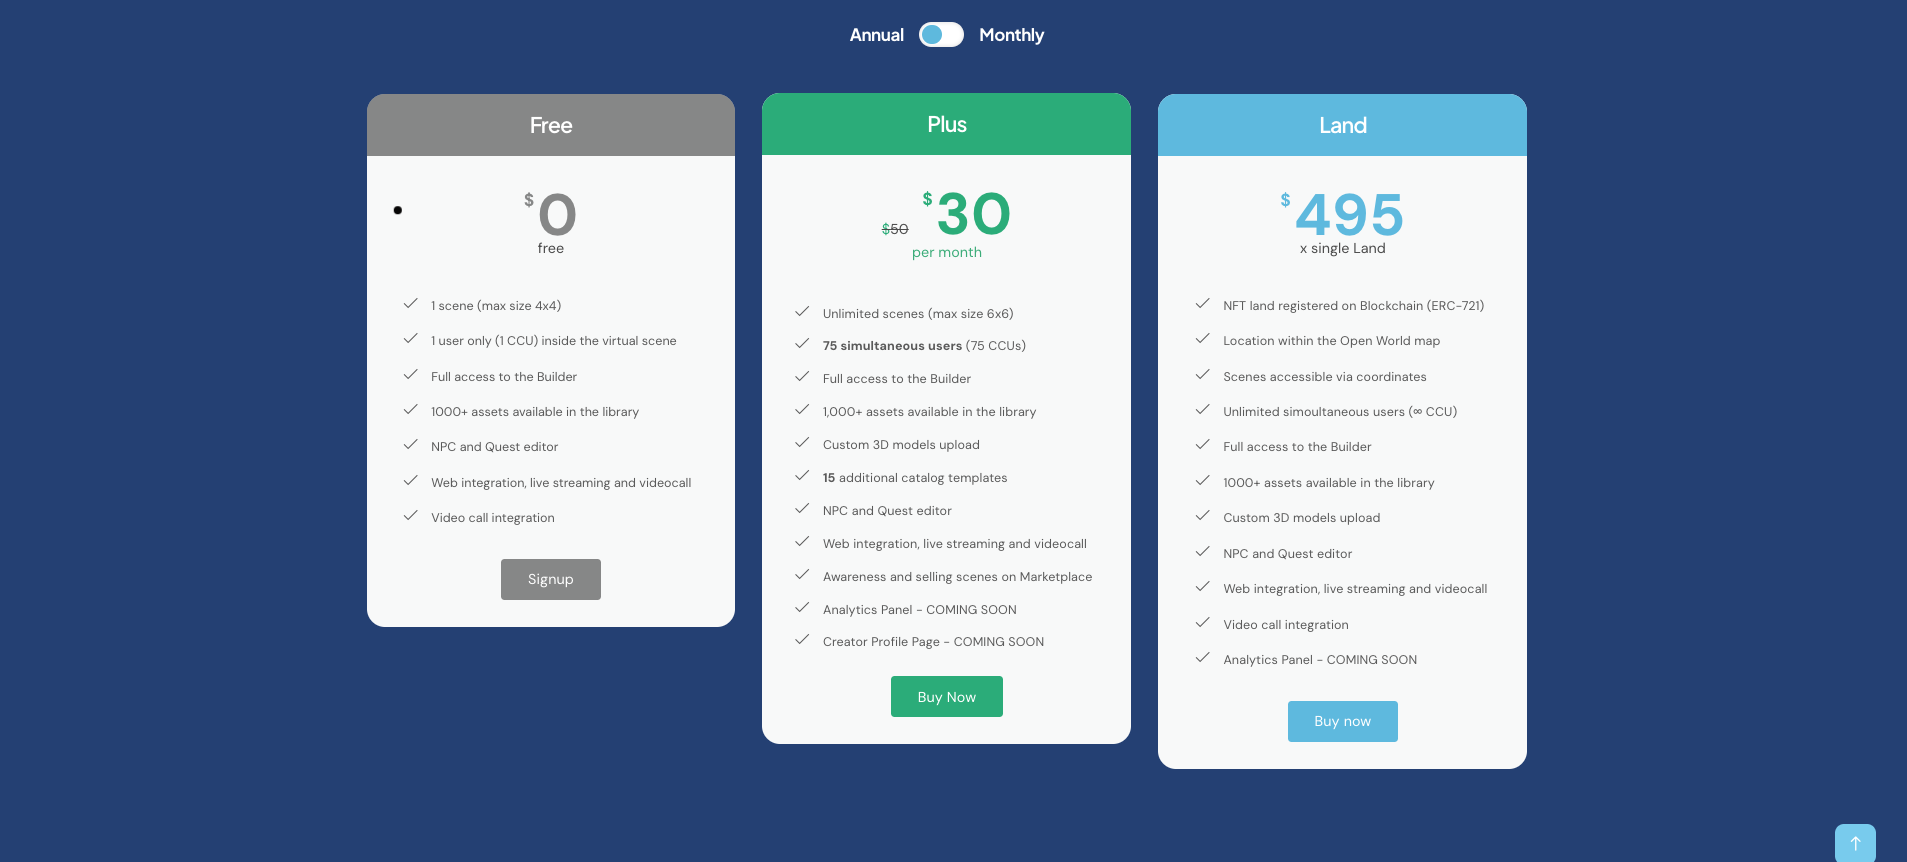
<figure><img src="https://1025404586-files.gitbook.io/~/files/v0/b/gitbook-x-prod.appspot.com/o/spaces%2FvALqBsUIqL1aZ2BmaieV%2Fuploads%2FVnEZE5QrJewSJG87jP10%2FScreenshot%202024-07-02%20alle%2010.48.39.png?alt=media&amp;token=1d8158e7-d883-4361-a2d2-d7bb23b9dfba" alt=""><figcaption><p><a href="https://www.coderblock.com/en/creators/#pricing">Subscription Plans Coderblock Studio</a></p></figcaption></figure>


# Free

With the **Free** Plan, you'll be able to **access the Builder Tool for free** with a simple registration and **start experimenting with its key features**. You can try building unlimited experiences within a **single 4x4 scene** and unleash your creativity!

<figure><img src="https://1025404586-files.gitbook.io/~/files/v0/b/gitbook-x-prod.appspot.com/o/spaces%2FvALqBsUIqL1aZ2BmaieV%2Fuploads%2FyY8fIKDhpFKRCxN9vA4i%2FProgetto%20senza%20titolo%20(4)%20copia%202.png?alt=media&amp;token=c5b30fe8-b053-4b4d-92be-42736a10d15a" alt="" width="375"><figcaption><p><a href="https://coderblock.com/signup?_gl=1*umd0vj*_gcl_au*NTc2NzcwLjE3MTgxODMzOTc.">Free Plan</a></p></figcaption></figure>


# Plus

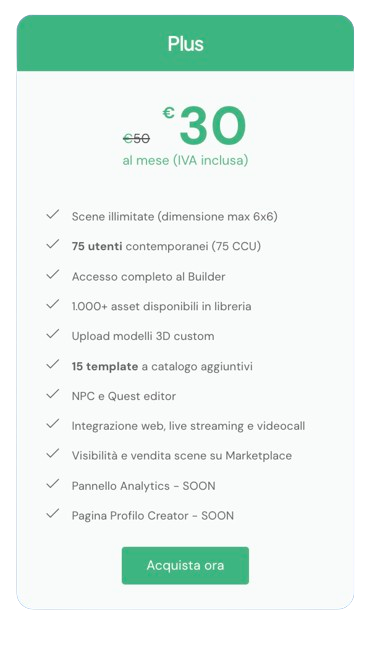
The Plus plan gives you the ability to create unlimited scenes and, most importantly, start monetizing your creativity. Create, share and earn money by selling your scenes on the Coderblock Hub marketplace!

<figure><img src="https://content.gitbook.com/content/vALqBsUIqL1aZ2BmaieV/blobs/qxCNML9XSrpNKQkD88DG/PLUS.png" alt=""><figcaption><p><a href="https://pay.coderblock.com/b/eVaaIa3nP0Jx9e828j?prefilled_promo_code=CBVL40&#x26;_gl=1*umd0vj*_gcl_au*NTc2NzcwLjE3MTgxODMzOTc.">Piano Plus</a></p></figcaption></figure>


# LAND

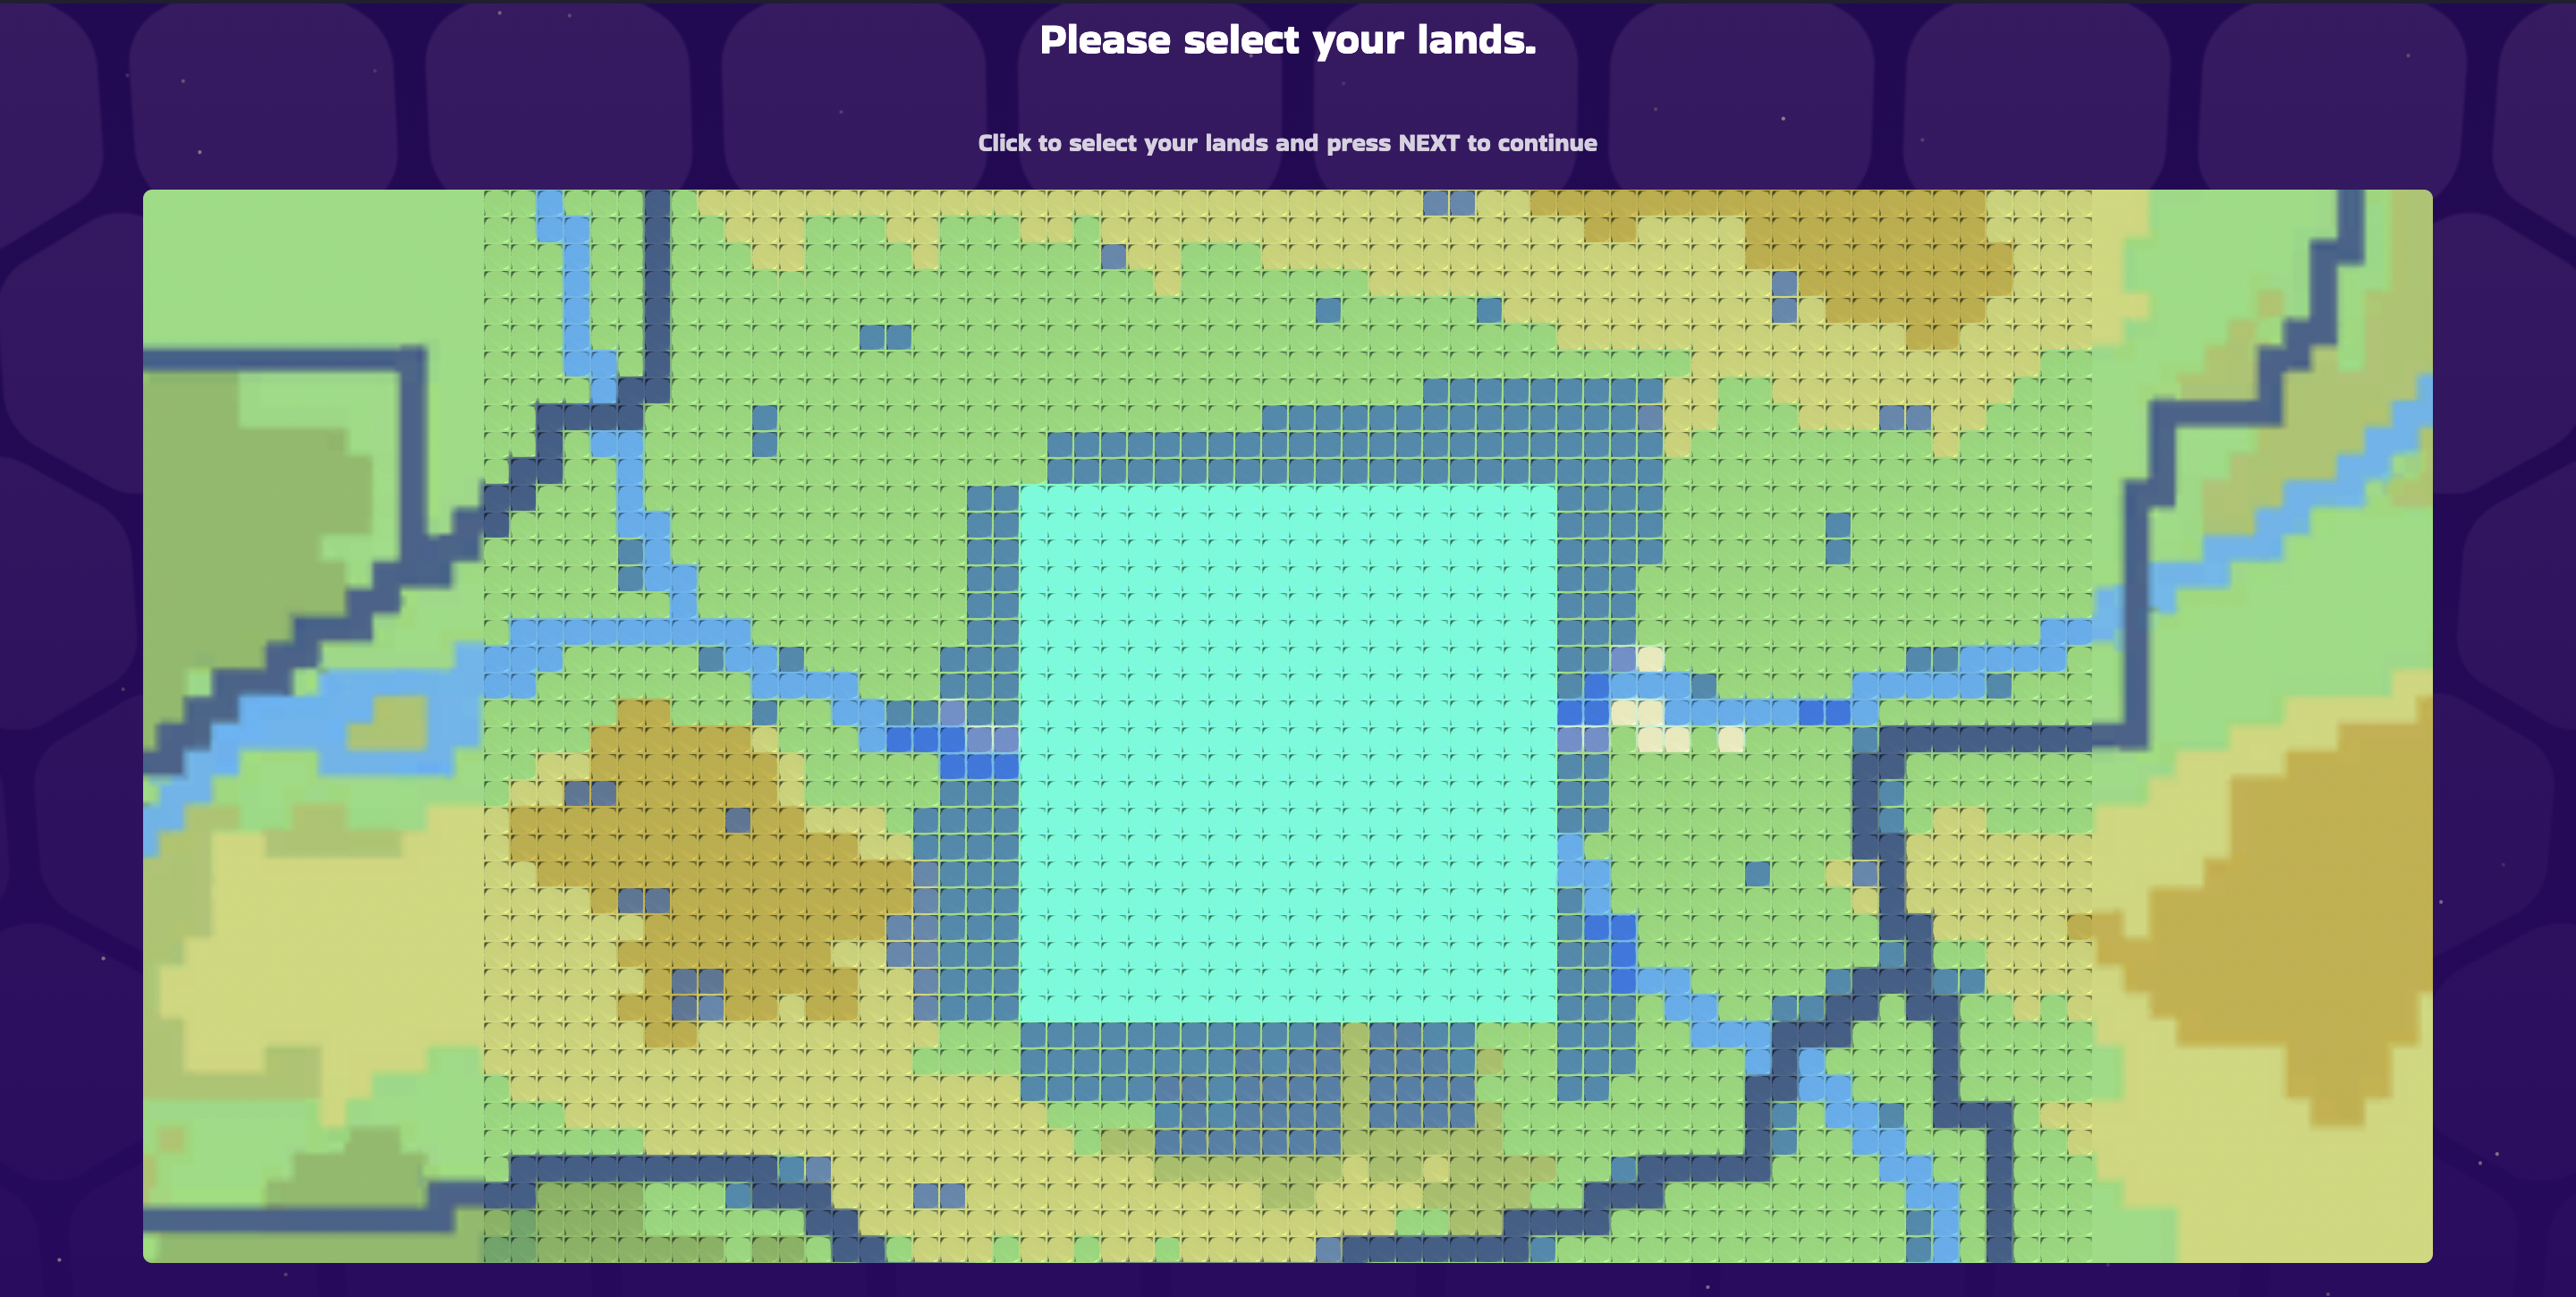
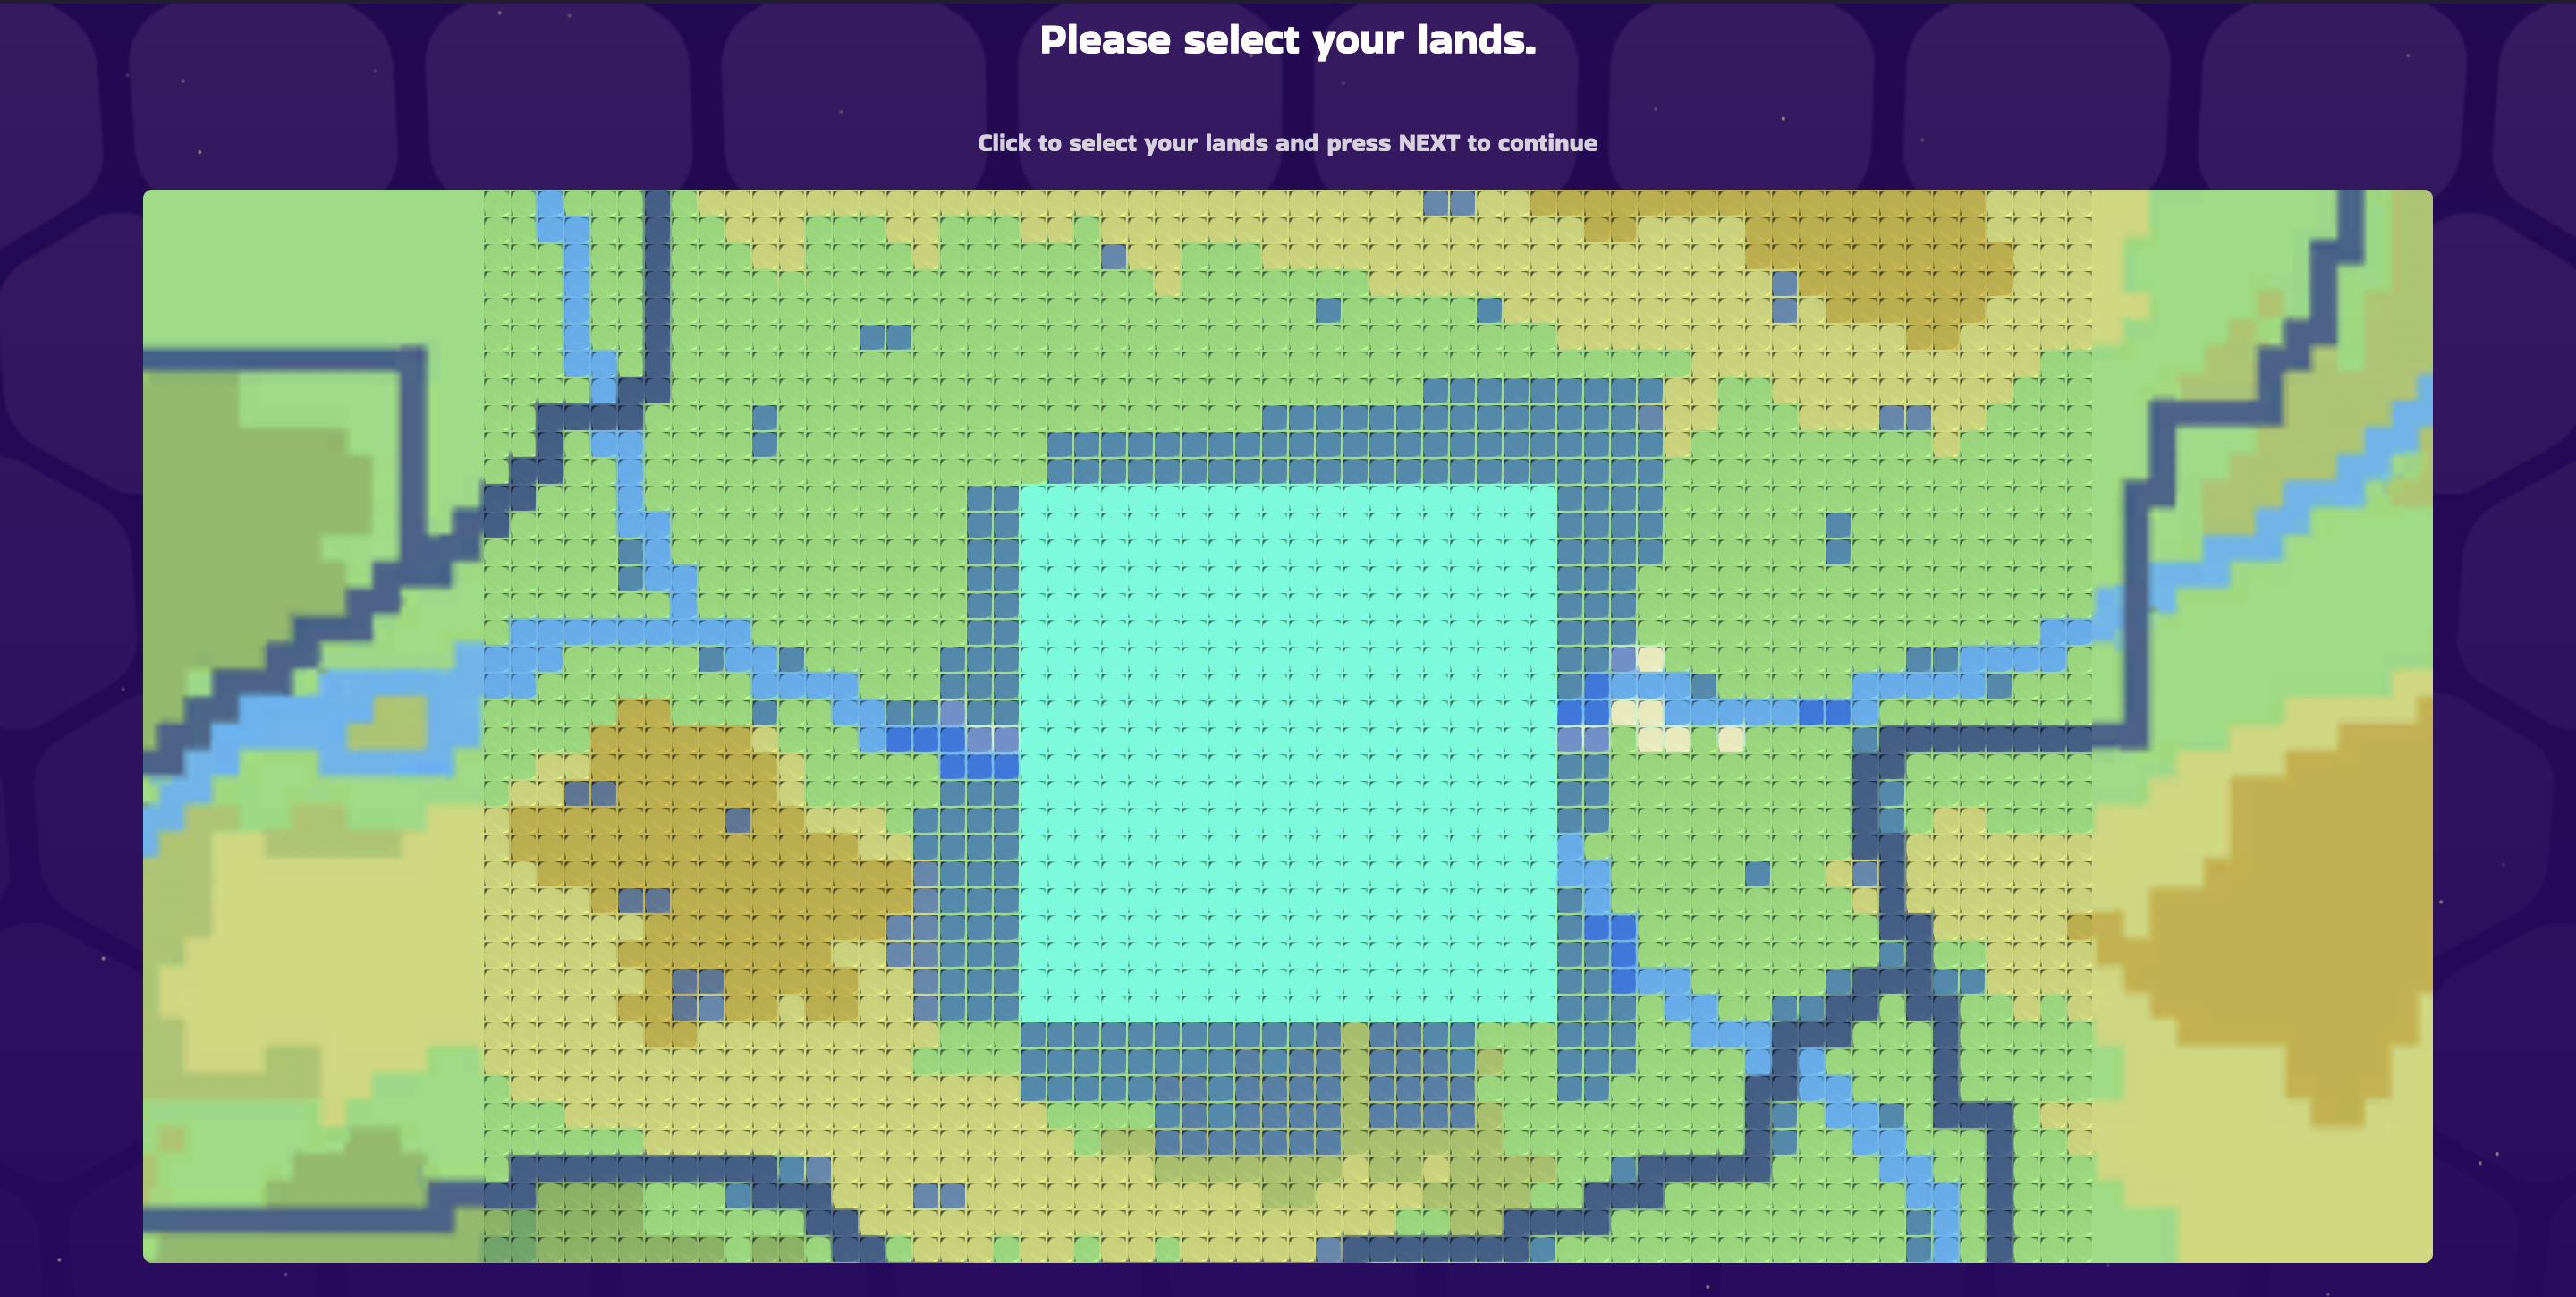
Would you like to have a **registered location** for your virtual experiences? By [purchasing one or more lands](/coderblock-lands/how-to-get-your-lands) within the Coderblock universe, you can own a **real virtual property** registered on the blockchain. These lands are located on a **shared map** and can be accessed via coordinates or simple exploration, potentially reaching an **infinite number of users**.

<figure><img src="https://1025404586-files.gitbook.io/~/files/v0/b/gitbook-x-prod.appspot.com/o/spaces%2FvALqBsUIqL1aZ2BmaieV%2Fuploads%2FoV7aK8DKPhqYgsgYVEpf%2Fland.png?alt=media&amp;token=70380b86-6b47-433a-939b-2049dd813d2c" alt="" width="375"><figcaption><p><a href="http://land.coderblock.com/?_gl=1*ax13nn*_gcl_au*NTc2NzcwLjE3MTgxODMzOTc.">Land Plan</a></p></figcaption></figure>


# Payment Methods

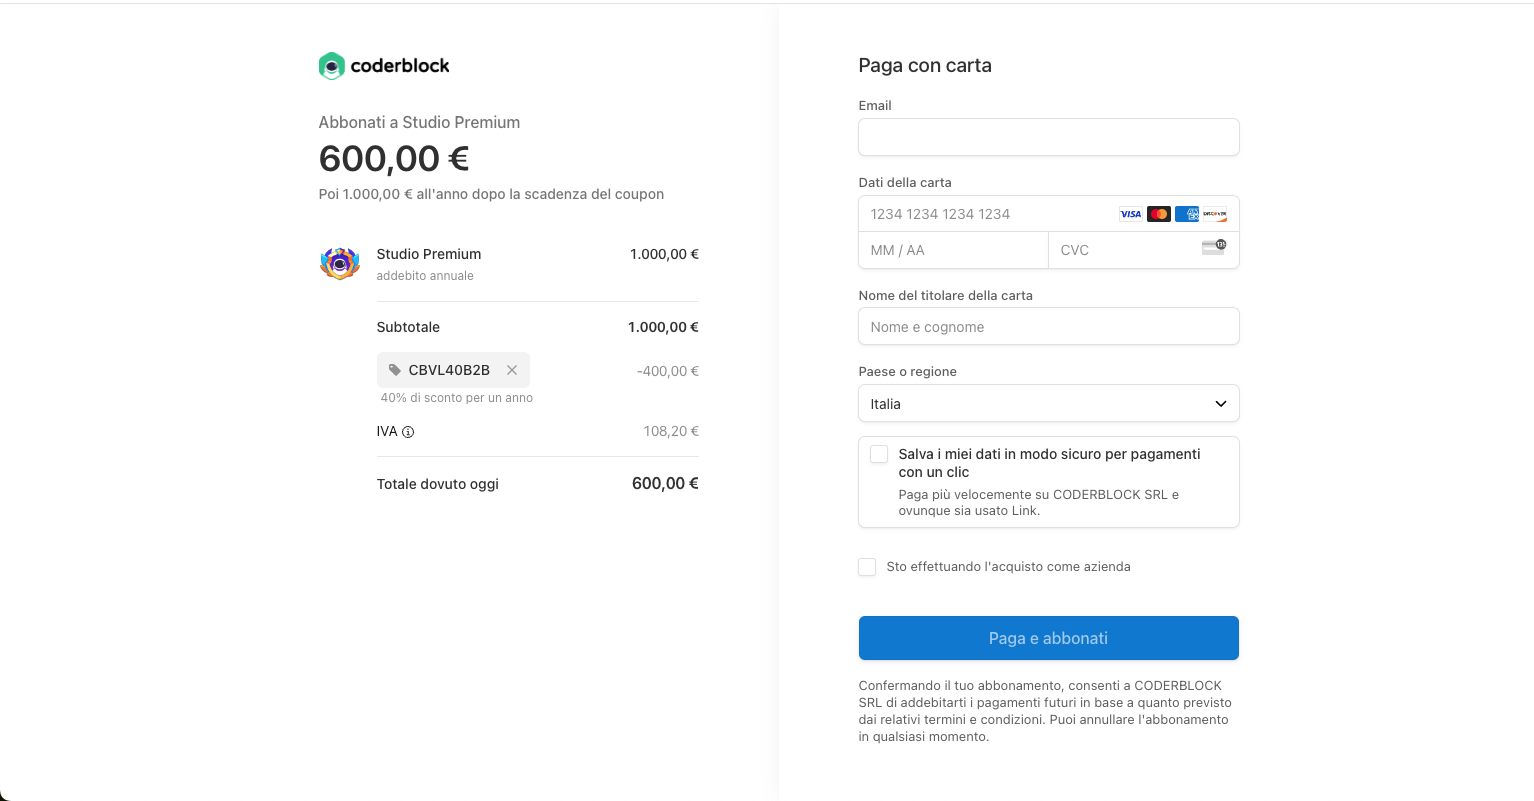
You can subscribe to one of **Coderblock's subscription plans** using your preferred payment method: **use your card** by entering the required details, or conveniently purchase using **PayPal**.

Once you have selected the plan that best suits your needs, you will be taken to the payment page where you can complete your purchase. Whether you choose a monthly or annual plan, your subscription **will automatically renew at the specified interval**. You can cancel your subscription at any time from the Coderblock Studio dashboard at no additional cost.

<figure><img src="https://content.gitbook.com/content/vALqBsUIqL1aZ2BmaieV/blobs/wcfGkbPuVdDqsxUsuJOZ/Screenshot%202024-06-25%20alle%2017.17.01.png" alt=""><figcaption></figcaption></figure>


# Builder Tool

**Builder Tool** is the online 3D editor within **Coderblock Studio** that brings scenarios, buildings and customised experiences to life in your virtual worlds. It is available to all **Landowners** (owners of land in Coderblock) **and subscribers**, allowing them to act as true digital architects according to their tastes and preferences.

{% embed url="<https://www.youtube.com/watch?v=f2inE11taX4>" %}
Builder Tool: become a digital architect! - Youtube: @Coderblock
{% endembed %}

Following, is a basic guide to the main features of the Builder Tool.\
\
For more details and insights, see the [Advanced Guide](/coderblock-studio/builder-tool-advanced-guide).


# Building with the Builder Tool

By using the **Builder Tool**, you can create scenarios that best reflect your desires and goals within your virtual world. No special technical knowledge of 3D modeling is required: the Builder Tool is simple and intuitive for everyone.

This tool provides access to an extensive catalogue of 3D objects in a library of over 1,000 predefined models. It also allows you to upload your own 3D models, giving you complete creative freedom.


# How to: create a new scene

Creating a new scene with the Builder tool is very easy, just follow a few steps:

1. [Login ](https://coderblock.com/login)to Coderblock with your credentials

<figure><img src="https://content.gitbook.com/content/vALqBsUIqL1aZ2BmaieV/blobs/HY3ASP2k4dqAuWbGr0qg/Screenshot-2024-05-23-alle-10.28.05.png" alt=""><figcaption></figcaption></figure>

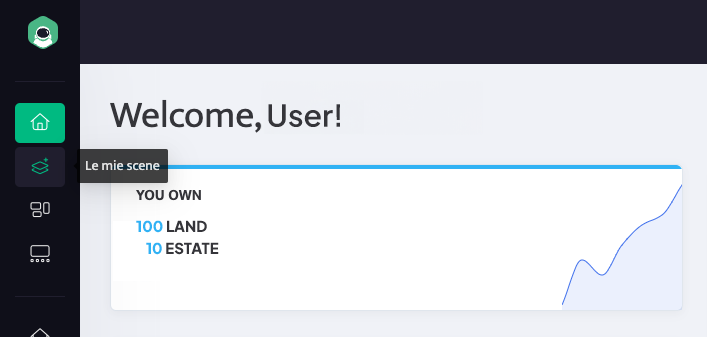
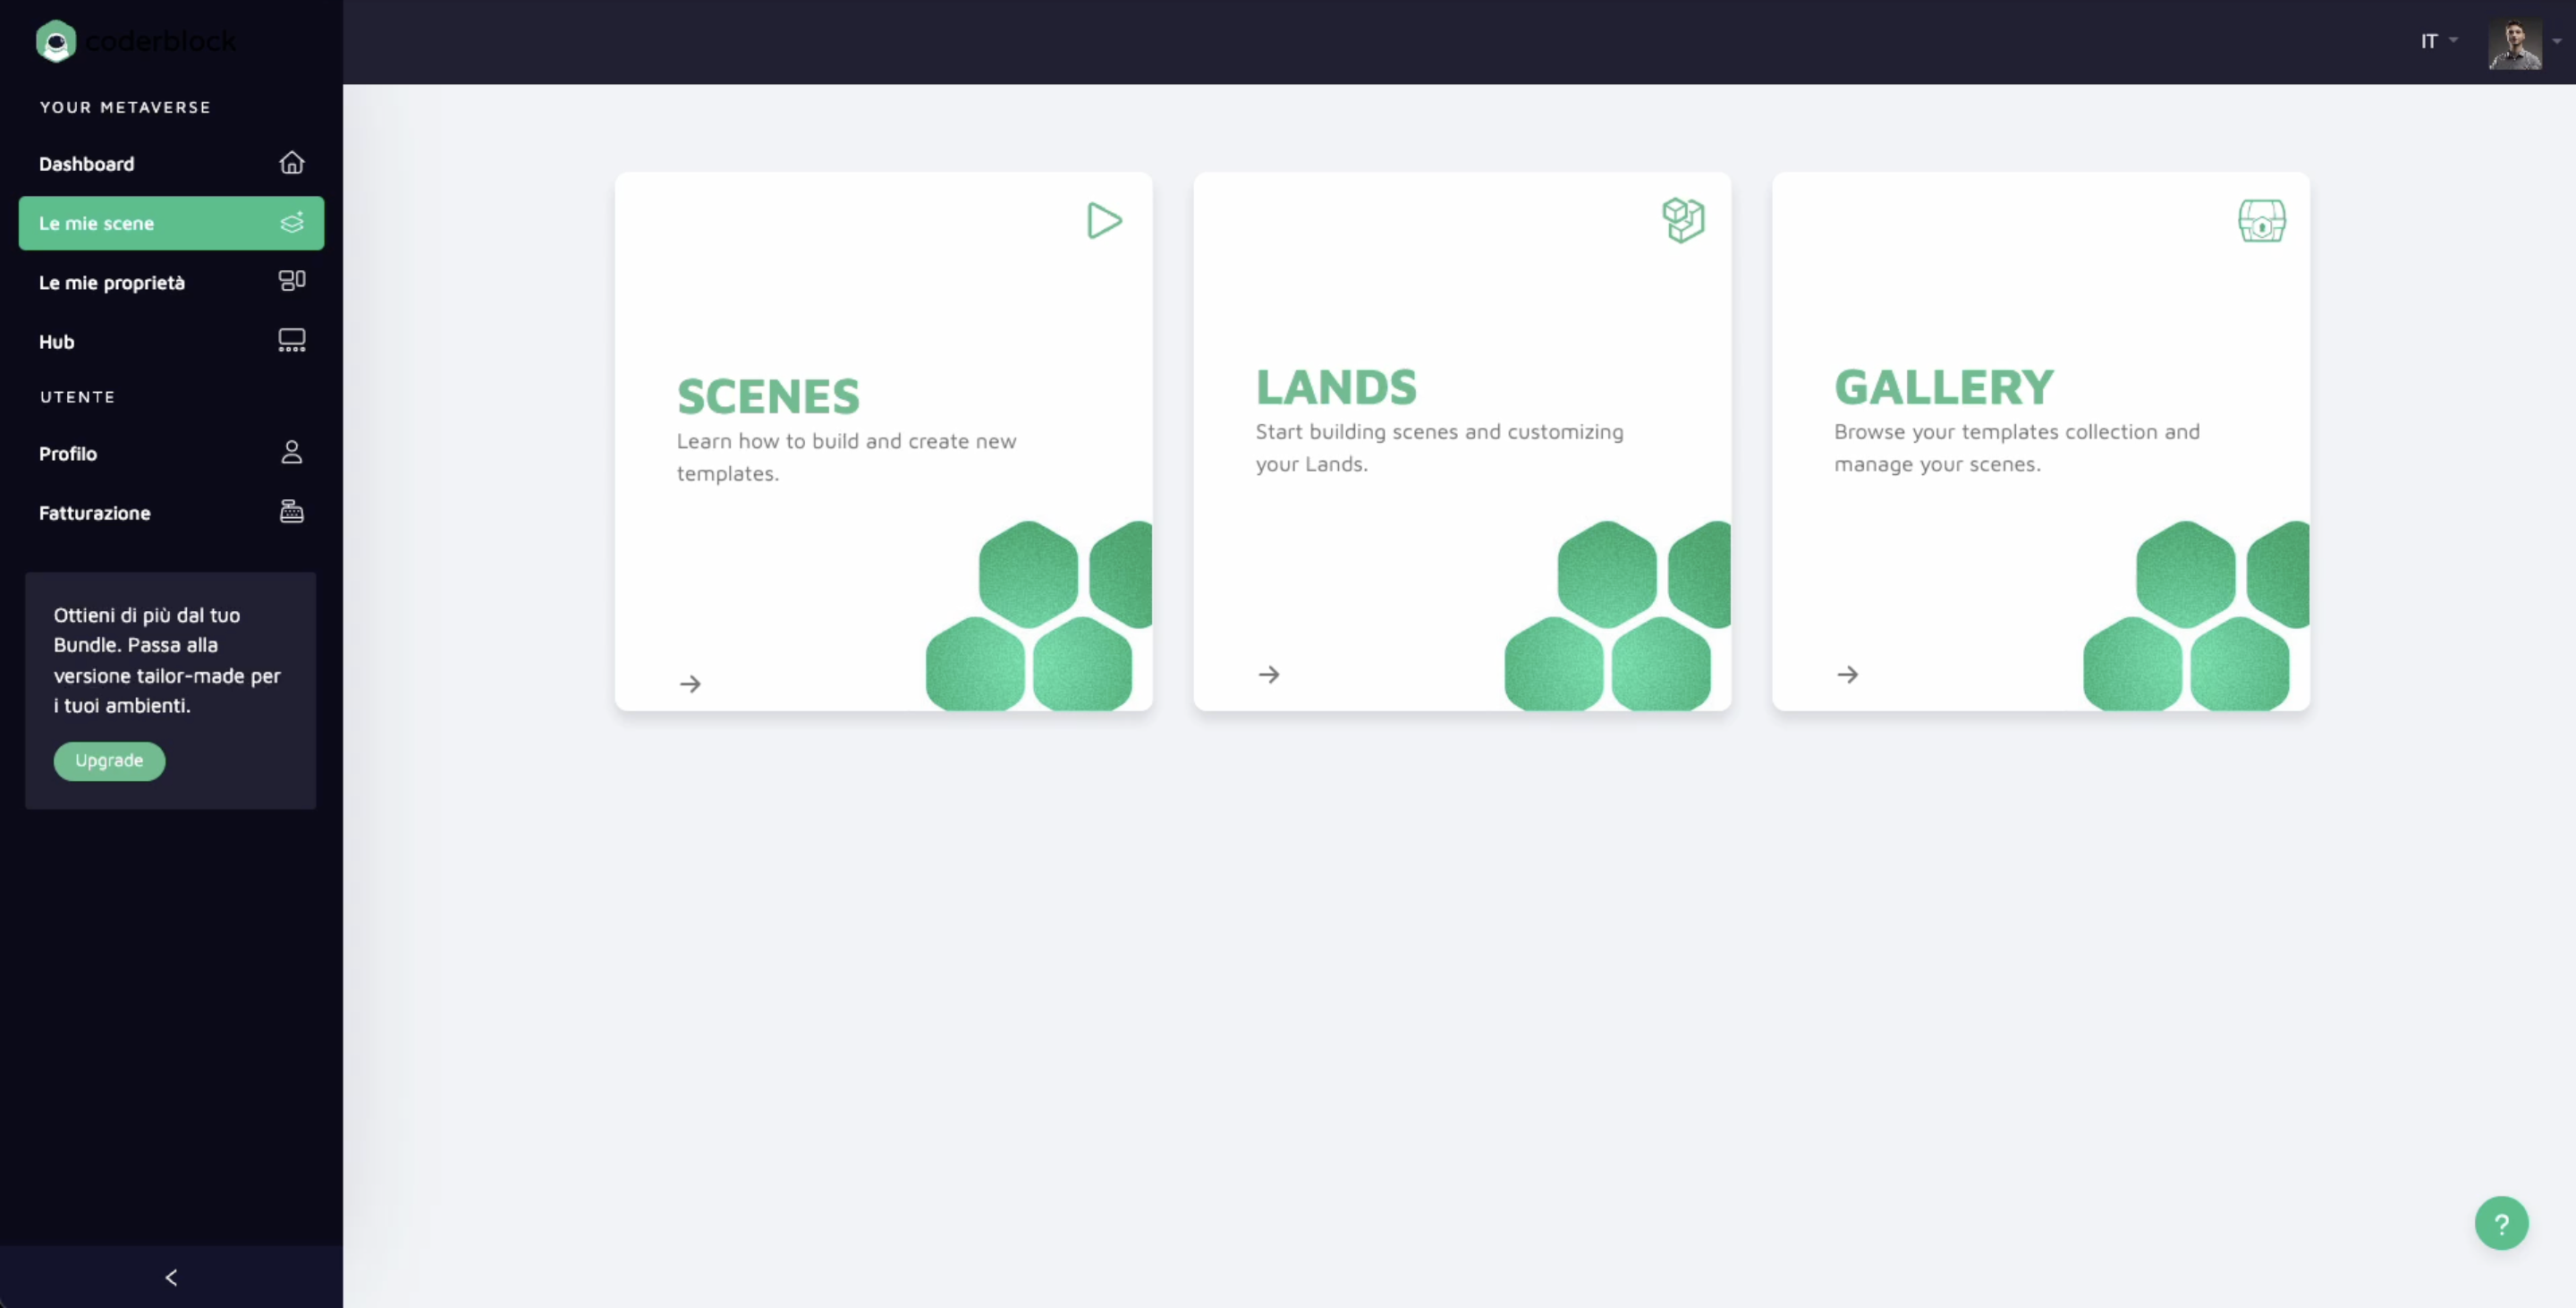
2. After logging in, you will be on the Dashboard. To create a new scene (or view the ones you have already created), simply click on **My Scenes**.
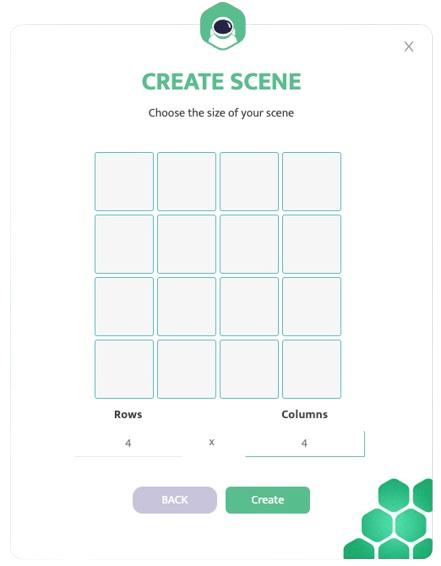
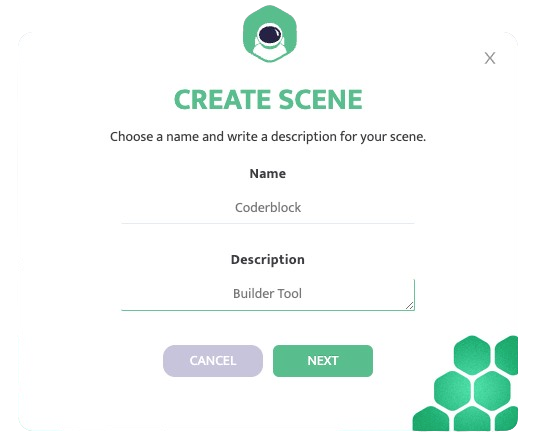
3. Clicking on ***Scenes*** will open a series of screens that you will have to fill in with the required data.

<figure><img src="https://content.gitbook.com/content/vALqBsUIqL1aZ2BmaieV/blobs/5ZiId1aY2fByoUwYBBjA/Screenshot%202024-06-28%20alle%2011.27.21.png" alt=""><figcaption></figcaption></figure>

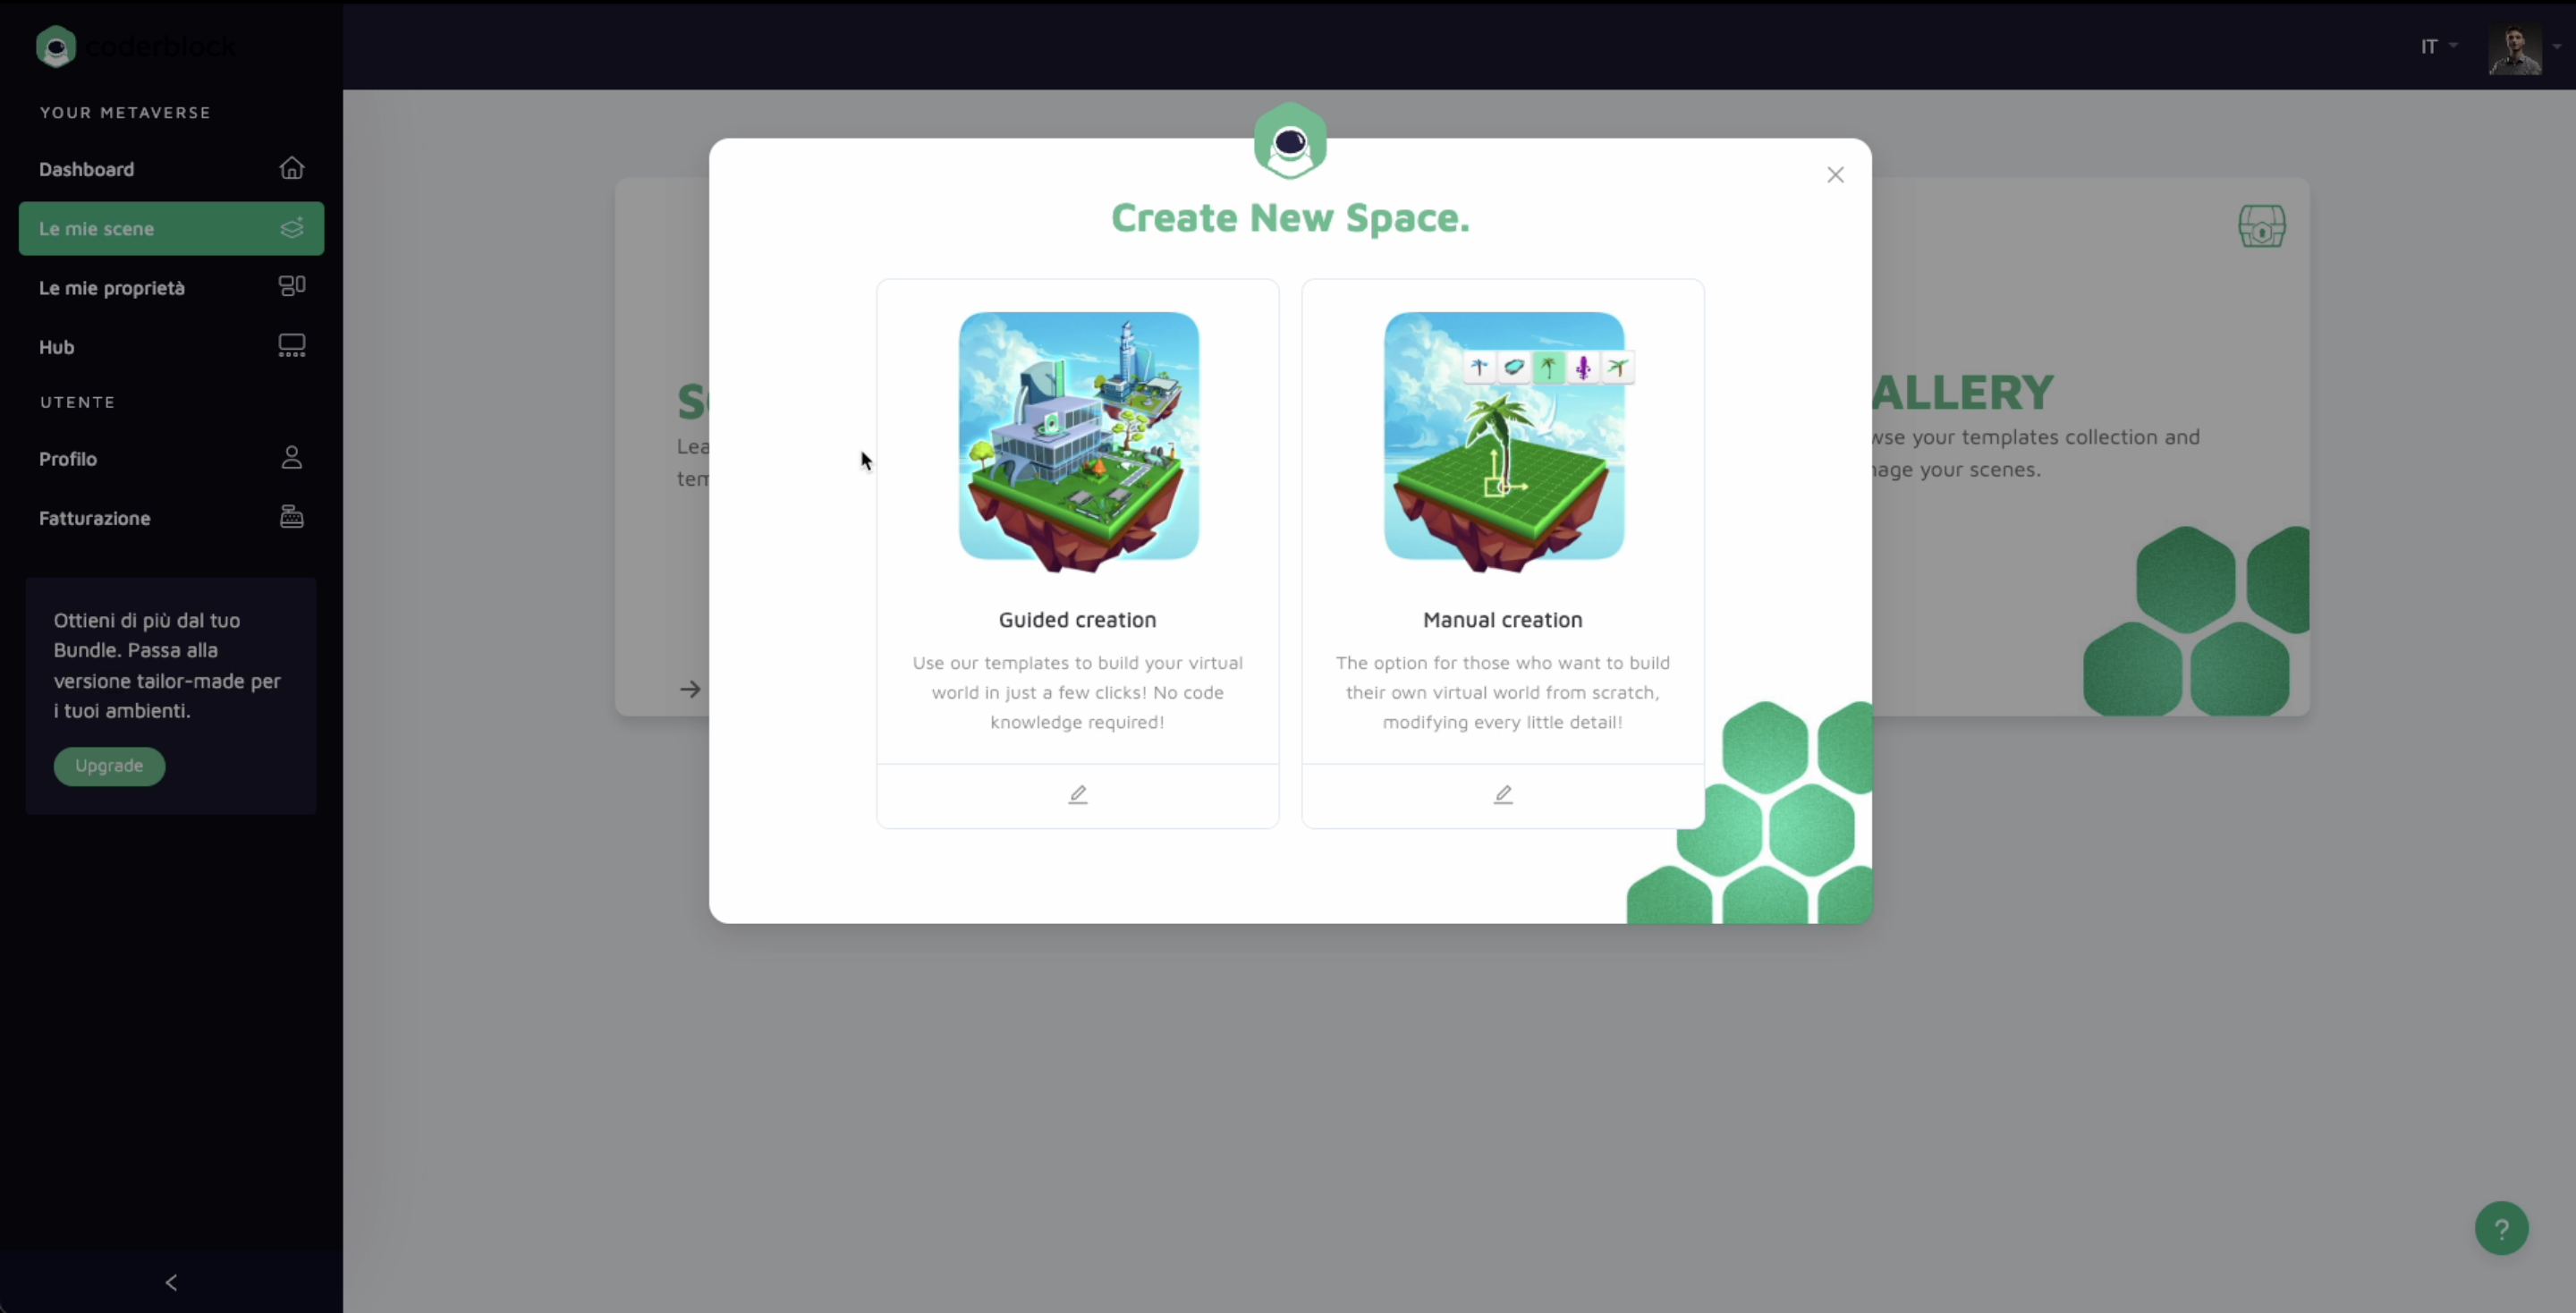
4. Within the Builder tool, you have the choice of guided creation (from templates) or completely autonomous creation!

<figure><img src="https://content.gitbook.com/content/vALqBsUIqL1aZ2BmaieV/blobs/8dG8aPsHa8o8r7aQiv7S/Screenshot%202024-06-28%20alle%2011.28.28.png" alt=""><figcaption></figcaption></figure>

<figure><img src="https://content.gitbook.com/content/vALqBsUIqL1aZ2BmaieV/blobs/FyDkl8JeNjfDY7K9PTh7/Screenshot_2024-05-23_alle_10.32.01-removebg-preview.png" alt=""><figcaption></figcaption></figure>

<figure><img src="https://content.gitbook.com/content/vALqBsUIqL1aZ2BmaieV/blobs/NHw5LEVbq5aPldsONQZU/Screenshot_2024-05-23_alle_10.31.48-removebg-preview.png" alt=""><figcaption></figcaption></figure>

5. Clicking ***Next*** will take you to the editor screen.
6. Now you can make all your dreams come true!

<figure><img src="https://content.gitbook.com/content/vALqBsUIqL1aZ2BmaieV/blobs/TzShGE6KYJS7MVoeZgyV/Screenshot%202024-06-28%20alle%2011.44.59.png" alt=""><figcaption></figcaption></figure>

Once you have created a new scene, see the Advanced Guide for details on:

* [view and movements](/coderblock-studio/builder-tool-advanced-guide/working-environment/view-and-movements) within the scene
* the [main tools](/coderblock-studio/builder-tool-advanced-guide/working-environment/design-tools) of the Builder


# How to: manage my scene

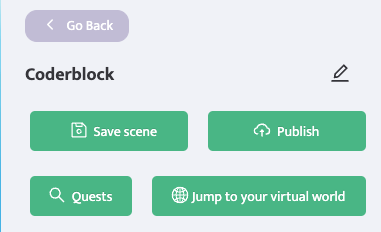
You can manage a scene both during its creation and afterwards. During creation, you can use the features available in the top right panel:

<figure><img src="https://content.gitbook.com/content/vALqBsUIqL1aZ2BmaieV/blobs/wd3fqJ3mFfs9Ifb3IyIK/Screenshot%202024-05-23%20alle%2010.38.51.png" alt=""><figcaption></figcaption></figure>

Here you can:

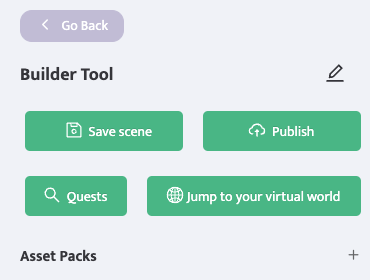
1. Save the scene
2. Publish the scene (you can undo this if you decide not to publish your scene anymore!)
3. Create Quests
4. Explore the scene with your avatar

If you have already saved and/or published your scene, but would like to modify it, simply follow the steps below:

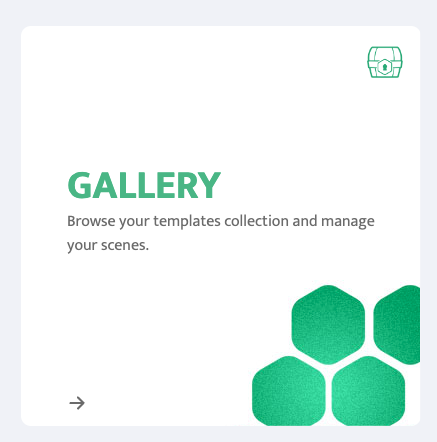
1. Go back to ***My Scenes***. This time click on ***Gallery***.

<figure><img src="https://content.gitbook.com/content/vALqBsUIqL1aZ2BmaieV/blobs/EhuM0tVgcWOYuMLaO1Ua/Screenshot%202024-05-23%20alle%2010.44.13.png" alt=""><figcaption></figcaption></figure>

2. A screen will appear showing all your creations.

<figure><img src="https://1025404586-files.gitbook.io/~/files/v0/b/gitbook-x-prod.appspot.com/o/spaces%2FvALqBsUIqL1aZ2BmaieV%2Fuploads%2F67CQ8Nl4aGrrBbYlCer0%2Fcatalogo.png?alt=media&amp;token=dda8d6a2-190e-46da-aa6e-5c1e893e7660" alt=""><figcaption></figcaption></figure>

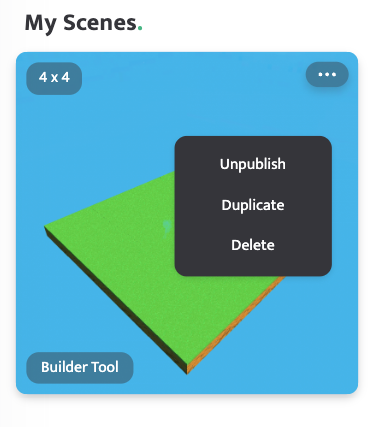
3. Click on the three dots in the top right corner above the country to open a drop-down menu.

<figure><img src="https://content.gitbook.com/content/vALqBsUIqL1aZ2BmaieV/blobs/q4oXjOt4UzVTN0IoRnAh/Screenshot%202024-05-23%20alle%2010.45.04.png" alt=""><figcaption></figcaption></figure>

Here you can:

* Make your scene private&#x20;
* Duplicate the scene&#x20;
* Delete the scene<br>

For more details and insights, see the [Advanced Guide](/coderblock-studio/builder-tool-advanced-guide/working-environment/scene-management/finalization-tools).


# 3D model library

Want to know what is available in the Builder Tool? Take a look at our **inventory**!

But remember, the Builder Tool also allows you to upload your own 3D models in .glb format.

<figure><img src="https://1025404586-files.gitbook.io/~/files/v0/b/gitbook-x-prod.appspot.com/o/spaces%2FvALqBsUIqL1aZ2BmaieV%2Fuploads%2FeLDbBsAqJ8DRUGaIZRBb%2FScreenshot%202024-07-02%20alle%2011.50.21.png?alt=media&amp;token=2830a046-7f6a-403d-a405-5cd1dc1f3599" alt=""><figcaption></figcaption></figure>

For all the details on [library elements](/coderblock-studio/builder-tool-advanced-guide/working-environment/design-tools/asset-packs), see the Advanced Guide.


# Upload your own 3D models

Want to customise your scene even more? The Builder Tool allows you to upload your own 3D models.

Just follow these steps:

1. Click on the **+** at the top right

<figure><img src="https://content.gitbook.com/content/vALqBsUIqL1aZ2BmaieV/blobs/d2SRYV3bgMS3oAOrAGgo/Screenshot%202024-05-23%20alle%2015.43.23.png" alt=""><figcaption></figcaption></figure>

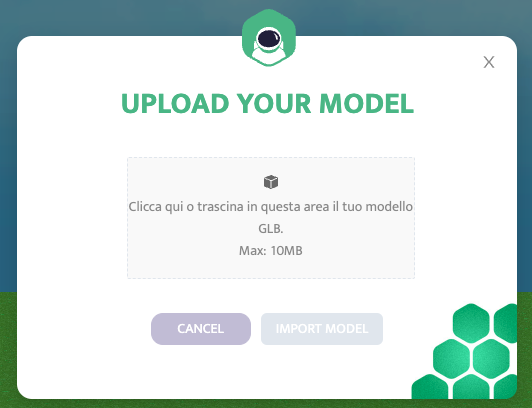
2. Drag your 3D model into the box

<figure><img src="https://content.gitbook.com/content/vALqBsUIqL1aZ2BmaieV/blobs/L4ju5DwYvc16NLIEFbbR/Screenshot%202024-05-23%20alle%2015.44.33.png" alt=""><figcaption></figcaption></figure>

3. Click **Import Model**&#x20;
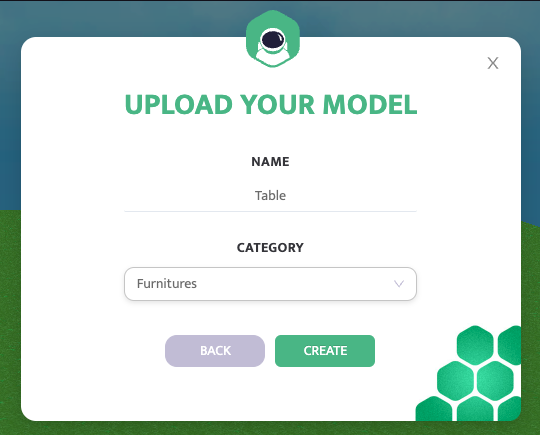
4. Choose a name for your object and select the category

<figure><img src="https://content.gitbook.com/content/vALqBsUIqL1aZ2BmaieV/blobs/Ygds78HDJU0HOlTg6h5r/Screenshot%202024-05-23%20alle%2015.46.56.png" alt=""><figcaption></figcaption></figure>

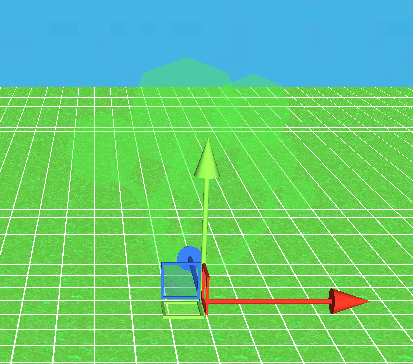
5. Now all you have to do is place your item wherever you want and use it just like any other item in your inventory!

<figure><img src="https://1025404586-files.gitbook.io/~/files/v0/b/gitbook-x-prod.appspot.com/o/spaces%2FvALqBsUIqL1aZ2BmaieV%2Fuploads%2F84NdjUqJGulUMn6qWQW3%2Fnewmenu.png?alt=media&amp;token=c2affd4a-f8ab-486c-b551-2cc344238fd5" alt=""><figcaption></figcaption></figure>


# Objects features

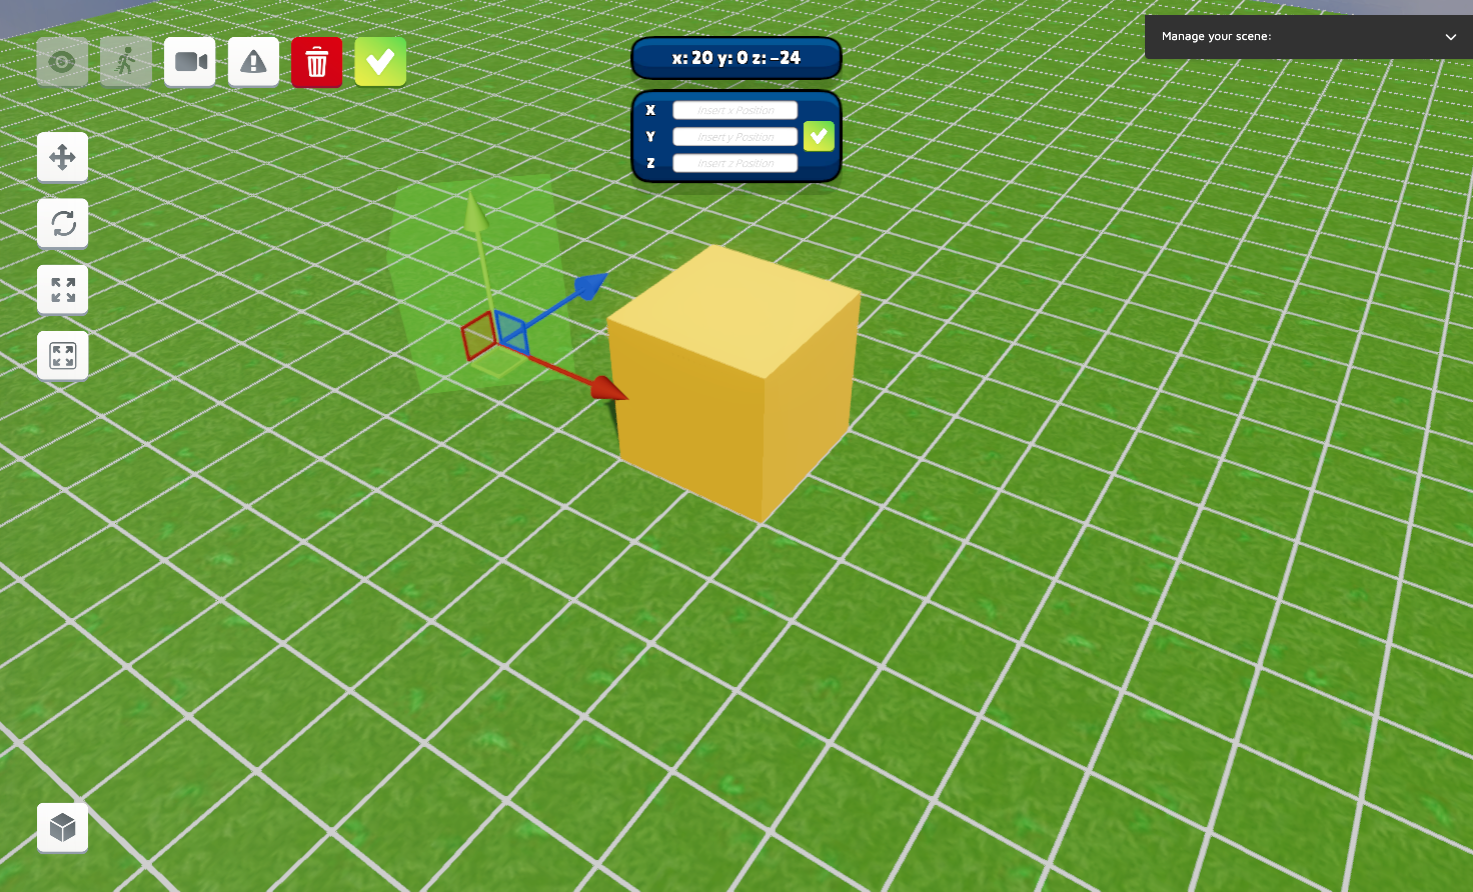
For each object you place in your scene, you can modify some of its properties. You can:

1. Move it in all directions&#x20;
2. Scale it&#x20;
3. Rotate it in all dimensions&#x20;
4. Confirm the object&#x20;
5. Delete the object

<figure><img src="https://content.gitbook.com/content/vALqBsUIqL1aZ2BmaieV/blobs/htGnIhT2CcigpMIoB9gH/Screenshot%202024-05-23%20alle%2011.17.46.png" alt=""><figcaption><p>Builder Tool - Scale</p></figcaption></figure>

All these actions are possible thanks to the panel that opens on the left when the object is placed in the scene. This panel allows you to manage all the actions individually or simultaneously:

<figure><img src="https://content.gitbook.com/content/vALqBsUIqL1aZ2BmaieV/blobs/gzuz377JJziiy004Etsu/Screenshot%202024-05-23%20alle%2011.23.36.png" alt=""><figcaption><p>Builder Tool - Rotate</p></figcaption></figure>

Each object has different properties, which you can view in the drop-down menu on the right when you select an object.

For more details and insight into object manipulation, see the [Advanced Guide](/coderblock-studio/builder-tool-advanced-guide/working-environment/design-tools/gizmo-and-assets-manipulation).


# NPC and conversations

One of the most interesting features of Coderblock World is that you can insert Non-Playable Characters (**NPC**) into your virtual scenes or lands and create conversations that are activated whenever a user interacts with them!&#x20;

These conversations represent a significant step towards a more immersive and dynamic gaming experience: interactive and realistic dialogue - enhanced by artificial intelligence - helps to create a more lively and engaging environment, making the user experience unique.

<figure><img src="https://1025404586-files.gitbook.io/~/files/v0/b/gitbook-x-prod.appspot.com/o/spaces%2FvALqBsUIqL1aZ2BmaieV%2Fuploads%2FbVpdJcGfSoDTWsIu6qCM%2Fottimizzazione%20flussi.jpg?alt=media&amp;token=6fca2cc1-3086-4411-b2e6-273a76f8a8fd" alt=""><figcaption><p>NPC - Conversation example</p></figcaption></figure>

### How to: place an NPC in the scene

You can add either one of our Codys or one of the Digital Humans to your scene as an NPC. Search for **NPC** in the Builder's search bar and choose your favourite!

<div data-full-width="true"><figure><img src="https://1025404586-files.gitbook.io/~/files/v0/b/gitbook-x-prod.appspot.com/o/spaces%2FvALqBsUIqL1aZ2BmaieV%2Fuploads%2FTM5ZNjseGmBrLjaQn52h%2Fspaces_7Xx9MXfrv3u3rqwjPomO_uploads_2AI7RsCQjuxRxaUwTtkS_Screenshot%202024-07-01%20alle%2012.webp?alt=media&amp;token=27775f26-723f-4916-9612-7adf1e9d1df5" alt=""><figcaption><p>Cody NPCs</p></figcaption></figure> <figure><img src="https://1025404586-files.gitbook.io/~/files/v0/b/gitbook-x-prod.appspot.com/o/spaces%2FvALqBsUIqL1aZ2BmaieV%2Fuploads%2FMHTTQymtbwC1begkbfcm%2Fspaces_7Xx9MXfrv3u3rqwjPomO_uploads_iIvXev4y27bvKU0EZH5R_Screenshot%202024-07-01%20alle%2012.webp?alt=media&amp;token=f6b6892a-eef3-41d8-8357-a39f94abf85d" alt=""><figcaption><p>Digital Humans NPCs</p></figcaption></figure></div>

Once you've selected the NPC, place it wherever you like in your scene. It could greet players at the entrance to a building, be next to a desk or table in a meeting room, or perhaps near where you've placed the start of a quest: any location can be suitable for an NPC in your scene!

### Setting up the conversation flow

Once the NPC has been placed, click on it and then click on '**Create Conversation**'.

<figure><img src="https://1025404586-files.gitbook.io/~/files/v0/b/gitbook-x-prod.appspot.com/o/spaces%2FvALqBsUIqL1aZ2BmaieV%2Fuploads%2F5KuqvXymNTjhuq8zcH3l%2Fspaces_7Xx9MXfrv3u3rqwjPomO_uploads_dCzoRiDtDEATRP4jPxGt_Screenshot%202024-07-01%20alle%2012.webp?alt=media&amp;token=d7bcf6e1-18a5-4670-a311-54261f73e646" alt="" width="138"><figcaption><p>NPC conversations</p></figcaption></figure>

Conversation flows are managed by **Narrative Events**.&#x20;

Each Narrative Event represents a 'node' in the conversation flow, and the user's choices determine the order of the nodes and therefore the conversation with the NPC that is displayed. \
\
Within each Narrative you can add one or more 'Items', which can be thought of as 'sub-nodes'. There are two types of item to choose from:&#x20;

* **ItemText**: This is an 'informative', 'conversational' item. It's a simple text that you can decide to insert into the conversation, it doesn't involve a choice, but allows the flow of conversation to continue until the end of that particular Narrative Event, or until an ItemChoice is encountered. If there is no ItemChoice and the Narrative Event ends (i.e. there are no more ItemTexts), the conversation with the NPC will end.&#x20;
* **ItemChoice**: Allows the user to make a choice via 'Answers' that will redirect the conversation flow to another Narrative Event. Click '**Add Answer**' to add the choices that the user can make (with the text that will appear on the choice buttons) and the corresponding Narratives where the conversation flow will land based on the choice.

<div><figure><img src="https://1025404586-files.gitbook.io/~/files/v0/b/gitbook-x-prod.appspot.com/o/spaces%2FvALqBsUIqL1aZ2BmaieV%2Fuploads%2Fts3We6C8mfZ1PVnzW8M6%2F1.webp?alt=media&amp;token=010c5653-97b5-44fa-bf3b-53b7b600e4d8" alt=""><figcaption><p>Narrative Event - Item Text</p></figcaption></figure> <figure><img src="https://1025404586-files.gitbook.io/~/files/v0/b/gitbook-x-prod.appspot.com/o/spaces%2FvALqBsUIqL1aZ2BmaieV%2Fuploads%2FwbWFBKsRJSxZKvX0KahY%2F2.webp?alt=media&amp;token=2dc2687f-1f33-4404-8317-da6f5a15c41c" alt=""><figcaption><p>Narrative Event - Item Text 2</p></figcaption></figure> <figure><img src="https://1025404586-files.gitbook.io/~/files/v0/b/gitbook-x-prod.appspot.com/o/spaces%2FvALqBsUIqL1aZ2BmaieV%2Fuploads%2FEBcZFwq2UlxOKAmHmE7Y%2F3.webp?alt=media&amp;token=f65d45b8-5e81-4b56-a912-e496192f3983" alt=""><figcaption><p>Narrative Event - Item Choice</p></figcaption></figure></div>

For both types of item, you can use the '*Dialogue Text*' to enter what the NPC will say when the conversation reaches that particular item.&#x20;

To add an item to the narrative event, simply click '*Add ItemText*' or '*Add ItemChoice*' and it will be placed after the last previously created item (or as the first if you haven't added any items yet).

<figure><img src="https://1025404586-files.gitbook.io/~/files/v0/b/gitbook-x-prod.appspot.com/o/spaces%2FvALqBsUIqL1aZ2BmaieV%2Fuploads%2FgTayIu3q9Inm9Pr0FlAm%2Fspaces_7Xx9MXfrv3u3rqwjPomO_uploads_BeG2iP5XB42yeLB5emzo_Screenshot%202024-07-01%20alle%2012.webp?alt=media&amp;token=a9f22e9e-7868-40c6-8589-c9149d3154aa" alt="" width="287"><figcaption><p>Narrative Event</p></figcaption></figure>

For each item, you can also define **Conditions** and **Effects**, which allow you to better manage the conversation by specifying the conditions under which this 'sub-node' will be displayed to the user during the conversation, or the effects that it will trigger.&#x20;

The main purpose of these two settings is to manage quests, as explained [HERE](/coderblock-studio/builder-tool/npc-and-conversations#gestione-delle-quest-tramite-conversazione-con-npc).

<figure><img src="https://1025404586-files.gitbook.io/~/files/v0/b/gitbook-x-prod.appspot.com/o/spaces%2FvALqBsUIqL1aZ2BmaieV%2Fuploads%2FeU4x9zuJbu1iovBfroKR%2Fspaces_7Xx9MXfrv3u3rqwjPomO_uploads_qzRUlTnUdYRaX7wK6593_Screenshot%202024-07-01%20alle%2013.webp?alt=media&amp;token=9d971f32-0add-421c-a899-9a0bd49f4013" alt="" width="305"><figcaption><p>Narrative Event - Condition and Effect</p></figcaption></figure>

Once the conversation is created, you can change it at any time by clicking on the NPC and then clicking on '**Update Conversation**'.&#x20;

Remember to click '**Save**' on each item within a Narrative Event when you make changes, as well as the 'Save' button at the top of the entire conversation.

<figure><img src="https://1025404586-files.gitbook.io/~/files/v0/b/gitbook-x-prod.appspot.com/o/spaces%2FvALqBsUIqL1aZ2BmaieV%2Fuploads%2FtxBmcTvNZKazxSPZcmlx%2Fspaces_7Xx9MXfrv3u3rqwjPomO_uploads_mENqjHNZeVOV8MMdVz4H_Screenshot%202024-07-01%20alle%2012.webp?alt=media&amp;token=d3457a78-3146-4725-82f9-e7a23cdc2e1b" alt="" width="329"><figcaption><p>Narrative Event - Save changes</p></figcaption></figure>

Finally, click the green '**Save Scene**' button in the top right corner to save your changes.

### Quest management -  *Condition and Effect*

Our NPCs are not just friendly characters who provide information and companionship, they can also play a crucial role in your virtual environment.&#x20;

**The activation and management of**  [**Quest**](/coderblock-studio/builder-tool/quests-what-they-are-and-how-to-create-them) **is entirely up to the NPCs** and their conversations!&#x20;

The part of the conversation flow related to quest management deserves a separate discussion. We are talking about the Condition and Effect sections, which can be found in detail [HERE](/coderblock-studio/builder-tool/quests-what-they-are-and-how-to-create-them#attivazione-e-gestione-quest-tramite-npc)


# Quests: what they are and how to create them

**Quests** are missions or tasks that users can complete within interactive virtual worlds. This concept is very common in video games and is also found in your virtual world.

In order for a user to participate in a Quest, it must be **activated by talking to an NPC**.

To implement a Quest in your scene, you'll need to follow three main steps:

* Create the **Quest**&#x20;
* Add an **NPC** to the scene&#x20;
* Set up the **activation of the quest** within the NPC's conversation.

The user can then choose to participate in the quest by talking to the NPC.

Here's a simple example:

\- The user interacts with the NPC by pressing E and initiating the conversation. \
\- NPC: "Welcome! Would you like to join the quest?" \
\- At this point, the user can choose to click the "Yes!" button or "No, thank you!" (or any other form you decide to use in the conversation). \
\- If the user clicks "Yes!" and the conversation with the NPC is correctly set to start the quest under those conditions, the quest will start! \
\
**NOTE**: *Quests will soon be available on lands as well as spaces!*

### Create a Quest

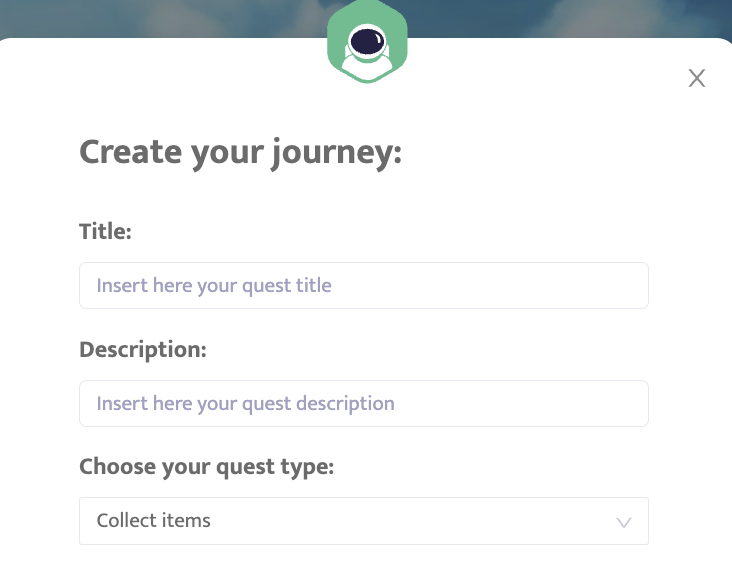
To create a quest, simply click on the green '**Quests**' button at the top of the screen, and then click on the '***Create New Quest'*** button that will appear in the centre of the screen.

At this point, you can give your quest a name and description, and select its type based on the type of quest you want to create, as we'll see shortly.

<figure><img src="https://content.gitbook.com/content/vALqBsUIqL1aZ2BmaieV/blobs/iB9fKaxHkXctVNZTADUf/Screenshot%202024-06-28%20alle%2016.58.32.png" alt="" width="366"><figcaption><p>Quest creation</p></figcaption></figure>

Once you have filled in the Title, Description and Quest Type fields, you will find yourself at this stage (in the example, a CollectItems quest type):

<figure><img src="https://content.gitbook.com/content/vALqBsUIqL1aZ2BmaieV/blobs/1pCHT708puFqBEfeFEEX/Screenshot%202024-06-28%20alle%2018.15.46.png" alt=""><figcaption><p>Quest - Collect Items</p></figcaption></figure>

From here, you can choose to edit the information you just entered (such as the title and description) by clicking on '**Edit Info**', delete the quest by clicking on '**Delete**', or continue to define its details by clicking on '**Edit Quest**'.

**Important**: Remember to set the quest to 'Active' if you want it to be operational!&#x20;

Currently available quest types include '**Treasure Hunt**' and '**Follow the Path**' quests, with and without **timers** (new quest types will be available soon, follow us on social channels to stay updated)!

In both cases, the concept is the same: once the quest starts, the participating user must approach and get close to the objects you have chosen to include in the quest in order to **collect** them. The quest is completed when all the items have been collected (or within a certain time if you have set a timer).

#### Treasure Hunt&#x20;

To set up a treasure hunt, choose '**CollectItems**' as the quest type. In this quest, all the items you select will appear simultaneously at the start of the quest, placed in the locations you select in the scene.

You can collect them in any order you like - the only requirement to complete the quest is to collect **them all**!&#x20;

Once you have created the 'base', click on '***Edit Quest***' to decide which items you want to use in your quest and how you want to arrange them.

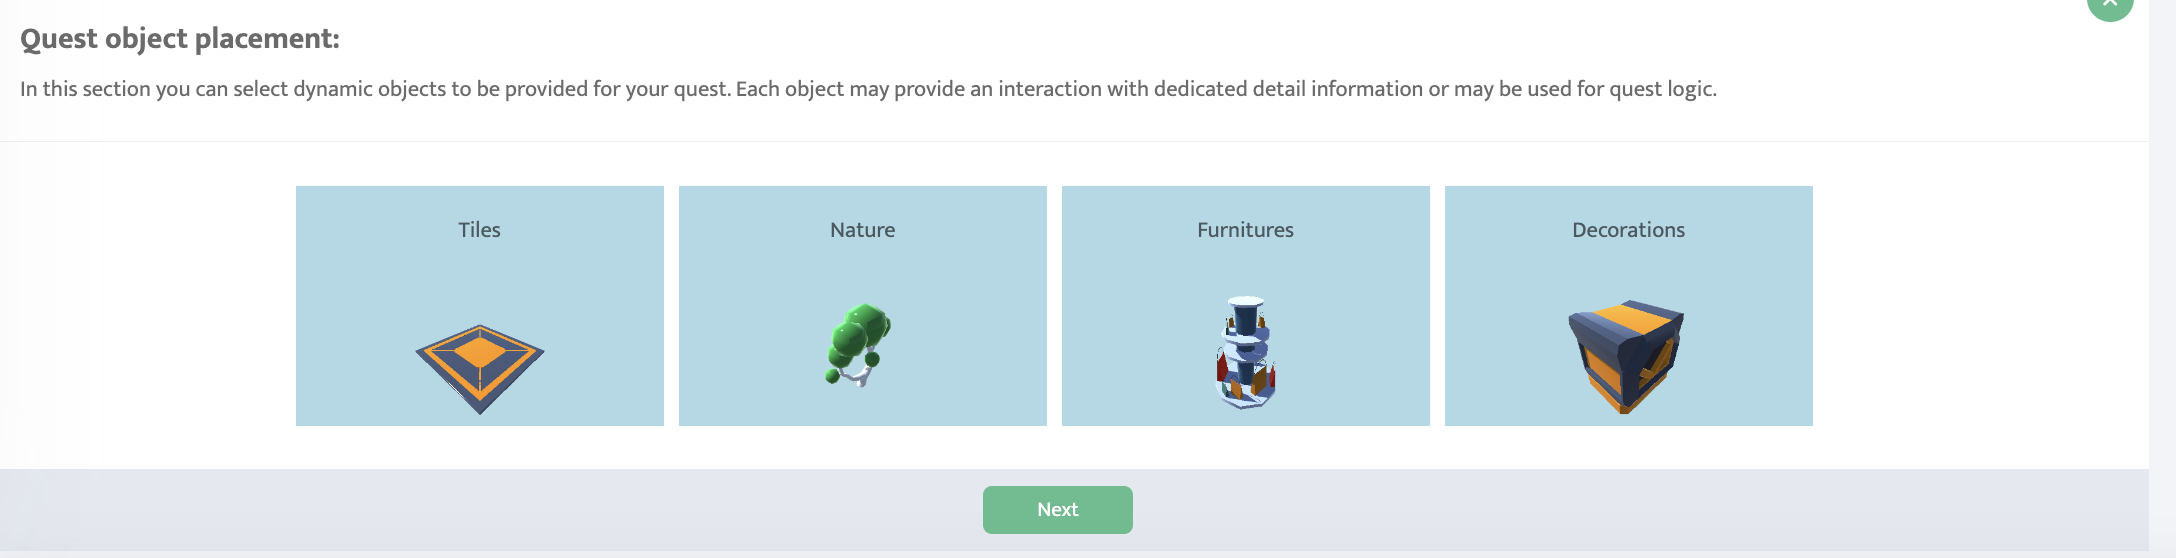
Choose whether you want to use items such as 'Tiles', 'Nature', 'Furniture' or 'Decorations', then click 'Next' and select the single items you want to use.

<figure><img src="https://content.gitbook.com/content/vALqBsUIqL1aZ2BmaieV/blobs/jt3Rqpu3jzru4v0XUxVI/Screenshot%202024-06-28%20alle%2018.27.15.png" alt=""><figcaption><p>Quest - Items to collect</p></figcaption></figure>

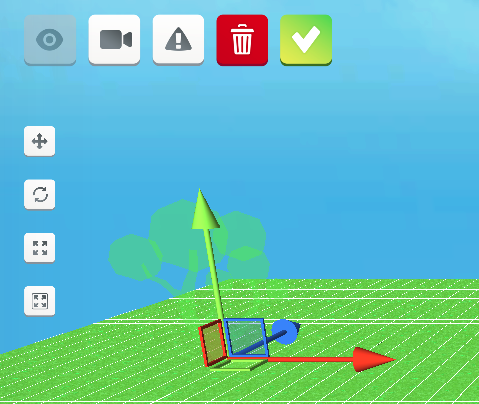
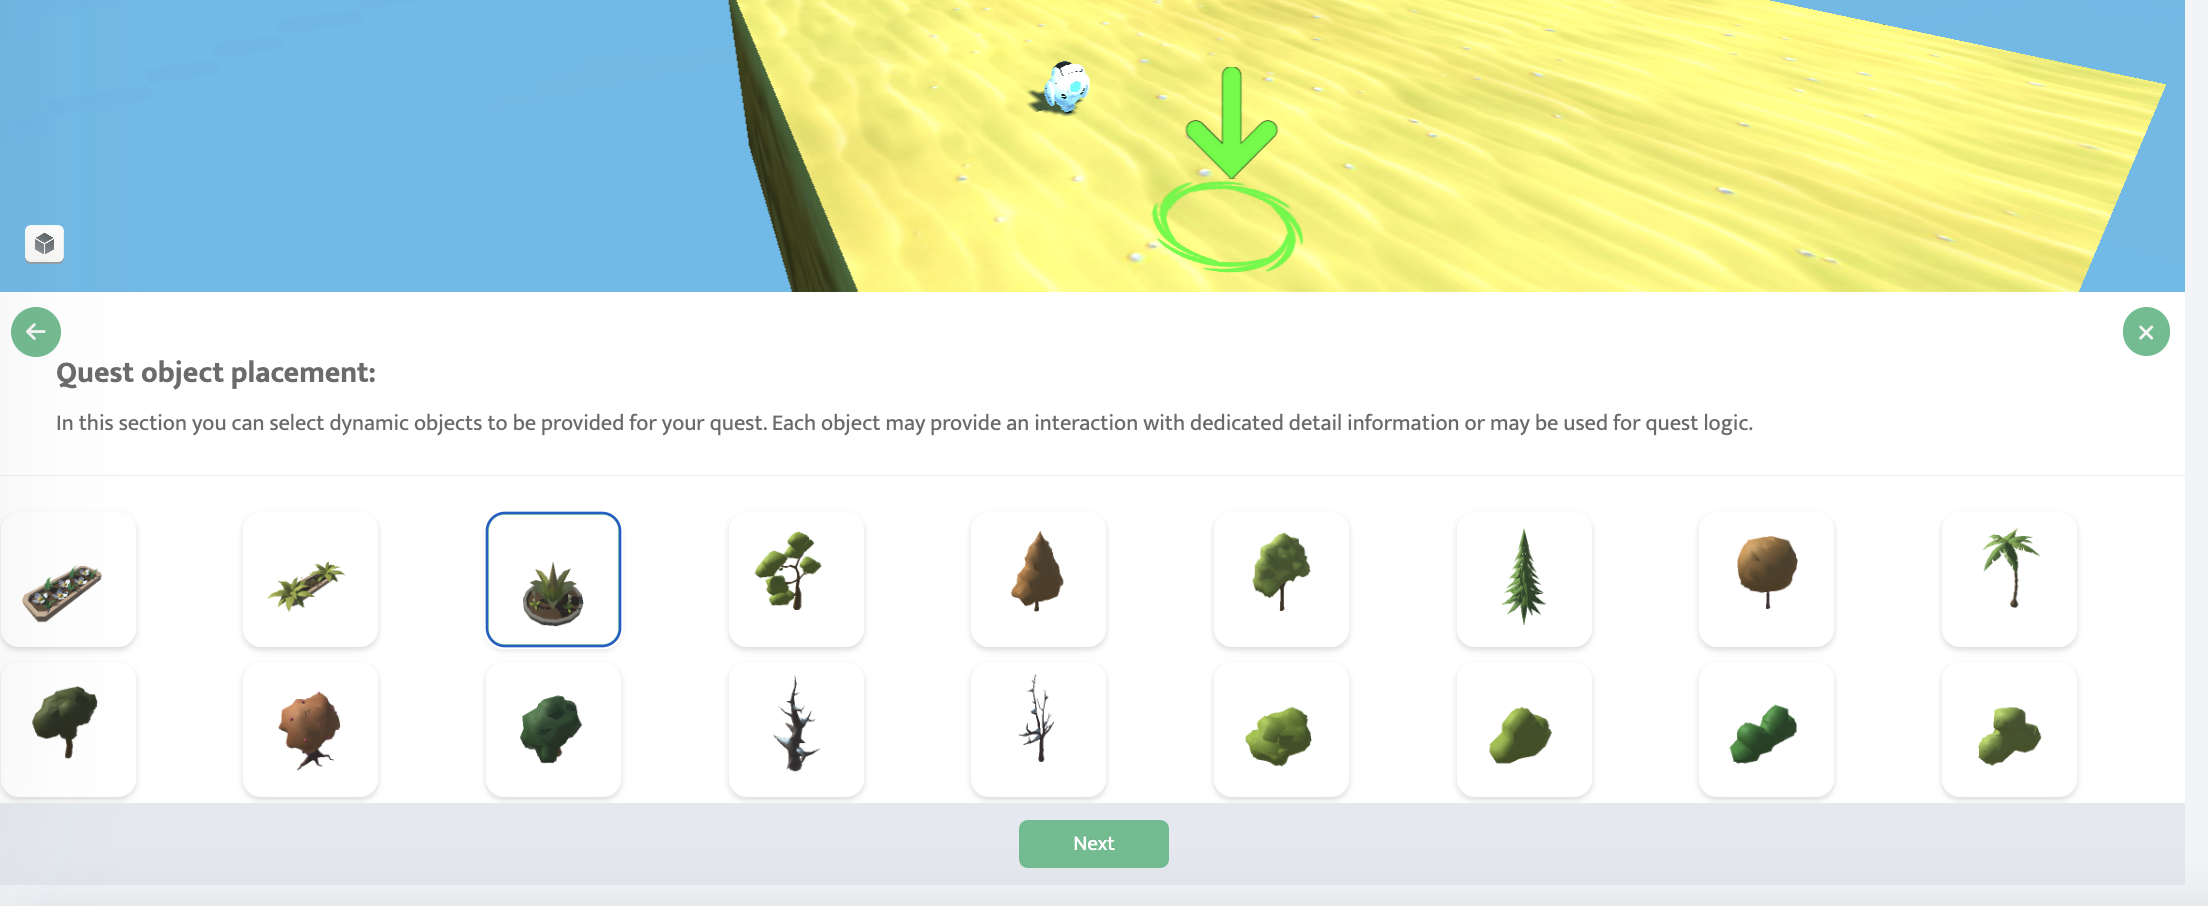
In the example below, we have chosen a 'Circle Flower Bed' of type 'Nature', and we are going to place it in the scene.

<figure><img src="https://content.gitbook.com/content/vALqBsUIqL1aZ2BmaieV/blobs/Uzo1tQb4ZKRHU1fsq1B4/Screenshot%202024-06-28%20alle%2018.29.34.png" alt=""><figcaption><p>Quest - Items position</p></figcaption></figure>

Choose how many items you want and place them wherever you prefer within your scene (you can also use different types of items).&#x20;

Once you have positioned all the items that you want users to collect during the quest, click on **Next**. At this point, you can set up an interaction with each of the objects you have placed. This means that when a user touches or passes over an object, you can show them an iframe with the content of a web page, just like with other objects placed in the scene outside of the quest, as explained [HERE](/coderblock-studio/virtual-environment-management/website-integration).

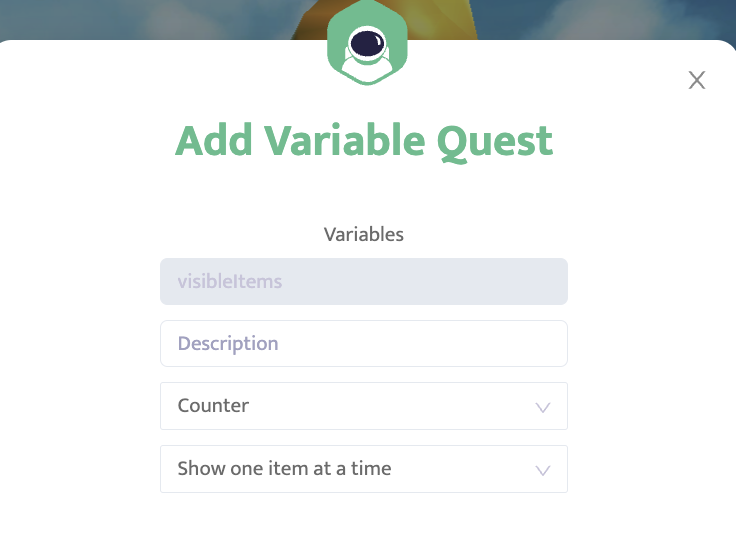
Now, click on **Next** and proceed to set up the '**Variables**', which are crucial for the proper functioning of the Quest.&#x20;

Click on '**Add Variable**' to set additional details in your quest, such as the presence or absence of a timer.

<figure><img src="https://content.gitbook.com/content/vALqBsUIqL1aZ2BmaieV/blobs/TpFGLwgo9Nz5YSDNAs9F/Screenshot%202024-06-28%20alle%2018.39.50.png" alt="" width="368"><figcaption><p>Quest - Add Variable</p></figcaption></figure>

Note: The description must not contain any spaces.&#x20;

The first drop down menu allows you to choose between '**Counter**' and '**Countdown**'.&#x20;

**Counter** simply indicates that the quest will end when all items have been collected, and during the quest users will see a counter showing how many items remain to be gathered. You can also choose to have the items appear all at once (as in a treasure hunt) or one at a time (as in a 'follow the path' quest). \
(In the case of a treasure hunt, it is not necessary to set a Counter variable: you can choose not to set any variables and the items will appear all at once).

Instead, you can add a **Countdown** variable to require users to collect all the items within a specified time to complete the quest. \
\
Click **Ok** and then **Next** at this point. \
Click **Next** again on the next screen, 'Quest actor placement', and then click **Done** on the final screen, 'Quest actor conversation', as the activation of the quest in this case will be managed by an NPC external to the quest and its conversation, as explained in the next paragraph.&#x20;

Congratulations, you have created your first quest! Now all you have to do is set it up to be activated by an NPC, but we'll see about that in a moment 😉.

#### Follow the Path

If you want to implement a '**follow the path**' type of quest, choose **FollowPath** as the quest type.

In this type of quest, the items you select will appear in the scene one at a time, in the order and location you specify. In this case, it is necessary to collect the item that appears in order for the next one to appear (unlike a treasure hunt), so that the user follows the path you have outlined.

Due to the nature of this quest, which is typically used to guide the user along a specific path, it is advisable to place the items not too far apart so that the user can easily see the next one.

The process of creating this type of quest is very similar to that of a treasure hunt. After creating the 'base' quest, you will also need to click '**Edit Quest**' to select and position the items you want the players to collect during the quest.

The only real difference is in the '**Variable**': in this case you will need to add a **Counter** variable and set it to '**Show one item at a time**'.

As before, add a **Countdown** if you want your users to collect the items - one at a time in this case - within the time available.

### Placing an NPC in the scene

Once the quest has been created, **you will need to activate it by having a conversation with an NPC** that you will need to place in the scene and whose role will be to manage the quest.&#x20;

Follow the instructions [HERE](/coderblock-studio/builder-tool/npc-and-conversations) to add at least one NPC to your scene to use quests: the conversation doesn't necessarily have to be about activating the quest, the topics can vary. What is important is that there is a flow that leads to the activation of the quest itself, if the user chooses to participate in the quest.&#x20;

**Note**: The NPC can initiate the quest, but can also end it. They can also give hints on where to find items if the user is unable to find them.&#x20;

During a quest, if the user resumes the conversation with the NPC by interacting with them, the NPC will respond differently than they did before the quest began. They may also respond differently once the quest has been completed. You determine all aspects of quest management - before, during and after - by setting up the NPC conversation as you wish, including parameters such as **Conditions and Effects**, as explained in the next section.

### Managing Quests through NPC: Condition and Effect

Once you've placed the NPC in the scene and set up its conversation flow as explained [HERE](/coderblock-studio/builder-tool/npc-and-conversations), it's time to insert ***Conditions and Effects*** into the conversation elements as you see fit, allowing you to manage quests (and more!).

A ***Condition*** allows you to enable or disable a particular ItemText or ItemChoice within a narrative. Each time the conversation flow reaches an Item in a Narrative, it checks the Condition associated with that Item. If the condition is not met (for example, the 'Gather Crystals' quest has ended while it's still running or hasn't started yet), then that item will not be displayed to the user, and the conversation flow will continue without displaying it. Conversely, if the condition is met or not defined, the item will be considered, shown to the user, and any set effects will be activated.

Currently, you can set a condition to check whether a quest is *active*, *started*, *in progress* or *completed*.

An ***Effect***, on the other hand, allows you to set functionality that is activated when the conversation flow reaches a certain point in a narrative (assuming the condition is met or not defined). You can decide to *start*, *stop* or mark a quest as *completed* (successfully or not).

<figure><img src="https://1025404586-files.gitbook.io/~/files/v0/b/gitbook-x-prod.appspot.com/o/spaces%2FvALqBsUIqL1aZ2BmaieV%2Fuploads%2FW1qTfALU8XSu3llQ9VZv%2Fspaces_7Xx9MXfrv3u3rqwjPomO_uploads_U4QCc775ymOBFSTjxghr_Screenshot%202024-07-01%20alle%2013.webp?alt=media&amp;token=2b80d6cd-4ec6-4564-87c8-904c883d8ccd" alt="" width="305"><figcaption><p>Quest - Condition and Effect</p></figcaption></figure>

The flexibility of Condition and Effect allows you to manage different situations within the same quest through a single NPC.

For example, you can set up the conversation flow so that the first time a user speaks to an NPC (when the quest hasn't started yet), the NPC asks if the user wants to join the quest. If the user speaks to the NPC again during the quest, the conversation will be different, with the NPC perhaps offering hints on the location of items to be found. Similarly, if the user speaks to the NPC after completing the quest, you can set up a different conversation in which the NPC congratulates the user on completing the quest.

It is therefore vital that you learn how to use Condition and Effect to get the most out of your quests.

In the **first example** of our simple conversation with the NPC and the 'Collect Items' quest, the start of the quest is set in Narrative Event 2 (its first and only item), which is reached when the user answers '*Yes*' to the question '*Do you want to participate in the quest?'*

<div><figure><img src="https://1025404586-files.gitbook.io/~/files/v0/b/gitbook-x-prod.appspot.com/o/spaces%2FvALqBsUIqL1aZ2BmaieV%2Fuploads%2FzIwwzcfAeRgzdYFnGZhi%2F1.webp?alt=media&amp;token=70c84d95-5173-4a5c-9078-fff276828bf5" alt="" width="182"><figcaption></figcaption></figure> <figure><img src="https://1025404586-files.gitbook.io/~/files/v0/b/gitbook-x-prod.appspot.com/o/spaces%2FvALqBsUIqL1aZ2BmaieV%2Fuploads%2Fv05HGv0dqjXi21HZDGDu%2F2.webp?alt=media&amp;token=5d143837-a06c-48f5-abf5-88813092fc04" alt="" width="172"><figcaption></figcaption></figure></div>

In this case, no conditions have been set, so the only requirement to start the quest is for the user to answer 'Yes', which will allow the conversation flow to reach the Narrative that handles the 'Start Quest' function, thus starting the quest!

<figure><img src="https://1025404586-files.gitbook.io/~/files/v0/b/gitbook-x-prod.appspot.com/o/spaces%2FvALqBsUIqL1aZ2BmaieV%2Fuploads%2FnCzel0LHSPv0PxGcHH4d%2Fspaces_7Xx9MXfrv3u3rqwjPomO_uploads_nkgQxunCKNF4rqzj504e_Screenshot%202024-07-01%20alle%2011.webp?alt=media&amp;token=e0bb941e-53f8-4cf5-8ba6-bf147a46ea0b" alt=""><figcaption></figcaption></figure>

**NOTE**: Whenever you make changes to the conversation flow, remember to click 'Save' on both the individual item you've edited and the conversation as a whole, as well as 'Save Scene' at the top right!


# OpenAI - COMING SOON

Soon it will be possible to harness the power of AI directly into Coderblock's virtual experiences with the integration of some OpenAI functionality! Stay tuned 🔜


# Rights on my creations

As with all platforms where virtual scenes can be created, replicating a scene involves rebuilding it piece by piece from assets available in the Builder library.

Custom objects imported from external sources are copyrighted by the person who originally uploaded them.


# Virtual environment management

Do you want to be able to create, manage and interact with virtual environments on your own? Once you've created your 3D world, it's time to use it to organise events and initiatives!

Discover the key features you can use to get the most out of virtual environments.

<table data-view="cards"><thead><tr><th></th><th></th><th></th><th data-hidden data-card-target data-type="content-ref"></th></tr></thead><tbody><tr><td></td><td>Live Streaming</td><td></td><td><a href="/coderblock-studio/virtual-environment-management/live-streaming-in-my-environments">Live streaming in my environments</a></td></tr><tr><td></td><td>Users in my scene (CCU)</td><td></td><td><a href="/coderblock-studio/virtual-environment-management/users-in-my-scene-ccu">Users in my scene (CCU)</a></td></tr><tr><td></td><td>Users interactions</td><td></td><td><a href="/coderblock-studio/virtual-environment-management/users-interactions">Users interactions</a></td></tr><tr><td></td><td>Website integration</td><td></td><td><a href="/coderblock-studio/virtual-environment-management/website-integration">Website integration</a></td></tr><tr><td></td><td>Video call integration</td><td></td><td><a href="/coderblock-studio/virtual-environment-management/video-call-integration">Video call integration</a></td></tr></tbody></table>


# Live streaming in my environments

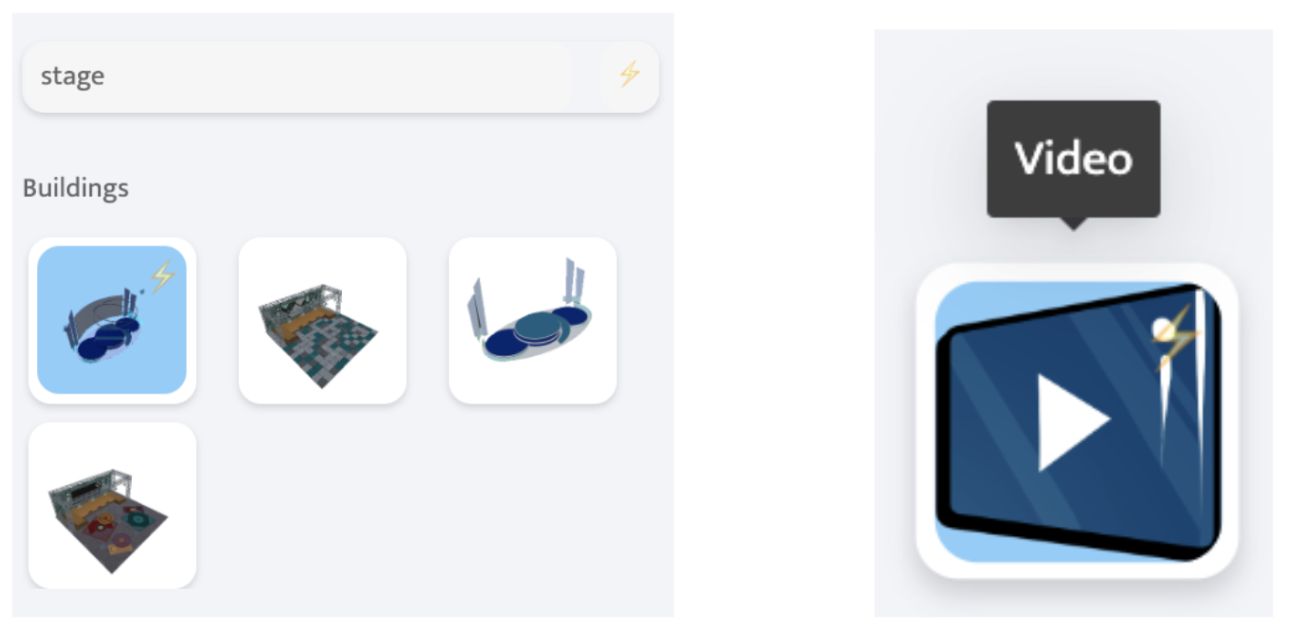
**Live streaming** is a feature that allows you to broadcast live video within a virtual scene. You can use this feature through a **Video** element or a **Stage** element, as these elements have an integrated screen.

<figure><img src="https://content.gitbook.com/content/vALqBsUIqL1aZ2BmaieV/blobs/ofqUUckDkqDuzJCZ5Bw9/Screenshot%202024-06-20%20alle%2011.12.57.png" alt="" width="375"><figcaption></figcaption></figure>

Once you have placed the screen or stage in the scene, you need to change the options as follows:

* **ResourceType**: Live Streaming (M3U8 HLS).
* **ResourceUri**: an m3u8 link obtained from the streaming engine, i.e. the third party platform used for streaming.
* **HasExternalURL**: disabled.

<figure><img src="https://lh7-us.googleusercontent.com/docsz/AD_4nXc6uPn7d4d7ZUYkcmi_D4f66r8v4y891Beaj0o7MBqPIuYZSrZp6UEXtieTNxjJ95u5W_XrAzx_GLjNOex_CLfhnL55PyGqPdjpG2lhbz36RMQd1FyZqRLbL4pRvexHru_3l1uEy4AWRsXbxH-Zdb27oHdQ?key=h-cZgoWjpGb-0otB_7JQbA" alt="" width="375"><figcaption></figcaption></figure>

Two other useful options:

* **Has Video control**: if enabled, it allows you to modify some video controls (play, pause, volume, etc.) and to view the live stream on mobile devices.
* **Range of interaction**: defines the area in front of the screen that, when crossed by the user, triggers playback.

Note: when a user walks through the interaction area in front of the screen, they are watching the live stream playback. However, they can choose to restart the playback from the beginning using the controls that appear on the screen.


# Users in my scene (CCU)

You can share your scene with an unlimited number of users using the link that is generated in Coderblock Studio. This will be the official entry point to the scene and there are no limits on sharing.

However, during your events, you can host a maximum number of users **simultaneously** within the scene. This value is called **CCU** (Concurrent Users) and depends on the [subscription plan](/coderblock-studio/subscription-plans) you have chosen: with the Plus plan you can host up to 75 users, while with the Premium plan you can host up to 100 users!

If you think your events will host more than 100 users, try our [Custom](/coderblock-studio/subscription-plans/plans-for-companies/custom) plan, buy a [Land](/coderblock-studio/subscription-plans/plans-for-creators/land) or contact us for a personalized package.<br>


# Users interactions

When they're in the scene that you've created, your users can interact with each other through a **shared** **general chat**, a **private chat**, an **individual audio call**, and a **video/audio** **call shared** with all the other users sitting at the same table or bench! \
\
In fact, in scenes that represent offices for meetings, networking activities, or just gathering places for friends, you could include tables that allow for integrated video calls.&#x20;

<figure><img src="https://1025404586-files.gitbook.io/~/files/v0/b/gitbook-x-prod.appspot.com/o/spaces%2FvALqBsUIqL1aZ2BmaieV%2Fuploads%2FFBI3uHMI9Z4kf1TwK2Hl%2FScreenshot%202024-07-02%20alle%2010.44.51.png?alt=media&amp;token=0499e039-a0bd-4732-9a1b-06edde3adf25" alt=""><figcaption></figcaption></figure>

But the interaction possibilities don't end with chat/calls: imagine attending a concert with users from all over the world and starting to dance to the music, waving to greet a new user, raising your hand to speak during an event, or applauding to show appreciation in front of a digital art exhibition. Expressing your **emotions** to those around you, even if they are physically thousands of miles away, has immense potential!&#x20;

By enabling a level of engagement and communication that replicates the dynamics of the real world, users can become more fully integrated into the virtual world they inhabit and fully appreciate the experience.&#x20;

Want to know more about how your avatar can interact with others? Check out the dedicated [section](/coderblock-world/user-experiences/interactions).<br>


# Website integration

One of the most useful features if you want to present and promote your business within your virtual scene is to use 'informative' elements directly from the Builder that users can interact with.&#x20;

You can use three types of elements for this purpose:

* **Details**: you can find them in the '*Features*' -> '*Contents*' section. Once placed, it appears as a small circle on the floor and users can interact with it using the E key, similar to other interactive elements.

<figure><img src="https://1025404586-files.gitbook.io/~/files/v0/b/gitbook-x-prod.appspot.com/o/spaces%2FvALqBsUIqL1aZ2BmaieV%2Fuploads%2FC0FODwPpF5wGccLldGOx%2Fspaces_7Xx9MXfrv3u3rqwjPomO_uploads_0CudEXey2AbNvEOaXm3N_Screenshot%202024-07-01%20alle%2015.webp?alt=media&amp;token=3e7b83d1-5229-499d-b803-09009e79e3b3" alt=""><figcaption><p>Details element</p></figcaption></figure>

When the user approaches this element and clicks the E key, an iframe is displayed with an image, a description and two buttons leading to different URLs, plus a third link placed in the iframe footer.

<figure><img src="https://1025404586-files.gitbook.io/~/files/v0/b/gitbook-x-prod.appspot.com/o/spaces%2FvALqBsUIqL1aZ2BmaieV%2Fuploads%2FkwQJp9vZCw6zlgiUwooV%2Fspaces_7Xx9MXfrv3u3rqwjPomO_uploads_QrluooMGeyGTPHHmM1ha_Screenshot%202024-07-01%20alle%2016.webp?alt=media&amp;token=bb99386c-13e8-43b7-80b7-7f0aa3eaed8e" alt="" width="375"><figcaption><p>Coderblock Info displayed</p></figcaption></figure>

**Roll up, banner and walls**: these are graphic elements that display an image and also link to a URL when the user interacts with them by pressing the E key.

<div><figure><img src="https://1025404586-files.gitbook.io/~/files/v0/b/gitbook-x-prod.appspot.com/o/spaces%2FvALqBsUIqL1aZ2BmaieV%2Fuploads%2F0bcCttmTNQBLR07iqqZd%2F1.webp?alt=media&amp;token=333ba471-b374-4af0-a329-f187c6bc124c" alt=""><figcaption><p>Roll-up</p></figcaption></figure> <figure><img src="https://1025404586-files.gitbook.io/~/files/v0/b/gitbook-x-prod.appspot.com/o/spaces%2FvALqBsUIqL1aZ2BmaieV%2Fuploads%2FIEcQdSIuGVT6hDKb5rU0%2F2.webp?alt=media&amp;token=013be839-29fe-433f-8c03-b54d913c73c5" alt=""><figcaption><p>Banners</p></figcaption></figure> <figure><img src="https://1025404586-files.gitbook.io/~/files/v0/b/gitbook-x-prod.appspot.com/o/spaces%2FvALqBsUIqL1aZ2BmaieV%2Fuploads%2Fo1dIvpYZCHnkDhYNHS6P%2F3.webp?alt=media&amp;token=2e9297af-ea2d-4f02-b72f-196e8c338077" alt=""><figcaption><p>Walls</p></figcaption></figure></div>

*Note: Not all walls offer this functionality, only the interactive ones. Remember that interactive objects of any type are visually identified in the Builder by a light blue background and a ⚡️ icon.*&#x20;

* **Stands**: There are several sizes available, all of which are capable of displaying graphics in different spaces according to the dimensions of the stand. They also integrate the functions of the Details element. When you interact with the E button on the stand, the iframe described above appears, offering the same customization options.

<figure><img src="https://1025404586-files.gitbook.io/~/files/v0/b/gitbook-x-prod.appspot.com/o/spaces%2FvALqBsUIqL1aZ2BmaieV%2Fuploads%2FFxkFg10SpwP4Wqyo6XT0%2Fspaces_7Xx9MXfrv3u3rqwjPomO_uploads_wJjDCVO17lw6oA0dtN8Y_Screenshot%202024-07-01%20alle%2015.webp?alt=media&amp;token=b058497e-d054-4b0e-b030-c875b26f93df" alt=""><figcaption><p>Stands</p></figcaption></figure>

These interactions not only enrich the user experience, but also provide creative opportunities to promote your business and engage visitors as they explore virtual worlds!


# Video call integration

If you've decided to allow users in your virtual scene to interact with each other via **video call**, perhaps creating an experience that resembles an office for meetings or just a meeting place for friends, you can do this by placing an interactive 'table' element in the scene, as well as benches or chairs.

Not all tables allow this functionality, so remember that you can identify interactive objects (tables and others) by their sky blue background and ⚡️ icon.<br>

<figure><img src="https://1025404586-files.gitbook.io/~/files/v0/b/gitbook-x-prod.appspot.com/o/spaces%2FvALqBsUIqL1aZ2BmaieV%2Fuploads%2FthABSSPdwqkTP0oHKhVG%2Fimage.png?alt=media&amp;token=87167168-c4cb-4e06-a414-02a0128cee02" alt="" width="260"><figcaption><p>Interactable Tables</p></figcaption></figure>

In fact, in the image above, the interactive tables are the ones that allow integrated video calls between users sitting at them!

Once you've positioned the table, bench or chair in your scene, here are the options to set:

* If you want to use an **integrated video call** in the environment, enable the 'Use video call' option and also the 'Embed call' option. This way, when you sit at a table or bench, a window will open in the bottom right corner with a set of controls for managing the video call with other users sitting with you.

<figure><img src="https://1025404586-files.gitbook.io/~/files/v0/b/gitbook-x-prod.appspot.com/o/spaces%2FvALqBsUIqL1aZ2BmaieV%2Fuploads%2Fe5MX4EFiBAgvpR6ENxqq%2Fimage.png?alt=media&amp;token=38dccf1d-235f-43ed-8ad7-88efd421dd3d" alt="" width="269"><figcaption><p>Table - Integrated Video Call</p></figcaption></figure>

If you do not select 'Embed call', the video call will open in a separate window.&#x20;

* If you want to use a link to an **external video call**, such as Google Meet or Zoom, select '*Has external URL'* and enter the call link in '*URL*'. In this case, do not select either of the built-in video call options. This option can be useful if you are using chairs and want to allow all users who are spread around the room on different chairs to join the same call. Or if you want users sitting at any table to join the same call, rather than having a different call for each table.

<figure><img src="https://1025404586-files.gitbook.io/~/files/v0/b/gitbook-x-prod.appspot.com/o/spaces%2FvALqBsUIqL1aZ2BmaieV%2Fuploads%2F8ZF6BPlnTK0otg5r7Odc%2Fimage.png?alt=media&amp;token=4ca206e6-b0c8-4e21-8263-59e1b3770c99" alt="" width="273"><figcaption><p>Table - External Video Call</p></figcaption></figure>

In both cases, once the user has joined the video call by sitting down and pressing E, they can stand up (again, by pressing E) and continue exploring the environment without disconnecting from the video call.

The business opportunities associated with using the video call feature are numerous: you can manage meetings, presentations and discussions with clients or collaborators simultaneously and without geographical limitations!


# Builder Tool - Advanced guide

Here is a detailed technical guide to building your virtual environments and getting the most out of the Builder!


# Working environment

The Builder is made up of two main elements: the first is the **visualization space**, where we set up our scene and manipulate its appearance, which occupies a large part of our working environment; the second is what in technical jargon corresponds to the **HUD** (Head-Up Display), i.e. the overlay tools we have at our disposal to go through the various stages of working on our environment.

The builder, integrated into the web management system, is structured as follows:

* on the left side, the menu items for managing your account remain prominent for quick access to platform features;
* on the right side are the main controls for [scene management](/coderblock-studio/builder-tool-advanced-guide/working-environment/scene-management) and [finalization](/coderblock-studio/builder-tool-advanced-guide/working-environment/scene-management/finalization-tools) ([quest](/coderblock-studio/builder-tool/quests-what-they-are-and-how-to-create-them), [saving and testing](/coderblock-studio/builder-tool-advanced-guide/working-environment/scene-management/finalization-tools#publish)), as well as the [Asset library](/coderblock-studio/builder-tool-advanced-guide/working-environment/design-tools/asset-packs) for building the environment;
* the central part contains the working environment, [controls for managing the elements in the scene](/coderblock-studio/builder-tool-advanced-guide/working-environment/design-tools), and a monitoring panel, the [poly-count](/coderblock-studio/builder-tool-advanced-guide/working-environment/design-tools/scene-monitoring).

<figure><img src="https://1025404586-files.gitbook.io/~/files/v0/b/gitbook-x-prod.appspot.com/o/spaces%2FvALqBsUIqL1aZ2BmaieV%2Fuploads%2FI6QisVNQPVPJ4neiLTCd%2Fimage.png?alt=media&amp;token=01e8fb02-f649-47b1-a6df-585dadbcf4fc" alt="" width="563"><figcaption></figcaption></figure>


# Scene management

### Basic informations

First, it's important to establish the nature of our scene: it will be appropriate to assign it a name, a description and some parameters that will allow us to best index it within the Coderblock ecosystem.

Click on the edit icon <img src="https://1025404586-files.gitbook.io/~/files/v0/b/gitbook-x-prod.appspot.com/o/spaces%2FvALqBsUIqL1aZ2BmaieV%2Fuploads%2FJwEeXVdFtxb7mKTNFlWq%2Fimage.png?alt=media&amp;token=7a7bc14f-d93d-48f5-b28c-88a558cc9e93" alt="" data-size="line"> found at the top of the right panel.

<figure><img src="https://1025404586-files.gitbook.io/~/files/v0/b/gitbook-x-prod.appspot.com/o/spaces%2FvALqBsUIqL1aZ2BmaieV%2Fuploads%2FhlzIjebACjQiv2YRckVa%2Fimage.png?alt=media&amp;token=7572f350-283e-44aa-b8c7-7cdf510a1e87" alt="" width="563"><figcaption></figcaption></figure>

Then enter a **name** for your environment and a **description** (these values will be displayed on the welcome screen during login), then select a **market category** and **tags** for the template that can best represent the environment you are building.

<figure><img src="https://1025404586-files.gitbook.io/~/files/v0/b/gitbook-x-prod.appspot.com/o/spaces%2FvALqBsUIqL1aZ2BmaieV%2Fuploads%2Fb7q5kRRQtv8sqb9FSTY5%2Fimage.png?alt=media&amp;token=0e3eace4-b7b0-4442-9a28-6bd960f9d5cd" alt="" width="563"><figcaption></figcaption></figure>

Confirm by clicking on the *Update* button. You will notice that the side panel from which you will manage the scene has been enriched with the name you have assigned to it. Of course, it will be possible to edit this information, allowing you to make the environment versatile and editable according to your needs.

<figure><img src="https://1025404586-files.gitbook.io/~/files/v0/b/gitbook-x-prod.appspot.com/o/spaces%2FvALqBsUIqL1aZ2BmaieV%2Fuploads%2F09k6oitPzWhn36Z00DEF%2Fimage.png?alt=media&amp;token=b9d0e0e8-bab0-407f-8f50-a71195894f85" alt=""><figcaption></figcaption></figure>


# Finalization Tools

Among the management tools, those that we will call "finalization" tools are crucial for defining the experience within your space and its fruition from the outside.

At the top, next to the editing panel, a drop-down menu <img src="https://1025404586-files.gitbook.io/~/files/v0/b/gitbook-x-prod.appspot.com/o/spaces%2FvALqBsUIqL1aZ2BmaieV%2Fuploads%2F69vBW8UnWUpxyWPUi50p%2Fimage.png?alt=media&amp;token=fdaa3a13-abf8-47de-ac51-64024b95bec2" alt="" data-size="line"> will give you access to some of the functions described below:

* [Save scene](#save-scene)
* [Publish](#publish)
* [Quests](#quests)
* [Jump to your virtual world](#jump-to-your-virtual-world)

<figure><img src="https://1025404586-files.gitbook.io/~/files/v0/b/gitbook-x-prod.appspot.com/o/spaces%2FvALqBsUIqL1aZ2BmaieV%2Fuploads%2F1TfnEDDmfvLLXp3d77WS%2Fimage.png?alt=media&amp;token=7e72d1bc-42cf-4f5c-b4b3-3089621d4c36" alt=""><figcaption></figcaption></figure>

The buttons are self-explanatory, of course, but let's go through them:

#### Save scene

Although it may seem that saving our work on the builder is only associated with this button, this is not the case. In fact, as you build your environment, <mark style="background-color:yellow;">every single move you make is automatically saved</mark>, so if you left the Builder without clicking *Save Scene* and came back later, you would find the work exactly as you left it. However, you may not want to show the intermediate stages of processing when the environment is incomplete, especially if the work you are doing is particularly complex and may extend over time.\
\
So what is this button for, if the work is automatically saved? <mark style="background-color:green;">It is used to confirm that the work in progress is finished or has otherwise reached a level that you want to present to our audience.</mark> The status is then stored in the server cache and made available to the end user.

As a matter of good practice, it is not necessary to save the scene every time you make a small change, unless you need to make the change available immediately.

<mark style="color:red;">**Best practices**</mark>:

* do not save the scene every time you make a small change, except for changes that need to be made available quickly.
* once you have clicked the "Save Scene" button and waited for the save time (which varies depending on the complexity of the scene), click the "[Jump to your virtual world](#jump-to-your-virtual-world)" button to verify that the changes are displayed correctly and to speed up future uploads.

#### Publish

**Publish** allows you to publish the saved scene. However, we must distinguish between two different cases of publishing, depending on the type of scene you are managing, considering the possibility of operating as a user of Coderblock Studio for SaaS and as a Landowner.

Operating in **SaaS**, the Publish button will bring the scene within [Coderblock Hub](https://coderblock.com/hub/home), with visibility and searchable.

As a **landowner**, however, the scene will not be listed at the moment, but will be visible in the Open World. It is important to remember that you can build as many scenes as you like on the lands you own, but only the published one will actually be visible. This feature allows you to build many different scenes, or make small temporary changes to a duplicate scene, and choose from time to time which variant to publish.

#### Quests

The *Quests* button opens, in the footer, the tool for creating experiences in our environment, the "quests", and it is considered a finalization tool, since it is usually used at the end of the environment processing, when the setup is almost finished and you can devote yourselves to custom content (graphics and dialog). A [separate section](/coderblock-studio/builder-tool/quests-what-they-are-and-how-to-create-them) will cover how to create and activate quests.

<figure><img src="https://1025404586-files.gitbook.io/~/files/v0/b/gitbook-x-prod.appspot.com/o/spaces%2FvALqBsUIqL1aZ2BmaieV%2Fuploads%2FfDHCdr8k1bBK5LdXCNgs%2Fimage.png?alt=media&amp;token=6cfadfd5-d39b-415d-b78d-ddb1087b4814" alt="" width="563"><figcaption></figcaption></figure>

<mark style="color:red;">**Best practice**</mark>: for proper design, quest creation should precede dialogues writing.

#### Jump to your virtual world

When your scene is ready, or sufficiently set up to be tested, the "Jump to your virtual world" button will take you to the environment you have just created. A new tab will open in your current browser. The URL displayed has a fixed structure (<mark style="color:green;">**game.coderblock.com/#id=**</mark> <mark style="color:green;"></mark><mark style="color:green;">followed by an identification code</mark>), will be unique and will never change despite any changes you make over time. You can then share it with your end users to allow them to visit your space and access the experience you have created.

<mark style="color:red;">**Best practice**</mark>: the URL consists of three parts: the root <mark style="color:green;">**game.coderblock.com/#id=**</mark>, an alphanumeric code, and spatial parameters traceable to our positional coordinates. The last part is preceded by an **&** and only appears when we start moving through space with our avatar, and changes dynamically. Therefore, when sharing an access link with your users, it would be good <mark style="background-color:yellow;">to provide the URL that you see once you enter the environment</mark>, or if you are already moving, remember to capture only the part that precedes the **&**.

<figure><img src="https://1025404586-files.gitbook.io/~/files/v0/b/gitbook-x-prod.appspot.com/o/spaces%2FvALqBsUIqL1aZ2BmaieV%2Fuploads%2FD2rKMqthFiQByCVHXLCM%2Fimage.png?alt=media&amp;token=873dc6d7-aff5-4ba3-936f-e03a110b76eb" alt="" width="563"><figcaption></figcaption></figure>


# View and movements

First, it's important to learn how to move around the scene you are building in order to better manage perspective and evaluate space and placement.

You can use the mouse (or trackpad) and keyboard simultaneously for optimal editing.

The keyboard alone does not allow an unlimited number of movements, whereas the mouse does. The difference, however, is that the mouse by its very nature has spatial limitations related to the size of its support surface in relation to the amplitude of the movement you perform, while the keyboard can allow continuous movements of unlimited amplitude (just holding down a key is enough to extend a command). At the end of this section, we will outline some best practices for using them together to achieve smooth movements and precise positioning.

If we consider an absolute condition for the positioning of objects, with spatial coordinates that converge to the 0 point in the upper left corner of our scene (or of the global map in the open world), the movement in space assumes a relative condition, referring to the orientation of our point of view (**POV**) for each and every instant in which the movement itself takes place, thus considering a horizontal axis for **x**, a vertical one for **y**, and one perpendicular to us for **z**, always concordant to our POV. This imaginary, fixed Cartesian system, of which **z** traces an invisible line between us and the object we are observing, does not correspond to the references relating to the movement of the objects themselves, except in a specific mode of [translation on the orthogonal plane](/coderblock-studio/builder-tool-advanced-guide/working-environment/design-tools/gizmo-and-assets-manipulation/position/movement-on-the-orthogonal-plane). Later, when we deal with manipulating and editing objects in the scene, we will assign <mark style="color:red;">**red**</mark>, <mark style="color:green;">**green**</mark>, and <mark style="color:blue;">**blue**</mark> reference colors to these axes.

The POV cannot rotate around itself, but always relative to a **focus** that affects it, as if walking along a circumference or on the surface of a sphere, always looking at the center. Rotation of the POV on axes is only possible for **panning** (y-axis) and **tilting** (x-axis).

{% hint style="info" %}
Imagining the camera at a fixed point, the main movements are derived directly from film jargon and practice. In this specific context, we count three, one for each axis of rotation: <mark style="color:red;">**tilting (x)**</mark>, <mark style="color:green;">**panning (y)**</mark> and <mark style="color:blue;">**rolling (z)**</mark>. \
However, since there are no directorial/cinematic needs, but only practical and architectural ones, the rolling movement is excluded from the possibilities. This may seem like a limitation, but it is actually an advantage because it allows for faster execution in the construction phases. The absence of rolling will be most noticeable when describing the [orthogonal plane positioning](/coderblock-studio/builder-tool-advanced-guide/working-environment/design-tools/gizmo-and-assets-manipulation/position/movement-on-the-orthogonal-plane) tool.

**To make it easier to distinguish between the axes of the workspace and those of the POV, we will refer to the former by the letters&#x20;**<mark style="color:red;">**x**</mark>**,&#x20;**<mark style="color:green;">**y**</mark>**,&#x20;**<mark style="color:blue;">**z**</mark>**, according to the spatial coordinate system, and to the latter by the terms&#x20;**<mark style="color:red;">**tilting**</mark>**,&#x20;**<mark style="color:green;">**panning**</mark>**&#x20;and&#x20;**<mark style="color:blue;">**rolling**</mark>**.**
{% endhint %}

### Focus

When you enter a scene, whether it is new or loading a previous work, the focus is placed on a predefined point in space. Your movements in the environment and the manipulation of objects will affect the focus. Its centering can be restored by clicking on the [**Focus Camera**](/coderblock-studio/builder-tool-advanced-guide/working-environment/design-tools/control-panel#focus-camera) button to reinitialize it, or by pressing the **F key** after selecting an object to reset the focus on that object. The latter operation is very useful when you are working in large environments, where moving your POV can cause rotations over very large radii for the selected object.

### Using the mouse/trackpad

The combined use of the three buttons (two side buttons and the center wheel) with the mouse movement allows a comprehensive use of the space, with no limits in the selection and movement of objects and PDV. If you wanted, you could use only this device for integral processing, without ever using the keyboard (except for customizations).

* The <mark style="color:green;">**left button**</mark> of the mouse retains its primary function of **selecting, dragging,** and **dropping**, and is therefore associated with **placing** and **manipulating** **objects** from the [Asset Pack](/coderblock-studio/builder-tool-advanced-guide/working-environment/design-tools/asset-packs) or already in the scene. Left-clicking on a point in the scene where there are no objects will therefore produce no results.
* The <mark style="color:green;">**right button**</mark> of the mouse allows you to **rotate around the** <mark style="color:green;">**panning axis (y)**</mark>, which is vertical to our focus, and **around the** <mark style="color:red;">**tilting axis (x)**</mark>, which is horizontal. The distance of our POV from the focus determines the rotation radius of the POV itself.
* The <mark style="color:green;">**middle button**</mark> of the mouse, corresponding to the cogwheel, is the one that suffers most from the mechanical limitations of the work surface, but it allows total control of the **linear movements**. Clicking on the cogwheel produces a **shifting**, where the horizontal movement of the mouse allows **lateral movement along the** <mark style="color:red;">**tilting axis (x)**</mark> and the vertical movement, on the other hand, results in **elevation along the** <mark style="color:green;">**panning axis (y)**</mark>. Finally, rotating the wheel allows you to **zoom** forward and backward, so **in depth along the** <mark style="color:blue;">**rolling axis (z)**</mark>.

<mark style="color:red;">**Please note**</mark>: the use of a **trackpad** is not explored in depth because the gestures that correspond to mouse movements are specific to the hardware in use and may vary.

### Using the Keyboard

As anticipated, the keyboard allows a limited number of movements, and they are only related to the **zoom** and **shifting** functions, i.e. those associated with the middle mouse button. The advantage of using the keyboard, however, is related to the **persistence of the command**, which allows large movements with extreme fluidity. In fact, if the mouse has the mechanical limitation of its usable surface, and the movement in space is related to the movement of the mouse, the movement performed by the keyboard is related to the duration of the key presses.

The keys associated with such moves are the first 6 on the left side of the keyboard, distributed as follows:

* <mark style="color:green;">**A**</mark>**/**<mark style="color:green;">**D**</mark>, respectively the left or right lateral shift, corresponds to the movement on the <mark style="color:red;">**tilting axis (x)**</mark>;
* <mark style="color:green;">**Q**</mark>**/**<mark style="color:green;">**E**</mark>, allow movement in the vertical plane, lowering and raising the POV along the <mark style="color:green;">**panning axis (y)**</mark>;
* <mark style="color:green;">**W**</mark>**/**<mark style="color:green;">**S**</mark>, to move forward and backward along the <mark style="color:blue;">**rolling axis (z)**</mark>.

<figure><img src="https://1025404586-files.gitbook.io/~/files/v0/b/gitbook-x-prod.appspot.com/o/spaces%2FvALqBsUIqL1aZ2BmaieV%2Fuploads%2FVUrKdueHX8iXv2jn0rjG%2Fimage.png?alt=media&amp;token=f5f77fea-7325-4ce7-840e-d75182be5818" alt="" width="563"><figcaption></figcaption></figure>

Constant button presses move the POV along the axes, but what if we want to move in one plane? It's easy: just give the commands for the directions involved at the same time. The same goes for moving in three-dimensional space: press three buttons, one for each axis.\ <mark style="background-color:yellow;">Ex: I want to move along on the horizontal plane while moving forward and to the right at the same time, so I will press W and D, dosing them to get to the desired point.</mark>

Note: as mentioned at the beginning of the chapter, the translation axes are relative. Therefore, if we were looking at our environment from above, and had therefore applied a downward tilt to frame the scene (as in the image above), a forward movement along the <mark style="color:blue;">**rolling (z) axis**</mark> (<mark style="color:green;">**W**</mark> key pressed) will not be parallel to the horizontal plane of the scene itself, but diagonal to it, and insisting on the movement will intercept it.

<mark style="color:red;">**Best practice**</mark>: motion management is best done with a combination of keyboard and mouse, where we leave 100% of the linear movement, zooming and panning to the keyboard, and use the mouse for tilting and panning, using only the right button and not the middle button.


# Design Tools

We have already mentioned the main components of the HUD, so let us get more specific by describing its main tools.

First of all, let us distinguish between two terms that we will come across repeatedly in relation to the tools of the Builder that allow us to make changes to the scene: we will talk about **editing** and **customization** tools, and they will refer primarily to the manipulation of objects. These terms may seem synonymous, but we will actually refer to them as such:

* <mark style="color:green;">**Editing**</mark>: all operations related to the integration and spatial transformation of the object;
* <mark style="color:green;">**Customization**</mark>: secondary operations that do not involve spatial configuration, but add interactions, special features, redirection, information, or custom graphics to the enabling objects.

The display area shows two groups of fixed elements:

* [a control panel](/coderblock-studio/builder-tool-advanced-guide/working-environment/design-tools/control-panel)
* [a monitoring panel](/coderblock-studio/builder-tool-advanced-guide/working-environment/design-tools/scene-monitoring)
* [the library of objects (asset packs)](/coderblock-studio/builder-tool-advanced-guide/working-environment/design-tools/asset-packs)

Other tools, however, will appear depending on the operation we are performing:

* an editing panel
* [a quest design panel](/coderblock-studio/builder-tool/quests-what-they-are-and-how-to-create-them)
* [a pop-up for dialogue management](/coderblock-studio/builder-tool/npc-and-conversations)


# Control panel

The Control Panel, which occupies the upper left part of the workspace, collects the display settings and commands for confirming the edit or deleting the object.

<figure><img src="https://1025404586-files.gitbook.io/~/files/v0/b/gitbook-x-prod.appspot.com/o/spaces%2FvALqBsUIqL1aZ2BmaieV%2Fuploads%2Fm2NgOh4lA8lTaDU6QGtG%2Fimage.png?alt=media&amp;token=e59b7c1f-ab91-474f-a1c0-6102e8cb6131" alt="" width="338"><figcaption></figcaption></figure>

We have already discussed the [management of movement](/coderblock-studio/builder-tool-advanced-guide/working-environment/view-and-movements) in space in the design phase, and we have highlighted the concept of POV, which corresponds to a camera that frames the workspace from vantage points that we choose. This type of construction allows us to have an overview, but it does not give us the certainty that we have designed the spaces optimally, at least from the point of view of walkability.

So, in order to validate the scene structure without necessarily publishing the environment to test it, the control panel helps us with the first two buttons from the left. These two buttons actually transform the working mode, locking the POV by assigning real motion functions to the keyboard and mouse.

#### First person

The first button <img src="https://1025404586-files.gitbook.io/~/files/v0/b/gitbook-x-prod.appspot.com/o/spaces%2FvALqBsUIqL1aZ2BmaieV%2Fuploads%2F8O7VuFKLdWLRHbPbMjRS%2Fimage.png?alt=media&amp;token=01d94e8c-74f7-4ad2-a26e-0b91a5cf2fa3" alt="" data-size="line"> activates the first-person viewport, simulating the presence of an avatar. As long as the mouse is inside the viewport, the pointer disappears: this way, mouse movements, in combination with the keyboard, orient the view and thus any non-straight movements.

In this mode, the controls differ from the game mode in that the keyboard is essential to enable movement, while the mouse provides a spherical view (x and y axes) and the click provides interaction feedback (if any).

The corresponding keys to apply motion are W-A-S-D, where

* W: forward
* S: backward
* A: left sideways shift
* D: right sideways shift
* SHIFT: run
* SPACE: jump

To exit this mode, press the **ESC** key on the keyboard to release the mouse.

<figure><img src="https://1025404586-files.gitbook.io/~/files/v0/b/gitbook-x-prod.appspot.com/o/spaces%2FvALqBsUIqL1aZ2BmaieV%2Fuploads%2FwuPk0affHKFuQqeJQR5q%2Fimage.png?alt=media&amp;token=729e303c-c606-432e-a96f-65842767945e" alt="" width="411"><figcaption></figcaption></figure>

Pressing ESC again will lock the mouse again <img src="https://1025404586-files.gitbook.io/~/files/v0/b/gitbook-x-prod.appspot.com/o/spaces%2FvALqBsUIqL1aZ2BmaieV%2Fuploads%2FmkU53Wt5ZFDBxLxlBvAH%2Fimage.png?alt=media&amp;token=e6e80d67-fd01-4abd-9737-33f3453d349c" alt="" data-size="line">, while clicking on the first person key <img src="https://1025404586-files.gitbook.io/~/files/v0/b/gitbook-x-prod.appspot.com/o/spaces%2FvALqBsUIqL1aZ2BmaieV%2Fuploads%2F8O7VuFKLdWLRHbPbMjRS%2Fimage.png?alt=media&amp;token=01d94e8c-74f7-4ad2-a26e-0b91a5cf2fa3" alt="" data-size="line"> will return you to construction mode.

#### Third person

The next button <img src="https://1025404586-files.gitbook.io/~/files/v0/b/gitbook-x-prod.appspot.com/o/spaces%2FvALqBsUIqL1aZ2BmaieV%2Fuploads%2FkQEe9XTthP84cMxDgUus%2Fimage.png?alt=media&amp;token=32372a81-0e4a-4d38-8499-fcf2d9fd5dfe" alt="" data-size="line"> brings an avatar into the scene by imposing a third-person view.

<figure><img src="https://1025404586-files.gitbook.io/~/files/v0/b/gitbook-x-prod.appspot.com/o/spaces%2FvALqBsUIqL1aZ2BmaieV%2Fuploads%2F1bomRmD6hCKT3aIH2Cw0%2Fimage.png?alt=media&amp;token=f59d60c1-b235-424b-bbdb-1eb94bd26512" alt="" width="411"><figcaption></figcaption></figure>

As in the first-person view, movements are entrusted to the keyboard with the same configuration, while the mouse orients the view and thus the direction of movement.

This mode is very useful when a **human reference** is needed to estimate **proportions** with the dimensions of objects in the scene.

For example, commonly used elements such as buildings and doors can be resized if necessary, but incorrect proportions could prevent proper enjoyment or create unwanted visual effects. A third-person motion test can help us properly evaluate any staging choices.

#### Focus Camera

This topic has already been covered [here](/coderblock-studio/builder-tool-advanced-guide/working-environment/view-and-movements#focus), but let's take a closer look:\
the third element in the control panel is the "focus camera" button <img src="https://1025404586-files.gitbook.io/~/files/v0/b/gitbook-x-prod.appspot.com/o/spaces%2FvALqBsUIqL1aZ2BmaieV%2Fuploads%2FAeW29rEMja5A0hUSpQl9%2Fimage.png?alt=media&amp;token=c79215fa-61b4-46a1-bd9c-c52b32a96f20" alt="" data-size="line">, and it is actually a function that is useful in the default viewing mode, i.e. free camera.\
As already mentioned, the focus repositions itself as the camera is moved, according to the positioning and manipulation of objects in the scene. It natively corresponds to a specific view of the object in use, or of the initial coordinates of the space.

What determines which view we get is the existence of an active selection:

* If **no object** is **selected**, the Focus Camera button returns to the scene initialization coordinates;
* if **an object** is **selected**, the Focus Camera button will reset the focus on it, bringing the POV to a predefined distance from the object's [**pivot**](/coderblock-studio/builder-tool-advanced-guide/working-environment/design-tools/gizmo-and-assets-manipulation#pivot); only in this case, we can use the same function through a keyboard shortcut by pressing the **F** key.

The focus camera is one of the least used features in the early stages of editing a scene, as the mostly empty environment allows for easy selection and editing. However, this simplicity creates a habit. In fact, management becomes complicated when there is a building to set up, and moving within it can become complex because the focus corresponds to a kind of pivot. It should be remembered that linear movement (**W** and **S** keys, on the **z** axis), unlike lateral movement, does not move the focus, but only the distance from it, and by rotating the view, architectural elements such as walls or other staging elements could be inserted between our point of view and the object to be edited.

<mark style="color:red;">**Best practice**</mark>: it might be necessary to move an object from a clearly visible position to another semi-hidden position or out of our field of view (more on this topic later). In some cases, an inaccurate movement might cause us to miss the object. In either case, before confirming its position, it would be a good idea to use the focus camera button (or the F key) to bring the object back into visual focus.

#### Legend

The only function of this element <img src="https://1025404586-files.gitbook.io/~/files/v0/b/gitbook-x-prod.appspot.com/o/spaces%2FvALqBsUIqL1aZ2BmaieV%2Fuploads%2FX7GCBsA9Deec7BsMcEye%2Fimage.png?alt=media&amp;token=8c14ab82-da0b-4dd2-b77e-94fc1032fcb0" alt="" data-size="line"> is to summarize the most important commands of the Builder, already mentioned here, regarding the movement and editing of objects and the movement in space.

#### Erase/Confirm

Normally disabled, these buttons become active only when an object is selected.

The first <img src="https://1025404586-files.gitbook.io/~/files/v0/b/gitbook-x-prod.appspot.com/o/spaces%2FvALqBsUIqL1aZ2BmaieV%2Fuploads%2Fd7O3RhPGFuIhQgFOC7Xt%2Fimage.png?alt=media&amp;token=8d472c75-ef6c-4855-867d-66e46bd07c8a" alt="" data-size="line">, has the sole function of deleting the selected item from the scene, and is irreversible. Its shortcut is the **CANC** key on a PC or **Fn+Backspace** on a Mac.

The second <img src="https://1025404586-files.gitbook.io/~/files/v0/b/gitbook-x-prod.appspot.com/o/spaces%2FvALqBsUIqL1aZ2BmaieV%2Fuploads%2FMEGujfD179w5dtgxgWXU%2Fimage.png?alt=media&amp;token=0fafb9f5-10ce-41ea-a484-ef171814bcf7" alt="" data-size="line">, confirms the position and is conditional on the validity of the position itself. In fact, as we will see later, we can only confirm the position for elements that are not larger than the scene itself, inscribed in it, or otherwise not outside its boundaries. Its shortcut is the **ENTER** key.

<mark style="color:red;">**Best practice**</mark>: when you are working on a layout that includes buildings and furniture, you may accidentally select a building and delete it, or move it and confirm the new location. To avoid this, when structuring complex spaces, it is a good practice to mark the position, rotation, and scale coordinates of the buildings on a note, exactly as they are described by the tools themselves, so that you can effectively relocate changed objects to the same positions.


# Gizmo and assets manipulation

When we pick up an object from the [asset pack](/coderblock-studio/builder-tool-advanced-guide/working-environment/design-tools/asset-packs), or when we select an object that already exists in the scene, the most important tool is undoubtedly the **gizmo**. The Gizmo is a virtual object that overlays the selected element to allow editing, and it is present in the Builder in four forms: one for each type of spatial transformation, and a universal one that includes them all.

The transformations concern position, rotation and scale, and their activation results in a different gizmo configuration, so that the transformation used can be recognized at a glance. When we select an object for the first time, the gizmo related to positioning appears by default, but after the first editing it will inherit the last tool used, in order to speed up any recurring operations.

#### Pivot <a href="#pivot" id="pivot"></a>

The gizmo does not occupy a random point on the object, but a specific position corresponding to the **pivot**. The pivot relative to the 3D model is intrinsic, i.e. it is arbitrarily defined when creating/exporting the object itself and cannot be changed in the Builder. It corresponds to a point that we might call a relative origin, i.e. the intersection of the axes, and it provides the Builder with instructions on how to position the object relative to the point where we clicked to release it.\
This means that for a simple 3D model such as a cube, if it has a fulcrum placed at its base, placing it at a point in our space will cause the cube to rest on the selected face. On the other hand, if the fulcrum were at its center of gravity, selecting the surface on which to place it will give us the effect of an object intersecting with the surface itself, leaving half of the cube exposed. Considering the exact placement of the pivot will be important if we decide to create and upload [custom objects](/coderblock-studio/builder-tool-advanced-guide/working-environment/design-tools/asset-packs/uploading-custom-objects) (e.g., a pivot away from the base of the model can be useful for creating floating objects).

#### Grid and Snap

When an object is selected, a grid is highlighted, which is useful as a spatial reference. The unit of measurement when discussing coordinates and dimensions is the meter, and each plot measures **16x16m**.

The grid superimposed on a plot divides the space into sixteenths, so that each small block measures 1x1m.

In order to speed up the design process, a snap, i.e. an anchor to a specific measure, has been set, which binds movement and scaling operations to fixed values. This measure allows increments and decrements of **1/4 units**. The meaning of this value will be explained in the next sections of the manual.

<figure><img src="https://1025404586-files.gitbook.io/~/files/v0/b/gitbook-x-prod.appspot.com/o/spaces%2FvALqBsUIqL1aZ2BmaieV%2Fuploads%2FYm0xfCdpPqG94w0aRsY3%2Fimage.png?alt=media&amp;token=09d20009-7758-44f5-aab9-9faee49c00c6" alt="" width="470"><figcaption></figcaption></figure>

#### Shortcut

If you need to move the POV while editing an object, you can use the keyboard commands [as described before](/coderblock-studio/builder-tool-advanced-guide/working-environment/view-and-movements#using-the-keyboard). However, you may notice that the gizmo changes shape during these movements. This is because some tool selection shortcuts share the same keys as the POV movement. These shortcuts, which we will discuss together, are as follows:

* W: positioning tool
* E: rotation tool
* R: scaling tool
* T: universal tool

It should be noted that accidentally activating these tools during a POV movement will not interfere with the editing of the object, unless you intervene with the mouse on the selected object.

#### Playground

In the following sections, we will explore the different gizmos in detail by spatially manipulating a cube taken directly from the Asset Pack

A reference configuration will be used. The yellow cube will be the object of manipulation in all four modes. The remaining four coloured cubes will remain fixed in the scene as a spatial reference. The focus will always be on the yellow cube, positioned with coordinates x: 24; y: 0; z: -24.

<figure><img src="https://1025404586-files.gitbook.io/~/files/v0/b/gitbook-x-prod.appspot.com/o/spaces%2FvALqBsUIqL1aZ2BmaieV%2Fuploads%2F8et8yF0FZQeNqDVeeXFV%2Fimage.png?alt=media&amp;token=4b1c9859-553f-436d-b9db-169ff332ceb2" alt="" width="314"><figcaption></figcaption></figure>

<figure><img src="https://1025404586-files.gitbook.io/~/files/v0/b/gitbook-x-prod.appspot.com/o/spaces%2FvALqBsUIqL1aZ2BmaieV%2Fuploads%2FMiOxe44NW0HbcmPPNs7U%2Fimage.png?alt=media&amp;token=fee75d6e-dad6-4905-b0a5-b886cc6b1525" alt="" width="375"><figcaption></figcaption></figure>

The attached videos provide an overview of the tools that we will explore in more detail in the following sections:

{% file src="/files/1dsWGa3v1UzKhmN8tDS4" %}

{% file src="/files/5KZ2R10sIIsdDtAq0o7T" %}


# Position

The first spatial editing tool is the Position tool. To begin, you will need to select an object from the asset pack or one that already exists in the scene. Normally the Position tool will be the active tool by default, but if it is not, click on the first button that appears on the left to activate it <img src="https://1025404586-files.gitbook.io/~/files/v0/b/gitbook-x-prod.appspot.com/o/spaces%2FvALqBsUIqL1aZ2BmaieV%2Fuploads%2FsiTlfIKyEQaBX19XOF6K%2Fimage.png?alt=media&amp;token=59e4e25b-bba5-4da4-874c-f94f79b515cd" alt="" data-size="line">, or use the **W** key on your keyboard.

**The gizmo will show six components: three axes and three intersecting planes.**

The three axes are absolute, so if you move the POV they will move with it accordingly, always showing the true orientations and easily recognizable by the colors:

* <mark style="color:red;">**Red**</mark>: x axis;
* <mark style="color:green;">**Green**</mark>: y axis;
* <mark style="color:blue;">**Blue**</mark>: z axis;

The same colors in the gizmo also apply to the squares representing the **planes perpendicular to the axes.**

If you move the mouse pointer over one of them, the selected axis will change color to <mark style="color:yellow;">**yellow**</mark>. You can then simply left-click and drag in any direction or axis to move the object.

<figure><img src="https://1025404586-files.gitbook.io/~/files/v0/b/gitbook-x-prod.appspot.com/o/spaces%2FvALqBsUIqL1aZ2BmaieV%2Fuploads%2F2TPAGWfEJsJWphNzsxoW%2Fimage.png?alt=media&amp;token=f889d37d-d367-4c0f-9e92-bedc981bc190" alt="" width="311"><figcaption></figcaption></figure>

Movement along the <mark style="color:red;">**x**</mark> and <mark style="color:blue;">**z**</mark> axes is affected by the **snap** on the grid, a kind of magnetic attraction that forces positioning to fixed values. The grid shows 1m intervals, but remember that the increment (or decrement) is 1/4 unit at a time, so each advance is 25cm. Movement along the <mark style="color:green;">**y**</mark>-axis, on the other hand, has no snap constraints, but is continuous, so it will always provide intermediate positions.

When an object is selected, a block of information appears at the top of the workspace giving its spatial description in relation to the selected tool. In this case, the position returns the coordinates on the three axes as values. These coordinates are dynamically updated as we move the element, allowing us to monitor its current position.

The same block carries a form. This is a second editing mode based on direct input of values. Knowing the exact distance and direction of movement, it is then possible to enter the target coordinates directly.

To take advantage of this system, simply enter the coordinates in the appropriate fields and validate them using the green adjacency button. Unit or floating point values are allowed to three decimal places (note: precision to the cm, i.e. two decimal places are more than sufficient to search for adjacencies without interpenetrations). Values, if decimal, must be written in the fields using the **comma** character. It is not necessary to fill in all the fields, only those of interest. Fields left blank retain their value.

<figure><img src="https://1025404586-files.gitbook.io/~/files/v0/b/gitbook-x-prod.appspot.com/o/spaces%2FvALqBsUIqL1aZ2BmaieV%2Fuploads%2FhIq3tZn7WIlgZ3z2oiqn%2Fimage.png?alt=media&amp;token=f0d90cbe-4b45-447c-bfdc-0e707779d944" alt=""><figcaption></figcaption></figure>

{% hint style="info" %}
A typical use of this input mode is the repositioning of many duplicated elements by copy/paste, such as the distribution of objects that are repeated several times at regular intervals, or the need to reproduce the same layouts on different floors of a building. Once an object has been duplicated, it is sufficient to modify its <mark style="color:green;">**y**</mark>-value.
{% endhint %}

{% hint style="warning" %}
Note: The values shown are rounded down to one decimal place. The following images illustrate a shifting of the object by 0.5m on <mark style="color:red;">**x**</mark>. This is done by hand, so there are two steps of 0.25m. The first will therefore approximate a value of 0.2, while the next will show the round figure of 0.5.
{% endhint %}

<div><figure><img src="https://1025404586-files.gitbook.io/~/files/v0/b/gitbook-x-prod.appspot.com/o/spaces%2FvALqBsUIqL1aZ2BmaieV%2Fuploads%2FJe6iwuNx6bRRKvafrLYj%2Fimage.png?alt=media&amp;token=33cbc559-2940-4716-a411-aa2b00223e0d" alt="" width="171"><figcaption></figcaption></figure> <figure><img src="https://1025404586-files.gitbook.io/~/files/v0/b/gitbook-x-prod.appspot.com/o/spaces%2FvALqBsUIqL1aZ2BmaieV%2Fuploads%2FPiTsLLSj7oxxtYb9DBXy%2Fimage.png?alt=media&amp;token=7d302f5a-f12b-4733-b32e-35aaee7383d9" alt="" width="171"><figcaption></figcaption></figure> <figure><img src="https://1025404586-files.gitbook.io/~/files/v0/b/gitbook-x-prod.appspot.com/o/spaces%2FvALqBsUIqL1aZ2BmaieV%2Fuploads%2FeVfjnzCKkbadMYA3yjCP%2Fimage.png?alt=media&amp;token=5a0c07b6-1703-46d3-93cd-5046b214a3f6" alt="" width="171"><figcaption></figcaption></figure></div>

{% hint style="warning" %}
It should be noted that the actual displacement still occurs for the exact 1/4 unit increment, i.e. 0.25m. To demonstrate this, the same displacements can be replicated using the input form.
{% endhint %}

#### Example of a linear displacement movement

In the example below, the yellow cube is positioned at coordinates \[<mark style="color:red;">**x: 24**</mark> <mark style="color:green;">**y: 0**</mark> <mark style="color:blue;">**z: -24**</mark>]. We want to move it 1m to the right along the x axis and 1m up along the z axis. The y remains unchanged, so the cube remains on its own plane.

Select the cube. The corresponding detail appears at the top. We then fill in the form by entering the correct values for the new **x** and **z** coordinates, i.e.: **25** and **-23**.

<figure><img src="https://1025404586-files.gitbook.io/~/files/v0/b/gitbook-x-prod.appspot.com/o/spaces%2FvALqBsUIqL1aZ2BmaieV%2Fuploads%2FWQY9LCFMPQhtqMFd7tD6%2Fimage.png?alt=media&amp;token=1b653ff9-1d7a-49da-a919-ee08f96aa5bb" alt="" width="563"><figcaption></figcaption></figure>

By validating the values with the green form button, the cube will move to the new position.

<figure><img src="https://1025404586-files.gitbook.io/~/files/v0/b/gitbook-x-prod.appspot.com/o/spaces%2FvALqBsUIqL1aZ2BmaieV%2Fuploads%2FHhGqmf73psuid56wcgVl%2Fimage.png?alt=media&amp;token=33deb2b1-90e8-4964-a408-1fa3b3ace298" alt="" width="563"><figcaption></figcaption></figure>

Confirm the operation by clicking on the Confirm button in the [**control panel.**](/coderblock-studio/builder-tool-advanced-guide/working-environment/design-tools/control-panel#erase-confirm) The cube is now in its new position.

<figure><img src="https://1025404586-files.gitbook.io/~/files/v0/b/gitbook-x-prod.appspot.com/o/spaces%2FvALqBsUIqL1aZ2BmaieV%2Fuploads%2FY2z1KXkxKpQwCLZvsP9Y%2Fimage.png?alt=media&amp;token=4df6e94c-879f-4752-ad9e-eac8ac9f73d6" alt="" width="563"><figcaption></figcaption></figure>

#### Movement along the intersection plane

The squares shown at the intersection of the gizmo axes represent the imaginary plane relative to the two axes involved. Each square shows the color of the excluded axis, i.e. the coordinate that remains fixed.

If we wanted to reproduce the previous example by moving the cube manually, we could intervene one axis at a time, dragging it to the correct coordinate until we reached the final position. But not involving the <mark style="color:green;">**y**</mark>-axis whose value remains fixed at <mark style="color:green;">**y: 0**</mark>, we could move the cube by acting directly on the green square. As with the axes, when the mouse pointer is over the <mark style="color:green;">**green square**</mark>, it turns yellow. By clicking on it, we will be able to drag it along the horizontal plane directly to the right position with a single mouse movement.

Again, the movement is anchored to the grid, with the snap set to 1/4 units on an axis and the corresponding plane.

<figure><img src="https://1025404586-files.gitbook.io/~/files/v0/b/gitbook-x-prod.appspot.com/o/spaces%2FvALqBsUIqL1aZ2BmaieV%2Fuploads%2FGg5pkrCwvyKHBRv7ngvR%2Fimage.png?alt=media&amp;token=6c895f65-b24e-4ce6-83cc-28d3e814da98" alt=""><figcaption></figcaption></figure>

<figure><img src="https://1025404586-files.gitbook.io/~/files/v0/b/gitbook-x-prod.appspot.com/o/spaces%2FvALqBsUIqL1aZ2BmaieV%2Fuploads%2Ffr4Dv7OoGPDEwSNTU7f6%2Fimage.png?alt=media&amp;token=74b32c92-6e80-4fb4-b272-f5a0d2298eab" alt=""><figcaption></figcaption></figure>

The same rule applies to planes that intersect the y-axis and therefore move in vertical planes, which is useful when we need to place decorations on walls, for example. The <mark style="color:red;">**red square**</mark> will therefore move the object in a vertical plane of a <mark style="color:red;">**fixed x**</mark>, and the <mark style="color:blue;">**blue square**</mark> will do the same in the vertical plane of <mark style="color:blue;">**z**</mark>.

{% hint style="warning" %}
The snap has priority over the float (fluid movement not locked to the grid). This means that for the movement along the two vertical planes, despite the fact that y is involved, which allows a smooth increment, the second axis will dominate by imposing the snap. We will therefore also have movement on the vertical plane always in 1/4 unit increments.
{% endhint %}


# Movement on the orthogonal plane

This mode of position editing is particularly complex and rarely used, but it offers even greater control over movement. While the traditional mode uses the axes and therefore the real planes relative to the workspace as a reference, here we use mutable references, the inclusion of which leads to results that are not entirely predictable, since the primary reference is our POV.

We spoke earlier of a Cartesian system in relation to the management of the POV. We can therefore say that, in this system, the three axes **x, y** and **z (locked)** correspond to the axes of <mark style="color:red;">**tilting**</mark>, <mark style="color:green;">**panning**</mark> and <mark style="color:blue;">**rolling (locked)**</mark> already mentioned.

<mark style="background-color:yellow;">This mode is activated by selecting the position instrument and pressing the</mark> <mark style="background-color:yellow;"></mark><mark style="background-color:yellow;">**SHIFT**</mark> <mark style="background-color:yellow;"></mark><mark style="background-color:yellow;">button and holding it down during operations</mark>

As you can see from the images, only two axes are shown, describing a plane on the object that is orthogonal to our POV. In fact, movement is allowed along the <mark style="color:red;">**tilting**</mark> and <mark style="color:green;">**panning**</mark> axes and on the plane they describe.

In fact, we have to imagine that the <mark style="color:blue;">**rolling axis**</mark> is a straight line, perpendicular and anchored to us, and that this new Cartesian system always remains fixed relative to our POV and therefore variable with respect to space.

In whatever direction we point the POV, these two axes and the square at their intersection remain fixed. And here is the complexity: the coordinates displayed in the control mirror always represent the real spatial coordinates of the object, but when we act on the arrow representing the <mark style="color:red;">**tilting axis (the orthogonal x-axis according to the POV)**</mark>, the object will move in a direction that is concordant with the axis and our POV, but **relative to space it will move instead on the real x and z**.

Since rotation cannot be applied to the rolling axis, <mark style="background-color:red;">the movement applied to the tilting axis (a horizontal directional axis) will always be parallel to the real horizontal plane.</mark>

{% hint style="info" %}
**Note: in this mode the snap is active, but it moves per unit. Each step will therefore measure 1m.**
{% endhint %}

An example will better explain the concept:

Let us empirically set up a POV by placing the space in a perspective as balanced as possible, with a rotation corresponding to about 45° on all axes. We will realize the success of this operation by observing the three intersecting planes of the axes: the union of the three squares, prospectively three rhombuses, will draw a regular hexagon. In this particular case, however, the greater precision sought is not so much in the angle with respect to the y axis, but in the balance between the real <mark style="color:red;">**x**</mark> and <mark style="color:blue;">**z**</mark> axes.

<figure><img src="https://1025404586-files.gitbook.io/~/files/v0/b/gitbook-x-prod.appspot.com/o/spaces%2FvALqBsUIqL1aZ2BmaieV%2Fuploads%2FrEAohVvMf0X8E3Qoneqx%2Fimage.png?alt=media&amp;token=4ea9a13c-7470-4836-b979-39d117f0ec08" alt="" width="351"><figcaption></figcaption></figure>

By setting with the SHIFT key to orthogonal mode, the <mark style="color:red;">**tilting axis**</mark> is in a position that suggests an equal shifting in the real plane relative to the <mark style="color:red;">**x**</mark> and <mark style="color:blue;">**z**</mark> coordinates, that is, a shifting of the object on a diagonal between the two axes.

<figure><img src="https://1025404586-files.gitbook.io/~/files/v0/b/gitbook-x-prod.appspot.com/o/spaces%2FvALqBsUIqL1aZ2BmaieV%2Fuploads%2FaSQ6sYNSkdjpRYXEBvpj%2Fimage.png?alt=media&amp;token=af796afc-0b06-46d3-a439-bff563768ca1" alt="" width="351"><figcaption></figcaption></figure>

We therefore apply a translation of the object on this relative axis by moving to the right. It has already been mentioned that the shifting is by unity, that is 1m from the starting point. We have therefore ideally moved the object 1m along the hypotenuse of a triangle described by an increment of <mark style="color:red;">**x**</mark> and an equal increment of <mark style="color:blue;">**z**</mark>.

<figure><img src="https://1025404586-files.gitbook.io/~/files/v0/b/gitbook-x-prod.appspot.com/o/spaces%2FvALqBsUIqL1aZ2BmaieV%2Fuploads%2F41Lu9GTXEKPGZAvM4PiH%2Fimage.png?alt=media&amp;token=b73efd16-83b0-4b35-a61a-de08892ab492" alt="" width="351"><figcaption></figcaption></figure>

The Pythagorean theorem and a quick calculation will then tell us that the displacement on the real axes was incremental by a value of 0.7. The start coordinates \[<mark style="color:red;">**x: 24**</mark> <mark style="color:green;">**y: 0**</mark> <mark style="color:blue;">**z: -24**</mark>] and the end coordinates \[<mark style="color:red;">**x: 24.7**</mark> <mark style="color:green;">**y: 0**</mark> <mark style="color:blue;">**z: -23.3**</mark>] confirm the correctness of these calculations.

<figure><img src="https://1025404586-files.gitbook.io/~/files/v0/b/gitbook-x-prod.appspot.com/o/spaces%2FvALqBsUIqL1aZ2BmaieV%2Fuploads%2FmINXIRTdIVWhgp00Lr7r%2Fimage.png?alt=media&amp;token=e18efb9f-1434-4219-9fce-aaa9b33d1cdd" alt="" width="351"><figcaption></figcaption></figure>

If this is true, what is expected from an action on the <mark style="color:green;">**panning axis (the y of the POV)**</mark>?

Again, the answer can be complex, because if a *<mark style="color:green;">rotation on the panning</mark>* axis can affect the angular direction involving the real <mark style="color:red;">**x**</mark> and <mark style="color:blue;">**z**</mark> through a translation on the tilting axis, a *<mark style="color:red;">rotation on the tilting</mark>* axis will also change the angle of incidence on the real plane: a translation on the panning axis (a vertical directional axis) will then affect all directions, affecting <mark style="color:red;">**x**</mark> and <mark style="color:blue;">**z**</mark> of the object according to the direction indicated by the arrow, and <mark style="color:green;">**y**</mark> according to the tilting angle.

The following is a practical example of a combined translation on the <mark style="color:red;">**tilting**</mark> and <mark style="color:green;">**panning**</mark> axes of a fixed POV.

<figure><img src="https://1025404586-files.gitbook.io/~/files/v0/b/gitbook-x-prod.appspot.com/o/spaces%2FvALqBsUIqL1aZ2BmaieV%2Fuploads%2FxE1X50NwOu2uNwStaFF7%2Fimage.png?alt=media&amp;token=c60d7f70-d710-4be1-a07e-2ab6e8011936" alt="" width="563"><figcaption></figcaption></figure>

<figure><img src="https://1025404586-files.gitbook.io/~/files/v0/b/gitbook-x-prod.appspot.com/o/spaces%2FvALqBsUIqL1aZ2BmaieV%2Fuploads%2FdBQREw6GawX2Rb9XvAIA%2Fimage.png?alt=media&amp;token=86a0f8ab-e5bf-47b7-9938-6007d2858d59" alt="" width="563"><figcaption></figcaption></figure>

<figure><img src="https://1025404586-files.gitbook.io/~/files/v0/b/gitbook-x-prod.appspot.com/o/spaces%2FvALqBsUIqL1aZ2BmaieV%2Fuploads%2FGwAwYP0feonPBz3KhZrw%2Fimage.png?alt=media&amp;token=4d37cb6c-37d5-4a35-98e2-757d5f3b2d71" alt="" width="563"><figcaption></figcaption></figure>

The translation just illustrated was carried out quickly by moving the small square at the intersection of the axes: moving it to the right and upwards resulted in an incremental translation involving <mark style="color:red;">**x**</mark>, <mark style="color:green;">**y**</mark> and <mark style="color:blue;">**z**</mark>. In fact, it can be seen that although the step is unity, the <mark style="color:green;">**y**</mark> reports a final value of 0.8, determined by the particular angle of the <mark style="color:red;">**tilting**</mark> axis.

{% hint style="info" %}
**But does the&#x20;**<mark style="color:green;">**panning axis**</mark>**&#x20;really force vertical translation?**

Short answer: no.

To say that rolling is not enabled is to say that it is fixed at a rotation angle of 0°.

But tilting is possible over an angle of 360°. This means that a POV that is perfectly orthogonal to the plane, i.e. with a rotation on tilting for an angle of 90°, will cause the panning axis to be parallel to the plane itself.

In this state, the tilting axis and the panning axis will both affect <mark style="color:red;">**x**</mark> and <mark style="color:blue;">**z**</mark> depending on the direction.

The translated object then retains its <mark style="color:green;">**y**</mark> value.

In the following example, the movement of the yellow cube resting on the plane keeps the <mark style="color:green;">**y: 0**</mark> value constant.
{% endhint %}

<figure><img src="https://1025404586-files.gitbook.io/~/files/v0/b/gitbook-x-prod.appspot.com/o/spaces%2FvALqBsUIqL1aZ2BmaieV%2Fuploads%2Fzw7tpBhSGwSNDXP1EM0W%2Fimage.png?alt=media&amp;token=433c87c1-e423-4636-9656-31b6907ac787" alt="" width="563"><figcaption></figcaption></figure>

<figure><img src="https://1025404586-files.gitbook.io/~/files/v0/b/gitbook-x-prod.appspot.com/o/spaces%2FvALqBsUIqL1aZ2BmaieV%2Fuploads%2FmFlYDapXeEYiPXlei7km%2Fimage.png?alt=media&amp;token=fa57cf97-810f-4e33-909b-daee52dc28e6" alt="" width="563"><figcaption></figcaption></figure>


# Rotation

The rotation tool can be accessed by selecting the object from the second pop-up button <img src="https://1025404586-files.gitbook.io/~/files/v0/b/gitbook-x-prod.appspot.com/o/spaces%2FvALqBsUIqL1aZ2BmaieV%2Fuploads%2FnAtREFTnElusN9F4icX0%2Fimage.png?alt=media&amp;token=231b1658-c927-49c8-9176-3803dbc992cd" alt="" data-size="line"> or by pressing the **E** key on the keyboard.

In this case, the arrows in the gizmo will be replaced by **three spherical circles highlighted in the colors corresponding to their rotation axes**.

<figure><img src="https://1025404586-files.gitbook.io/~/files/v0/b/gitbook-x-prod.appspot.com/o/spaces%2FvALqBsUIqL1aZ2BmaieV%2Fuploads%2Fwa9i2jQKMPDOFy4meZH6%2Fimage.png?alt=media&amp;token=e890351a-15f4-4905-94cc-b38befc11552" alt="" width="470"><figcaption></figcaption></figure>

From the image above, it is easy to see that the new gizmo is in a specific position, the one related to the pivot, in this case placed on the base of the cube we are using for this demonstration.

What was previously a <mark style="color:green;">**y**</mark> axis of vertical movement now becomes a rotation axis, so the translation of each point of the object is no longer linear, but angular on the corresponding plane perpendicular to the axis itself.

It is activated by selecting the circumference of our interest and moving the mouse by the amount of momentum required to achieve the desired rotation. As with the Position tool, mouse interaction will highlight the reference in yellow, and clicking will initiate the action.

Again, the information block in the middle will show real-time references relative to the editing operations. In this case, the unit of measurement is the **decimal sexagesimal degree**, i.e. 360 degrees on the full rotation and a decimal fraction of a degree, so we will see non-unit values indicated by a comma. Similarly, we will be able to manually enter the values we are looking for with the form below, which is very useful when we need to accurately replicate the rotation of multiple objects.

It is possible to enter positive or negative values. Positive values produce a clockwise rotation with respect to the normal of the rotation plane, negative values produce a counterclockwise rotation.

{% hint style="info" %}
Note: entering negative values will always display the positive counterpart in the information block. \
For example, if you manually enter a value of -15 with respect to an axis, it will be displayed as 345 after confirmation.
{% endhint %}

In the following example, the cube is rotated 45° on the <mark style="color:green;">**y**</mark> axis.

<figure><img src="https://1025404586-files.gitbook.io/~/files/v0/b/gitbook-x-prod.appspot.com/o/spaces%2FvALqBsUIqL1aZ2BmaieV%2Fuploads%2FbMkJSqnLnLFQfP0byC2F%2Fimage.png?alt=media&amp;token=a3f00d18-5deb-4d55-814b-b63fd41ac59d" alt="" width="563"><figcaption></figcaption></figure>

<figure><img src="https://1025404586-files.gitbook.io/~/files/v0/b/gitbook-x-prod.appspot.com/o/spaces%2FvALqBsUIqL1aZ2BmaieV%2Fuploads%2FjgrWMwXjILjS4rnavtwj%2Fimage.png?alt=media&amp;token=2b457dad-bf70-4f60-9516-f3f98b0f4a93" alt="" width="563"><figcaption></figcaption></figure>

<figure><img src="https://1025404586-files.gitbook.io/~/files/v0/b/gitbook-x-prod.appspot.com/o/spaces%2FvALqBsUIqL1aZ2BmaieV%2Fuploads%2F9Rs66WcAECXmkZ4WtDqP%2Fimage.png?alt=media&amp;token=abbd5701-f202-467e-b4a9-3f6ecc0acf7b" alt="" width="563"><figcaption></figcaption></figure>

The pivot is placed at the center of the vertical axis of the cube, but at the base of the cube. The resulting rotation does not significantly change its position or size of the element in the space.

However, we cannot expect the selected element to remain in the same position as it rotates, because the angular movement is determined by the radius, and thus the distance between the object and its pivot. This means that a pivot placed exactly in the center will cause the object to rotate about itself, but a pivot that is unbalanced or outside the object will cause nonlinear motion along a circumferential arc.

Let us return the cube to its original position and see what happens when we apply a rotation on the <mark style="color:blue;">**z**</mark>-axis instead. We will test two values, rotating it 45° and 90°.

<figure><img src="https://1025404586-files.gitbook.io/~/files/v0/b/gitbook-x-prod.appspot.com/o/spaces%2FvALqBsUIqL1aZ2BmaieV%2Fuploads%2FC8Rd1BgvEEV36Iu2dTVh%2Fimage.png?alt=media&amp;token=13e2ad7b-f559-4a4c-b4bd-356676e5cccc" alt=""><figcaption></figcaption></figure>

<figure><img src="https://1025404586-files.gitbook.io/~/files/v0/b/gitbook-x-prod.appspot.com/o/spaces%2FvALqBsUIqL1aZ2BmaieV%2Fuploads%2FIEdnyX79FyOK3yEvDq9p%2Fimage.png?alt=media&amp;token=3db46c15-4401-44a5-9a19-63692dc52e10" alt=""><figcaption></figcaption></figure>

<figure><img src="https://1025404586-files.gitbook.io/~/files/v0/b/gitbook-x-prod.appspot.com/o/spaces%2FvALqBsUIqL1aZ2BmaieV%2Fuploads%2FaGF5GIsWci8g5C6uXDbY%2Fimage.png?alt=media&amp;token=94585414-fc2a-4a08-9bb0-45b2f67d69f4" alt=""><figcaption></figcaption></figure>

If the pivot point is located at the bottom, i.e. off-center with respect to its height, a rotation along the <mark style="color:blue;">**z**</mark>-axis produces a rotation with a fulcrum on the pivot itself, which causes the object to lie sideways and also to change its position in space.

{% hint style="warning" %}
The change in position is only perceptual. The object has not actually been moved, because its coordinates always refer to the position of the pivot. By asking the builder about the position of the yellow cube, its value actually remains unchanged.\
![](https://1025404586-files.gitbook.io/~/files/v0/b/gitbook-x-prod.appspot.com/o/spaces%2FvALqBsUIqL1aZ2BmaieV%2Fuploads%2F2K35AiCCXwMklJhqJsce%2Fimage.png?alt=media\&token=e009410e-a805-406f-ba3c-0bde60f3485f)
{% endhint %}

{% hint style="info" %}
The movement along the circumference is smooth, with no snap constraints, because the input form can always be used to set specific values. However, there is a mode that allows rotation in predefined steps of 15°, a geometrically very common value because of its regular multiples (related to angle measurements).

To activate the **15° snap**, simply hold down the **SHIFT** key while rotating with the mouse.
{% endhint %}


# Scaling

The scaling tool allows you to scale objects according to the principles of enlargement or reduction.

Selezionando l'oggetto, è possibile attivare questo strumento attraverso il terzo pulsante dall'alto <img src="https://1025404586-files.gitbook.io/~/files/v0/b/gitbook-x-prod.appspot.com/o/spaces%2FvALqBsUIqL1aZ2BmaieV%2Fuploads%2FxjpwPTodnByPGmzYqNFj%2Fimage.png?alt=media&amp;token=41b6ad75-d638-46ec-8c8f-b94d0b97ae09" alt="" data-size="line"> o tramite il tasto **R** della tastiera.By selecting the object, you can activate this tool by pressing the third button from the top or the R key on the keyboard.

<figure><img src="https://1025404586-files.gitbook.io/~/files/v0/b/gitbook-x-prod.appspot.com/o/spaces%2FvALqBsUIqL1aZ2BmaieV%2Fuploads%2FcQjWvv9LTaIBJtQPTz18%2Fimage.png?alt=media&amp;token=66d76db3-88f4-4c3e-9bd2-d0cf3095a0fd" alt="" width="470"><figcaption></figcaption></figure>

You will immediately notice the disappearance of the gizmo, which will give way to a **small cube placed at the pivot**. Like the other instruments, its position will be critical in determining the source of accretion or reduction.

In other words, if the pivot is at the center of gravity of the object, it will either grow or shrink around it, but if it is outside, or unbalanced, so will the relative scaled distances.

The object of our demonstration, the yellow cube, has the pivot placed at the center of the face that serves as the base. This particular configuration comes in handy; in fact, as we place the cube on our work surface, it will grow or shrink while always keeping the base adjacent to the surface, giving us the ability to measure even visually the outcome of the scaling we are going to apply.

Once the tool is activated, all you have to do is move the mouse over the small cube that acts as a gizmo. As you can see, it is neutral gray and does not have the colors previously assigned to the axes, since this scaling will involve the three dimensions together. By interacting with it with the mouse pointer, it will turn yellow. By clicking and dragging, we will be able to scale the object at will.

The information panel at the top dynamically reports the scaling as usual, while the small input form, this time only one, allows us to enter custom values.

{% hint style="info" %}
**The mathematics of Scaling**

Scaling an object means being able to increase or decrease its size by multiplying the individual dimensions of the object.

**The number associated with scaling is a coefficient**, which is a dimensionless value, a multiplier, with no unit of measurement.&#x20;

**The default initial coefficient is 1.**

<mark style="background-color:yellow;">This reference, the coefficient that we use to perform the dimensioning edit, does not involve volumetric values, but linear ones,</mark> i.e. if we set a scaling coefficient to 2, it would mean that we would not be doubling the object itself (and thus its volume), but the individual dimensions that make it up, by the values of <mark style="color:red;">**x**</mark>, <mark style="color:green;">**y**</mark> and <mark style="color:blue;">**z**</mark>.

**The increment or decrement we measure is also in steps of 1/4 relative to the initial coefficient**, and will remain so each time we continue scaling without leaving the mouse click.

In the case of an incremental motion, we will not encounter any limitations in scaling with the mouse, so it will be possible to easily go from coefficient 1 to larger values, proceeding by steps in a single movement.

In the case of a reducing motion, however, we will encounter a first mathematical limitation: <mark style="color:red;">**the coefficient cannot be 0**</mark>.\
Assuming a reduction starting from the default coefficient, we will in fact encounter this progression: **1 ->** <mark style="color:green;">**0,75**</mark>**&#x20;->&#x20;**<mark style="color:green;">**0,5**</mark>**&#x20;->&#x20;**<mark style="color:green;">**0,25**</mark>**&#x20;->&#x20;**<mark style="color:red;">**0**</mark>

Therefore, **the limit of decremental steps is set to three at a time**. The fourth step will then bring the coefficient back to the unit value. To obtain further reductions, it will be necessary to leave the click at an intermediate coefficient of the three allowed steps (also depending on our reduction goals) and click again to further reduce.

So, working in increments and knowing that they correspond to 1/4, if we wanted to double the size of the object (scale: 2), starting from the default state (scale: 1), we would have to click on the cubic gizmo and drag the mouse to the desired value.

If the increment is 1/4, it will take 4 increments, or 4 steps, to reach our goal. \
We will then see the value of the coefficient progress in this way: \
**1 ->** (step 1) <mark style="color:green;">**1,25**</mark> -> (step 2) <mark style="color:green;">**1,5**</mark> -> (step 3) <mark style="color:green;">**1,75**</mark> -> (step 4) <mark style="color:green;">**2**</mark>&#x20;

#### Formula to determine the final coefficient

The following formula, where "**ci**" is the initial coefficient and "**s**" is the number of steps, will give us the final value of the scaling coefficient "**cf**":

$$cF= cI ( 1 ± s/4)$$

In applying the formula, we will use addition to increase the scaling and subtraction to decrease it.
{% endhint %}

After what has been said, let us see the doubling of our reference cube. We will do this by selecting it and entering the value directly in the input form.

<figure><img src="https://1025404586-files.gitbook.io/~/files/v0/b/gitbook-x-prod.appspot.com/o/spaces%2FvALqBsUIqL1aZ2BmaieV%2Fuploads%2FVC2KJuYmLfgXsQslr4sB%2Fimage.png?alt=media&amp;token=781e47e7-661e-4a22-a14a-4cc82a62d5c8" alt="" width="563"><figcaption></figcaption></figure>

<figure><img src="https://1025404586-files.gitbook.io/~/files/v0/b/gitbook-x-prod.appspot.com/o/spaces%2FvALqBsUIqL1aZ2BmaieV%2Fuploads%2FBI1TEsjw8aFdwFAEqG0I%2Fimage.png?alt=media&amp;token=f2199dcb-5a3d-4403-bedf-47e68a100e92" alt="" width="563"><figcaption></figcaption></figure>

<figure><img src="https://1025404586-files.gitbook.io/~/files/v0/b/gitbook-x-prod.appspot.com/o/spaces%2FvALqBsUIqL1aZ2BmaieV%2Fuploads%2FjtlCQY5d0durf1E504Qf%2Fimage.png?alt=media&amp;token=6880b4fe-b0d0-4951-a80f-c05543eeff87" alt="" width="563"><figcaption></figcaption></figure>

As already mentioned, the resulting cube will not be twice as large as the original (volumetrically it is 8 times as large), but its linear dimensions will be. In fact, we can easily verify through the grid that the initial dimension of each side is 2m, while in its final form it is 4m, twice as large.

If we want to do the opposite, that is, to halve the size of the cube, we will set a coefficient of 0.5, directly in the input.

<figure><img src="https://1025404586-files.gitbook.io/~/files/v0/b/gitbook-x-prod.appspot.com/o/spaces%2FvALqBsUIqL1aZ2BmaieV%2Fuploads%2FLBTX8cKZ0KVvFjiQBvhb%2Fimage.png?alt=media&amp;token=3801eeb9-49bb-4780-8ecd-7690f11770e2" alt="" width="563"><figcaption></figcaption></figure>

<figure><img src="https://1025404586-files.gitbook.io/~/files/v0/b/gitbook-x-prod.appspot.com/o/spaces%2FvALqBsUIqL1aZ2BmaieV%2Fuploads%2Fb0b4CSDa2WjCNHXwg4JP%2Fimage.png?alt=media&amp;token=b2d17a30-ea8a-4855-ac8d-e43f52374530" alt="" width="563"><figcaption></figcaption></figure>

<figure><img src="https://1025404586-files.gitbook.io/~/files/v0/b/gitbook-x-prod.appspot.com/o/spaces%2FvALqBsUIqL1aZ2BmaieV%2Fuploads%2F9VRAVQejNleWNidNyIXQ%2Fimage.png?alt=media&amp;token=0d48c0ce-c05f-4851-807e-42843643d2f1" alt="" width="563"><figcaption></figcaption></figure>

Again, the size of the cube at the volumetric level does not correspond to half (it is actually 1/4 of the original volume), but its dimensions are correctly as expected: those of a cube of 1m on each side.

#### Limits

If we did not take into account the size of the space in which we were operating, we would have a virtually infinitely large space, but not an infinitely small one.

In both cases, it will be the initial size of an object that will determine the yield of a very large enlargement or extreme reduction.

If we want to enlarge an object, it will be necessary to evaluate the effectiveness of a magnification according to one's aesthetic canons and in the overall view. The scalability of a three-dimensional object is in fact unlimited, given its **vector** geometric nature, but the possible presence of a decorative texture inside it, whether integrated in the object itself or the result of a customization (if any), will highlight the **raster** artifacts resulting from possible compressions and interpolations of the JPG or PNG images used.

Considering instead the assumption of a reduction, **the scale is limited to a final coefficient of 0,01**. This is where the initial size, i.e. its default size when the object is inserted into the environment, really matters. A cube with a native size of one meter on each side can be scaled down to one centimeter, while a 40m long building can be scaled down to a maximum of 40 cm.

{% hint style="warning" %}
**Resetting the initial coefficient.**

Why is it important not to leave the mouse click?

Because even if we have not confirmed the scaling with the button in the control panel <img src="https://1025404586-files.gitbook.io/~/files/v0/b/gitbook-x-prod.appspot.com/o/spaces%2FvALqBsUIqL1aZ2BmaieV%2Fuploads%2FMEGujfD179w5dtgxgWXU%2Fimage.png?alt=media&amp;token=0fafb9f5-10ce-41ea-a484-ef171814bcf7" alt="" data-size="line">, by changing its value we have set a new initial coefficient. If we then click the gizmo again, the 1/4 increase or decrease will not refer to the default value, but to the newly set value.

Continuing with the previous example, let us assume that we have increased the coefficient to 1.75, and that we have intentionally or unintentionally released the mouse click.\
The new initial value will be 1,75. Obviously, if we wanted to double it, we should be able to get a coefficient of 3,5.\
*Applying the formula mentioned above*, here is what we would get if we proceeded in this direction:

1,75 -> 2,19 -> 2,62 -> 3,06 -> 3,5

The new progression does not pick up where it left off, but starts over, resetting the initial coefficient.
{% endhint %}

{% hint style="warning" %}
**There is a trick to enlarge objects by increasing the coefficient by one unit at a time, without going through the 1/4 steps.**

To achieve this effect, which is not essential but sometimes useful, simply reduce the object till the 4th step, which will bring the coefficient back to 1, and then extend the movement without releasing the mouse click. We will get the following sequence:

**1 ->&#x20;**<mark style="color:red;">**0,75**</mark>**&#x20;->&#x20;**<mark style="color:red;">**0,5**</mark>**&#x20;->&#x20;**<mark style="color:red;">**0,25**</mark>**&#x20;-> 1 ->&#x20;**<mark style="color:green;">**2**</mark>**&#x20;->&#x20;**<mark style="color:green;">**3**</mark>**&#x20;->&#x20;**<mark style="color:green;">**4**</mark>**&#x20;->&#x20;**<mark style="color:green;">**5**</mark>**&#x20;->&#x20;**<mark style="color:green;">**etc.**</mark>
{% endhint %}


# Universal tool

The last edit tool is a universal tool that combines the previous three into a single multifunctional gizmo. After selecting the object, it can be activated with the fourth button on the toolbar <img src="https://1025404586-files.gitbook.io/~/files/v0/b/gitbook-x-prod.appspot.com/o/spaces%2FvALqBsUIqL1aZ2BmaieV%2Fuploads%2F7qclfAyitK9j6b4yoEbP%2Fimage.png?alt=media&amp;token=ddba1aaf-3305-4469-a280-e6f43fae6c97" alt="" data-size="line"> or with the **T** key on the keyboard. It is the most versatile of them all and is the one that is generally used to finalize certain details, such as making micro-adjustments to position, rotation and scale.

<figure><img src="https://1025404586-files.gitbook.io/~/files/v0/b/gitbook-x-prod.appspot.com/o/spaces%2FvALqBsUIqL1aZ2BmaieV%2Fuploads%2FArbdPkmUslzHvSVglgUZ%2Fimage.png?alt=media&amp;token=320d6589-1a6e-4f56-8cf7-b0231beda27a" alt="" width="470"><figcaption></figcaption></figure>

This potential stems from the fact that the tools proposed within it are 100% fluid, without any *snap* constraints, allowing complex constructions that can be both totally empirical, without any mathematical relief regarding positions, rotations and scales, and totally regular, following strict geometries and millesimal adjustments.

How these two souls coexist is determined by the individual design intentions, since the tool does not carry an information panel or the possibility of entering specific values.

{% hint style="danger" %}
This versatility is a strength, but it should lead the user to handle the tool with care, since we do not have real time numerical control, but only optical/perceptual. As a result, we have to confirm the object if we want to recognize its values in order to reproduce or correct its position by individually selecting the position, rotation and scaling tools.
{% endhint %}

Its extreme freedom of use thus makes it an absolute tool when used alone, but its greatest expression occurs when, in the case of a geometrically reasoned design, the finishing touches are applied to a portion of the layout. We will better understand the value of this statement in the next section of [copy/paste](/coderblock-studio/builder-tool-advanced-guide/working-environment/design-tools/gizmo-and-assets-manipulation/copy-paste).

As with individual tools, to activate the action, the mouse pointer must intercept the desired element of the gizmo by changing its color to yellow; it is then possible to click and drag to complete the action.

Let's look at an example of editing through our reference system. The selected yellow cube will undergo some transformations, the end result will be that it will be rotated on all axes and translated upwards.

<figure><img src="https://1025404586-files.gitbook.io/~/files/v0/b/gitbook-x-prod.appspot.com/o/spaces%2FvALqBsUIqL1aZ2BmaieV%2Fuploads%2FS8M6gb1izzZfWTEBq8Cl%2Fimage.png?alt=media&amp;token=e73eb3be-a17d-49e1-a541-833d8be84910" alt="" width="563"><figcaption></figcaption></figure>

<figure><img src="https://1025404586-files.gitbook.io/~/files/v0/b/gitbook-x-prod.appspot.com/o/spaces%2FvALqBsUIqL1aZ2BmaieV%2Fuploads%2FkidnzJM6kW9N8bUuzzM3%2Fimage.png?alt=media&amp;token=b3823277-3b46-4e0e-8ef7-a85ce5cb3af7" alt="" width="563"><figcaption></figcaption></figure>

<figure><img src="https://1025404586-files.gitbook.io/~/files/v0/b/gitbook-x-prod.appspot.com/o/spaces%2FvALqBsUIqL1aZ2BmaieV%2Fuploads%2FRcVmPAS6Bxyq1yOOxfBW%2Fimage.png?alt=media&amp;token=cf27ee77-7b4a-4c55-bcb9-388dab564533" alt="" width="563"><figcaption></figcaption></figure>

#### Shifting in the orthogonal plane

Again, there is an option to activate a translation mode in the orthogonal plane relative to the universal tool. It is activated by pressing the **SHIFT** key and interacting with the <mark style="color:red;">**x**</mark>, <mark style="color:green;">**y**</mark> and <mark style="color:blue;">**z**</mark> translation axes. Obviously, it follows the same rules as the [analogous tool](/coderblock-studio/builder-tool-advanced-guide/working-environment/design-tools/gizmo-and-assets-manipulation/position/movement-on-the-orthogonal-plane) in standard mode, but it inherits the fluidity of the transformation of its parent in the movements on the axes and in the plane.

<figure><img src="https://1025404586-files.gitbook.io/~/files/v0/b/gitbook-x-prod.appspot.com/o/spaces%2FvALqBsUIqL1aZ2BmaieV%2Fuploads%2FrCox630dfcWLYPTIj0TC%2Fimage.png?alt=media&amp;token=72ec2a1d-e663-4794-8595-c8bc2f0969b4" alt="" width="390"><figcaption></figcaption></figure>


# Copy/Paste

There is a copy/paste function linked to objects in the scene that allows us to integrate a large number of the same elements without having to take them out of the [asset pack](/coderblock-studio/builder-tool-advanced-guide/working-environment/design-tools/asset-packs) each time, preserving the editing values of the copied object. Obviously, the preservation of edits involves an overlap of the pasted object with its original, but it will be in an unconfirmed state, i.e. with an active tool that can then allow any rotation, movement or scaling according to our needs.

A typical example is that of an audience of chairs facing a stage, i.e. a positioning with possible rotation repeated **n** times in different points of the space, usually spaced with some regularity.

This tool has no counterpart on the HUD, only keyboard shortcuts, and since we are dealing with copy/paste there, the shortcuts are, as usual, **ctrl+C** and **ctrl+V** (**cmd+C**/**cmd+V** on Mac systems). All you have to do is select the object you want, copy it, paste it and position it where you want.

{% hint style="danger" %}
Copy/Paste commands are contextual. This means they must be performed in the correct location according to the reference. To copy an object, you must select it and not move the mouse focus elsewhere, such as to a different tab or application, where a "paste" command might produce different results. In fact, if the mouse were somewhere else in the browser and the URL bar were selected, the "paste" command would give no result or might paste additional text strings previously entered into memory.
{% endhint %}

To give a demonstration of the copy/paste tool, we will use a variation of the playground by eliminating some of the objects in the environment, leaving only the yellow cube as a spatial reference in the center of the scene. We select them one by one and delete them with the Erase button <img src="https://1025404586-files.gitbook.io/~/files/v0/b/gitbook-x-prod.appspot.com/o/spaces%2FvALqBsUIqL1aZ2BmaieV%2Fuploads%2Fd7O3RhPGFuIhQgFOC7Xt%2Fimage.png?alt=media&amp;token=8d472c75-ef6c-4855-867d-66e46bd07c8a" alt="" data-size="line">.

<figure><img src="https://1025404586-files.gitbook.io/~/files/v0/b/gitbook-x-prod.appspot.com/o/spaces%2FvALqBsUIqL1aZ2BmaieV%2Fuploads%2FzHhdDkh07MBV3MdSPOjf%2Fimage.png?alt=media&amp;token=17a4b90c-db76-42ff-ad3f-d4b25b046ca5" alt="" width="563"><figcaption></figcaption></figure>

Instead of the removed cubes, the result we want to achieve is in the following example: we will place a single red cube and assign a rotation to it. We will then distribute the others by copying the first one.

<figure><img src="https://1025404586-files.gitbook.io/~/files/v0/b/gitbook-x-prod.appspot.com/o/spaces%2FvALqBsUIqL1aZ2BmaieV%2Fuploads%2FVQY5XF3KSrJ2hwPlPehG%2Fimage.png?alt=media&amp;token=b5b60a52-f03a-4f22-a11d-b1433848b6a9" alt="" width="563"><figcaption></figcaption></figure>

Select a red cube from the asset pack and place it in the desired location.

<figure><img src="https://1025404586-files.gitbook.io/~/files/v0/b/gitbook-x-prod.appspot.com/o/spaces%2FvALqBsUIqL1aZ2BmaieV%2Fuploads%2Fz9up6YqeBpNkJjv3XO8K%2Fimage.png?alt=media&amp;token=4db8b3eb-8958-4c13-a6a2-8ae1a3a8d7ea" alt="" width="563"><figcaption></figcaption></figure>

Keeping the selection active on the cube, we adjust the position if necessary, then select the rotate tool and set it to 45° on the <mark style="color:green;">**y**</mark> axis. This is the result:

<figure><img src="https://1025404586-files.gitbook.io/~/files/v0/b/gitbook-x-prod.appspot.com/o/spaces%2FvALqBsUIqL1aZ2BmaieV%2Fuploads%2Fd3UHu84eJW2bHF1eADb6%2Fimage.png?alt=media&amp;token=f49fc035-5748-4791-b166-8fa2ea350c79" alt="" width="563"><figcaption></figcaption></figure>

It is not really necessary to confirm the object once it is correctly positioned: if we are sure of the settings, it will be enough to copy it (ctrl+C/cmd+C) when it is selected, taking care to keep the mouse selection in the workspace and not on the outer parts of the HUD (asset pack or any customization panels).

<figure><img src="https://1025404586-files.gitbook.io/~/files/v0/b/gitbook-x-prod.appspot.com/o/spaces%2FvALqBsUIqL1aZ2BmaieV%2Fuploads%2FkjnHauKG6C44nyUKWzUR%2Fimage.png?alt=media&amp;token=3ef2d991-6ed3-47de-ae07-4042905e39b3" alt="" width="563"><figcaption></figcaption></figure>

Pasting the newly copied object (Ctrl+V/cmd+V) will place it in perfect overlap.

<figure><img src="https://1025404586-files.gitbook.io/~/files/v0/b/gitbook-x-prod.appspot.com/o/spaces%2FvALqBsUIqL1aZ2BmaieV%2Fuploads%2F25txrX7RtNbg71C15DRs%2Fimage.png?alt=media&amp;token=52fa4825-cba7-49b5-b08a-836bd396cc10" alt="" width="563"><figcaption></figcaption></figure>

We can see that not only the selected object itself is clearly preserved, but also its position, rotation and the last selected tool. So we move the object to the desired coordinates. We can do this by acting on the axes or by direct input.

<figure><img src="https://1025404586-files.gitbook.io/~/files/v0/b/gitbook-x-prod.appspot.com/o/spaces%2FvALqBsUIqL1aZ2BmaieV%2Fuploads%2F5c3it2bHMjLuwdi0eKIF%2Fimage.png?alt=media&amp;token=3aa46dcb-050f-463e-9d2c-a352e09600ac" alt="" width="563"><figcaption></figcaption></figure>

Before confirming, we can now consider two options:

* repeat the copy/paste operation again, replicating the new object in the active selection
* repeat only the paste operation, which will then refer to the previously copied object.

In this case, we will proceed with the first hypothesis, keeping the active selection on the new object, and repeat the command pair.

<figure><img src="https://1025404586-files.gitbook.io/~/files/v0/b/gitbook-x-prod.appspot.com/o/spaces%2FvALqBsUIqL1aZ2BmaieV%2Fuploads%2FSwkjkpNu0sNVuphaSSVn%2Fimage.png?alt=media&amp;token=3bd72832-4510-4c6e-9f77-f41f666870d9" alt=""><figcaption></figcaption></figure>

The object of the active selection is then copied and pasted to itself.

We then move it to the desired position and confirm the operation.

<figure><img src="https://1025404586-files.gitbook.io/~/files/v0/b/gitbook-x-prod.appspot.com/o/spaces%2FvALqBsUIqL1aZ2BmaieV%2Fuploads%2Fmsjo8ioyVBVUh1IiRj5T%2Fimage.png?alt=media&amp;token=94281cd6-7c4a-4942-9674-67810a79943b" alt="" width="563"><figcaption></figcaption></figure>

Of the previous hypotheses, we now take advantage of the second one: one object is already in the copy buffer, the middle one, so without selecting anything, we simply replicate the paste command.

<figure><img src="https://1025404586-files.gitbook.io/~/files/v0/b/gitbook-x-prod.appspot.com/o/spaces%2FvALqBsUIqL1aZ2BmaieV%2Fuploads%2FGsD4tkW7rWvrayj7FerW%2Fimage.png?alt=media&amp;token=9578936d-4ad3-4394-8769-cb118f8b28c5" alt="" width="563"><figcaption></figcaption></figure>

The new cube will, as expected, take the same position as the previously copied object and we will move it to the desired position.

{% hint style="info" %}
This solution, especially when we are dealing with a progression in a series of objects (such as a row of chairs), may not be the ideal choice, since it would force us to make sequential movements that are from time to time greater than the initial position.

On the other hand, it comes in handy when we want to paste and move elements around a starting one, since having a definite central reference also facilitates the calculation of shiftings and the amount of motion we have to apply.
{% endhint %}

<figure><img src="https://1025404586-files.gitbook.io/~/files/v0/b/gitbook-x-prod.appspot.com/o/spaces%2FvALqBsUIqL1aZ2BmaieV%2Fuploads%2FyHPxz29pRJX8lhnKrhhA%2Fimage.png?alt=media&amp;token=1e3c8d05-d6d3-426c-8748-82f0ab9c0105" alt="" width="563"><figcaption></figcaption></figure>


# Asset packs

We have demonstrated [how the tools work](/coderblock-studio/builder-tool-advanced-guide/working-environment/design-tools/gizmo-and-assets-manipulation) using a very simple reference system. But if the environments we build are to be primarily representative of reality, then the objects that form the builder's raw material must themselves be representative of the real world, regardless of any styles that will determine their aesthetic impact.

For immediate enjoyment, all objects have been grouped into high-level categories. Thus, we will find in a single category "Nature" all the natural elements, whether plants, trees, flowers, animals or rocks, just as the category "Furniture" will make available any type of furniture, regardless of its function.

<figure><img src="https://1025404586-files.gitbook.io/~/files/v0/b/gitbook-x-prod.appspot.com/o/spaces%2FvALqBsUIqL1aZ2BmaieV%2Fuploads%2F0CjzsOrJhrUTKFsBtcZH%2Fimage.png?alt=media&amp;token=1fce5f65-e28f-4075-a8ab-16365ab1ba6b" alt="" width="272"><figcaption></figcaption></figure>

In describing the Asset Pack, we will not dwell on the analysis of each classification, but if we look at this column, which corresponds to the initial state of the Asset Pack, we will notice that, in addition to the basic categorized objects, a series of elements have been integrated that we will manage at the same level as the others with the tools provided by the Builder, but that suggest an additional method of categorization that is strictly functional. This will be the categorization on which we will base our analysis, let us look at it in detail:

* [**Ground**](#ground) -> these are not objects, but scene modifiers. They change the basic nature of the environment.
* [**Static and interacting elements**](#elementi-statici-e-interagibili) -> grouped in the categories **Tiles, Nature, Furniture, Structures, Buildings, Decorations** are the real objects that will make up the architecture of our environment.
* [**Contents**](#contents) -> intangible functional elements that enable the activation of a specific service at a specific time.
* [**NPCs**](#npcs) -> Non-Player Character (or Non-Playable Character) are meta-human elements that can be programmed to support conversational events.
* [**Custom asset pack**](#custom-asset-pack) -> collection of custom objects that the user integrates into the Builder using the button <img src="https://1025404586-files.gitbook.io/~/files/v0/b/gitbook-x-prod.appspot.com/o/spaces%2FvALqBsUIqL1aZ2BmaieV%2Fuploads%2FdJDTOUKDImfX0BJjgGXn%2Fimage.png?alt=media&amp;token=5bd1fa97-58de-415e-8d10-199fe41e8161" alt="" data-size="line"> in the upper right corner

#### Ground

At first, the scene presents a regular grass surface. But this is not the only aspect we can give to our environment. In fact, we can change its aesthetics by changing the nature of the individual lands that make it up into other natural or urban variations, such as a sandy or paved or even aquatic ground.

To do this, simply click on the selected item and drag it to the desired location.

<figure><img src="https://1025404586-files.gitbook.io/~/files/v0/b/gitbook-x-prod.appspot.com/o/spaces%2FvALqBsUIqL1aZ2BmaieV%2Fuploads%2FQq5aWF8lsjhOvd3xwcqD%2Fimage.png?alt=media&amp;token=bbf9a927-06e0-4fbf-ba3b-31ed6ebde4be" alt=""><figcaption></figcaption></figure>

Whenever the placement is considered valid, the selector switch turns green.

<figure><img src="https://1025404586-files.gitbook.io/~/files/v0/b/gitbook-x-prod.appspot.com/o/spaces%2FvALqBsUIqL1aZ2BmaieV%2Fuploads%2FAKpE5z10pjeNc87juQ6c%2Fimage.png?alt=media&amp;token=a4792c77-90cf-4127-a6a7-1e73f96050f2" alt=""><figcaption></figcaption></figure>

<figure><img src="https://1025404586-files.gitbook.io/~/files/v0/b/gitbook-x-prod.appspot.com/o/spaces%2FvALqBsUIqL1aZ2BmaieV%2Fuploads%2FCJUb7j3K3Z3mYj2fZVOH%2Fimage.png?alt=media&amp;token=c5b7a78c-4f1e-40ff-9945-06fe09f8f51f" alt=""><figcaption></figcaption></figure>

All modifiers behave the same way except water. This allows you to build underwater structures to create special experiences, or above ground structures on platforms, and of course you can walk on them in the game phase by swimming and diving.

#### Static and interactive elements

Most of the objects we find within the categories have a primarily architectural function. In fact, they are the components that, when put together, contribute to the creation of a layout that includes both exterior and interior spaces, thus guiding the visitor-user along a path of exploration designed according to our purposes.

**Static elements** are recognizable by the white background in the thumbnail, and their function is purely aesthetic and environmental, as their presence will return a material impact to the experience. In fact, all objects are material and, depending on their size, obstacles.

**Interactive elements** can be recognized by the presence of a *light blue background* in the thumbnails and a small *lightning* icon. Once placed in the environment and in active selection, they will propose in the HUD a series of adjustments according to the selected object. These interactions could be aesthetic (lights), functional (doors), informational, etc.

We will analyze the different types of interactive elements later.

Clicking on the button for each category will bring up the items belonging to that category. In the following example, we have clicked on the "Structures" button. The presence of static and interactive elements is immediately apparent.

<figure><img src="https://1025404586-files.gitbook.io/~/files/v0/b/gitbook-x-prod.appspot.com/o/spaces%2FvALqBsUIqL1aZ2BmaieV%2Fuploads%2FqaHR7KLRfAVKiTF8tqWi%2Fimage.png?alt=media&amp;token=81bb6ece-1422-4827-8b47-26e9a5213aee" alt="" width="281"><figcaption></figcaption></figure>

All you need to do is click on an object to select it, and drag it into the environment. The selector will show two components: an arrow and a circle. The **arrow** indicates where the object will be placed. The **circle** will indicate the support surface. In fact, we need to consider that we might want to place an object not only on the ground of the scene, but also on another surface, such as an elevated platform, the floor of a building, a desk, and so on. When both indicators, the arrow and the circle, turn green, you can click again to place the selected object.

<figure><img src="https://1025404586-files.gitbook.io/~/files/v0/b/gitbook-x-prod.appspot.com/o/spaces%2FvALqBsUIqL1aZ2BmaieV%2Fuploads%2FyaZdsdZgEBFLSyRPU9bW%2Fimage.png?alt=media&amp;token=868fdaf7-90a0-495b-a7e3-4c37b5f6bdcc" alt=""><figcaption></figcaption></figure>

In the example below, a fountain has been selected and placed on a point. The object selection remains active so that we can edit its position, rotation and scale if necessary.

<figure><img src="https://1025404586-files.gitbook.io/~/files/v0/b/gitbook-x-prod.appspot.com/o/spaces%2FvALqBsUIqL1aZ2BmaieV%2Fuploads%2FeRhsUcOvddUHOWS0h1L9%2Fimage.png?alt=media&amp;token=d7df2d3f-d578-4bd1-a00b-d6a42dcb928c" alt=""><figcaption></figcaption></figure>

Once the position is confirmed, the object is stabilized and automatically saved in the environment.

#### Contents

These objects are immaterial. There is evidence of their presence or function in the environment, but they cannot be considered architectural elements, only functional ones.

Because they have special functions, which we will explain later, they are represented with a blue background thumbnail and can be manipulated in space like any other object.

<figure><img src="https://1025404586-files.gitbook.io/~/files/v0/b/gitbook-x-prod.appspot.com/o/spaces%2FvALqBsUIqL1aZ2BmaieV%2Fuploads%2FyvsPQfelHl4Se6jnrhKh%2Fimage.png?alt=media&amp;token=192da1ff-5982-460d-86af-7de339fd5f2e" alt=""><figcaption></figcaption></figure>

#### NPCs

NPCs are avatars that can be placed anywhere in the environment to provide the user with a complete and interactive experience despite the possible absence of other players in the game environment.

<figure><img src="https://1025404586-files.gitbook.io/~/files/v0/b/gitbook-x-prod.appspot.com/o/spaces%2FvALqBsUIqL1aZ2BmaieV%2Fuploads%2F2d4Fv8HrhcE9QC71c69B%2Fimage.png?alt=media&amp;token=185bff41-83b5-4b57-9849-b5cafa3c7e0b" alt=""><figcaption></figcaption></figure>

Like inanimate objects, they can be manipulated in space, and their interactive component is **dialog**. With proper planning, this capability can extend the experience by guiding the user to obtain information or activate any **quest**.

#### Custom asset pack

The Builder can be considered as a platform that allows the manipulation of 3D objects designed according to some specific canons and taken from a library (asset pack). The library is in fact a container, and the objects within it have been tested and validated to work best in the environment. Nevertheless, the integration and classification of objects from external sources or from an independent design is allowed, as long as they meet certain criteria.

We will discuss these criteria [later](/coderblock-studio/builder-tool-advanced-guide/working-environment/design-tools/asset-packs/uploading-custom-objects).


# Interactive elements

Interactive objects have a purely aesthetic function as long as their internal components are not activated/customized.

The possibilities are many and, as mentioned above, such components can act as environmental modifiers, external redirects, or activators.

Most interactive elements allow customization of the interaction reference (**when click text**), as linguistic or contextual customization.

When we integrate and select an interacting object in the scene, it will show a specific view for customization in the right column of the builder.

<figure><img src="https://1025404586-files.gitbook.io/~/files/v0/b/gitbook-x-prod.appspot.com/o/spaces%2FvALqBsUIqL1aZ2BmaieV%2Fuploads%2FrnQHoCUmZz3qrgMJzrER%2Fimage.png?alt=media&amp;token=21a17ab5-476f-447a-9e5d-1dc72badc3b7" alt="" width="284"><figcaption></figcaption></figure>

We can identify primitive components that we will activate by entering text, URLs, or by manipulating switches and sliders. These components, combined within a specific object, determine the peculiarities.

The following diagrams provide an overview of all the interacting categories and their functions in relation to the associated primitives.

{% embed url="<https://airtable.com/appA7Wxlihl8Hiv7T/shrUizPosofMRpOXE>" %}

{% embed url="<https://airtable.com/appA7Wxlihl8Hiv7T/shrdIu6jNBYMkdQpd>" %}

Once the interactive object has been customized, simply confirm it like any other object to keep the changes.

Some objects can be customized by adding [graphical components](/coderblock-studio/builder-tool-advanced-guide/working-environment/design-tools/asset-packs/graphic-components). Instructions for creating such components and related actions are discussed in the next section.


# Graphic components

Some objects can be graphically customized.

The different nature and shape of these objects requires a precise creation of the graphic or photographic elements we want to integrate, since certain design specifications must be met in order to avoid possible deformations.

There are just three basic rules:

* All graphic components must be inscribed in a **square format**.
* The dimensions of the square must always be to the **power of 2**. The recommended formats in pixels are **512x512** and **1024x1024**.
* The file should be in **JPG** format (recommended), or **PNG** (if you want it to be transparent).

{% embed url="<https://airtable.com/appA7Wxlihl8Hiv7T/shrFcZ5kEnDXlxJ0B>" %}

{% hint style="info" %}
Regardless of the software used for production (Photoshop, Illustrator, Gimp, Canva, etc.), it is recommended to create the graphic based on the dimensions shown in the diagram, and later stretch the canvas to the square format, adding vertical or horizontal space depending on the object created, without stretching the final image.
{% endhint %}

{% hint style="info" %}
Objects such as "Logo Plane" or "Sticker" do not have a solid component as a frame and are primarily created to maintain transparency where needed. The use of PNG files is recommended in such cases.
{% endhint %}


# Uploading custom objects

The Builder gives you the ability to add custom objects to our scene.

If you have **low-poly 3D objects** created by yourself or a third party, you can integrate them into our scene.

The only format accepted is **GLB**, and proper weight must be given at the design stage to any textures it will carry. In fact, more than the complexity of the object (which is important for the purposes of the number of objects allowed in the room), textures will affect loading times. For example, considering the need to integrate very small objects, it will be appropriate to lighten the textures very much if they propose a level of detail that can be considered unnecessary.

To add custom assets, simply click the small **+** icon in the top right corner of the Asset Pack <img src="https://1025404586-files.gitbook.io/~/files/v0/b/gitbook-x-prod.appspot.com/o/spaces%2FvALqBsUIqL1aZ2BmaieV%2Fuploads%2FfWlfJpKjuPLhMwtsbNSQ%2Fimage.png?alt=media&amp;token=6771c138-c508-4901-b4ea-bdb62867f8da" alt="" data-size="line"> and upload the file. Give it a name and category and it will be easy to find using the search form <img src="https://1025404586-files.gitbook.io/~/files/v0/b/gitbook-x-prod.appspot.com/o/spaces%2FvALqBsUIqL1aZ2BmaieV%2Fuploads%2FG9zwcZuMbxEe7javqefF%2FScreenshot%202024-07-24%20alle%2020.09.20.png?alt=media&amp;token=0fb06d23-4b8b-4f50-87ab-1a0c57d61f8b" alt="" data-size="line"> or in the **Custom Asset Pack** category at the bottom.

<figure><img src="https://1025404586-files.gitbook.io/~/files/v0/b/gitbook-x-prod.appspot.com/o/spaces%2FvALqBsUIqL1aZ2BmaieV%2Fuploads%2FOvOyvoQcvhjtJLBKUeGK%2Fimage.png?alt=media&amp;token=18a2986b-1b71-4c5e-b74b-ebaed67233d6" alt="" width="311"><figcaption></figcaption></figure>

{% hint style="warning" %}
Custom objects do not have their own thumbnails, but have a unique icon to identify them<img src="https://1025404586-files.gitbook.io/~/files/v0/b/gitbook-x-prod.appspot.com/o/spaces%2FvALqBsUIqL1aZ2BmaieV%2Fuploads%2FYpPzdvmWPFFYfAk5F9Iw%2Fimage.png?alt=media&amp;token=4100f078-77ba-4e9e-8886-cf265fb104de" alt="" data-size="line">. If it is necessary to repeat the upload several times to make corrections, it is good practice to include a version number in the filename (e.g. \_v01, \_v02, \_v03, etc.).
{% endhint %}


# Scene monitoring

As with any construction process, an abundance of raw materials must be provided. The Asset Pack might suggest that this is unlimited, since there is no number for individual objects to indicate a reserve. But a limit must be set, of course, by the ability of an environment to be used on multiple devices.

In the lower left corner of the HUD is a small button with an image of a cube <img src="https://1025404586-files.gitbook.io/~/files/v0/b/gitbook-x-prod.appspot.com/o/spaces%2FvALqBsUIqL1aZ2BmaieV%2Fuploads%2Fybxsox6s1delH5YCxLzT%2Fimage.png?alt=media&amp;token=03cd7961-ab31-4bea-ba77-a3dafb8c4bb3" alt="" data-size="line">. When you click on it, a small information box opens with some numerical details about the number of objects in the scene, the number of materials, vertices and triangles.

<figure><img src="https://1025404586-files.gitbook.io/~/files/v0/b/gitbook-x-prod.appspot.com/o/spaces%2FvALqBsUIqL1aZ2BmaieV%2Fuploads%2FWU7fQUdc7Ik5WrVS7mkl%2Fimage.png?alt=media&amp;token=b79c190f-e7a0-4570-b1c7-25a132b248f8" alt="" width="563"><figcaption></figcaption></figure>

Depending on the complexity of the inserted objects, the **Poly-Counts** panel will report the exact number of triangles in the scene. Each scene has a number of triangles available depending on the number of lands it contains. Each land can hold **45000 triangles**, and the total is cumulative for the scene itself.

If the number of triangles entered exceeds the allowed limit, an "*Out of poly-count*" warning will inform you of the need to delete something.

{% hint style="warning" %}
The Asset Pack is optimized to allow for extensive integration of objects into the scene. It is very difficult to saturate this value, but not impossible! It is good to check this report from time to time, watch out for custom objects!
{% endhint %}


# BUSINESS

Coderblock Studio is the all-in-one platform for exploring the metaverse in an easy and intuitive way.

Get ready to revolutionise your business with artificial intelligence and virtual experiences!


# Start

**Coderblock Studio** is the **all-in-one platform** that can **revolutionize your business** by creating virtual experiences with just a few clicks and without the need for significant resources.

Experiment with and harness the potential of virtual environments, create immersive experiences and discover the power of **Generative AI applied to virtual experiences** to improve internal processes and gain a competitive edge.

{% embed url="<https://www.youtube.com/watch?v=3pXdg4cPjlg>" %}

<table data-view="cards"><thead><tr><th></th><th></th><th></th><th data-hidden data-card-target data-type="content-ref"></th></tr></thead><tbody><tr><td></td><td>I piani nel dettaglio</td><td></td><td><a href="/coderblock-studio/business/start/plans-in-detail">Plans in detail</a></td></tr><tr><td></td><td>Scene virtuali, Lands e digital twin</td><td></td><td><a href="/coderblock-studio/business/start/spaces-lands-e-digital-twin">Spaces, Lands e Digital twin</a></td></tr><tr><td></td><td>Ingresso in Coderblock Studio</td><td></td><td><a href="/coderblock-studio/business/start/getting-started-with-coderblock">Getting started with Coderblock</a></td></tr><tr><td></td><td>Gestione scene virtuali</td><td></td><td><a href="/coderblock-studio/business/start/virtual-scene-management">Virtual scene management</a></td></tr></tbody></table>


# Plans in detail

Two different subscription plans and a bespoke package offer every company the opportunity to explore the virtual world at a flat annual cost. Here are the plan details:

For more details on the subscription plans available, please visit the [following page](https://www.coderblock.com/pricing/).

<figure><img src="https://1025404586-files.gitbook.io/~/files/v0/b/gitbook-x-prod.appspot.com/o/spaces%2FvALqBsUIqL1aZ2BmaieV%2Fuploads%2F2jqw401ltTVwm5cOMfG9%2FScreenshot%202024-07-02%20alle%2010.34.37.png?alt=media&amp;token=fdde3371-35dc-4cd5-b1b4-79900fd65a01" alt=""><figcaption><p><a href="https://www.coderblock.com/en/pricing/">Subscription Plans</a></p></figcaption></figure>

<table data-view="cards"><thead><tr><th></th><th></th><th></th><th data-hidden data-card-target data-type="content-ref"></th></tr></thead><tbody><tr><td></td><td>Plus</td><td></td><td><a href="/coderblock-studio/subscription-plans/plans-for-companies/plus">Plus</a></td></tr><tr><td></td><td>Premium</td><td></td><td><a href="/coderblock-studio/subscription-plans/plans-for-companies/premium">Premium</a></td></tr><tr><td></td><td>Tailor-made</td><td></td><td><a href="/coderblock-studio/business/start/plans-in-detail/custom">Custom</a></td></tr></tbody></table>


# Plus

The Plus plan allows you to **start exploring the potential of virtual environments** with a basic package. With full access to the Builder, you can create your own branded experiences from scratch or using one of the 15 additional templates included in the plan.

In addition, the Plus plan includes **access to Coderblock Hub**, Coderblock's showcase designed to give visibility to your virtual worlds.

<figure><img src="https://1025404586-files.gitbook.io/~/files/v0/b/gitbook-x-prod.appspot.com/o/spaces%2FvALqBsUIqL1aZ2BmaieV%2Fuploads%2F6jjP96vxk9ZpX88iTn8A%2FScreenshot_2024-07-02_alle_10.40.38-removebg-preview.png?alt=media&amp;token=d8ae19e5-14e4-49da-b8a5-c0a6d5ec37a6" alt=""><figcaption><p><a href="https://pay.coderblock.com/b/00g6rU7E5fErfCwdQY?prefilled_promo_code=CBVL40B2B&#x26;_gl=1*t2vvtl*_gcl_au*NTc2NzcwLjE3MTgxODMzOTc.">Plus Plan</a></p></figcaption></figure>


# Premium

The Premium plan includes **all the features of the basic package**, with a larger number of catalog templates to use for building customized experiences. Additionally, it provides your business with **tailored strategic consulting** for potential projects in the metaverse.

Our team, with years of accumulated expertise, will guide you towards the most suitable design for your business needs, offering you dedicated support.

Among the additional benefits of the Premium plan is the **integration of AI tools and Digital Humans** into your virtual scenes, taking your experiences to the next level.

<figure><img src="https://1025404586-files.gitbook.io/~/files/v0/b/gitbook-x-prod.appspot.com/o/spaces%2FvALqBsUIqL1aZ2BmaieV%2Fuploads%2FbfbwS2WAKIOqdqesyKXp%2Fpremium.png?alt=media&amp;token=9c3b402b-f93a-49ca-a691-9db417ac0544" alt="" width="375"><figcaption><p><a href="https://pay.coderblock.com/b/8wM7vY9MdbobeysfZ4?prefilled_promo_code=CBVL40B2B&#x26;_gl=1*1grs77*_gcl_au*NTc2NzcwLjE3MTgxODMzOTc.">Premium Plan</a></p></figcaption></figure>


# Custom

The **Custom** plan is a truly **tailored solution**, designed in collaboration with our team to meet your brand's specific needs. You will receive **strategic and project consulting**, as well as Enterprise-level technical support. Your virtual project will be crafted with meticulous attention to detail, such as a bespoke digital twin, with 3D modeling of custom scenarios and personalized quests.

This plan also offers a higher number of simultaneous users connected to your scene, as well as the integration of advanced Artificial Intelligence features.

<figure><img src="https://1025404586-files.gitbook.io/~/files/v0/b/gitbook-x-prod.appspot.com/o/spaces%2FvALqBsUIqL1aZ2BmaieV%2Fuploads%2FmPJ3vcpAF2fD8PZtJ22V%2FProgetto%20senza%20titolo%20(4).png?alt=media&amp;token=4b53132f-54df-48c9-a4c8-8da894ab44a8" alt="" width="375"><figcaption><p><a href="https://www.coderblock.com/en/pricing/#contatti">Custom Plan</a></p></figcaption></figure>


# Spaces, Lands e Digital twin

Discover the differences between Spaces, Lands and Digital Twin!

<table data-view="cards"><thead><tr><th></th><th></th><th></th><th data-hidden data-card-target data-type="content-ref"></th></tr></thead><tbody><tr><td></td><td>Scenes</td><td></td><td><a href="/coderblock-studio/business/start/spaces-lands-e-digital-twin/spaces">Spaces</a></td></tr><tr><td></td><td>Land</td><td></td><td><a href="/coderblock-studio/creators/start/plans-in-detail/land">Land</a></td></tr><tr><td></td><td>Digital Twin</td><td></td><td><a href="/coderblock-studio/business/start/spaces-lands-e-digital-twin/digital-twin">Digital Twin</a></td></tr></tbody></table>


# Spaces

**Spaces** are **3D environments** featuring scenarios, buildings, NPCs, quests, and customized experiences. Unlike lands, these scenes are not located within a shared map but are **separate worlds that can be shared and accessed directly via URL**. They are ideal for hosting events, activities, and initiatives tailored to a specific target audience or for creating exclusive environments accessible to a limited group of users.

<figure><img src="https://content.gitbook.com/content/vALqBsUIqL1aZ2BmaieV/blobs/V8QBrHBzgWPrx1gB98ir/Spaces.png" alt=""><figcaption><p>Coderblock Headquarter</p></figcaption></figure>


# Land

**Lands** are **virtual plots registered on the blockchain**, with **ownership rights guaranteed by smart contracts**. These parcels are located at specific coordinates within a virtual map called the Open World. This environment is accessible and explorable by all users of the platform: owning land in this shared space offers various opportunities in terms of visibility and awareness.

<figure><img src="https://content.gitbook.com/content/vALqBsUIqL1aZ2BmaieV/blobs/T6HfXujIpjwguDhXwWTR/Screenshot%202024-06-29%20alle%2008.45.32.png" alt=""><figcaption><p>Our Open World</p></figcaption></figure>

This environment is **accessible and explorable** **by all users of the platform**: owning land in this **shared space** therefore offers several **opportunities in terms of visibility and awareness**. Each virtual plot **can be visited by a potentially unlimited number of people** who can experience the activities and events planned. Furthermore, as digital property, plots have an intrinsic value that can increase over time, making them tradable assets that can be rented or sold to other users.

{% embed url="<https://www.youtube.com/watch?t=6s&v=vp5pfT64BI0>" %}


# Digital Twin

**Digital twins** are **virtual representations of real environments, structures and initiatives**: a **true digital copy in the virtual world**.&#x20;

From headquarters to event pavilions, from hospital facilities to cinemas, every business reality can have its digital twin, a virtual replica of an existing physical entity used to simulate, analyse and optimise various business operations. This advanced technology allows the creation of a detailed digital model capable of optimizing processes, anticipating problems and innovating with greater agility to remain competitive in an increasingly dynamic market, providing real-time insights into performance and operating conditions.&#x20;

**It provides a truly immersive physical-digital experience** that enables activities such as simulation and testing, research and development, process optimization and efficiency improvement.

<figure><img src="https://content.gitbook.com/content/vALqBsUIqL1aZ2BmaieV/blobs/ad0WB7nwaGb9hT9ugavK/Q8_metaverse.jpg" alt=""><figcaption><p> Digital Twin - <strong>Flagship Station di Q8 a Paderno Dugnano</strong> (MI).</p></figcaption></figure>


# Getting started with Coderblock

Once you have subscribed to the plan that best suits your needs, you can begin **experimenting** by logging into the platform.&#x20;

To access Coderblock Studio, you need to log in [here](https://coderblock.com/login) with your credentials (or create an account if you haven't registered on Coderblock yet).


# Login/Sign up

* [Login](https://coderblock.com/login) by entering your account details. (Forgot your password? Reset it [here](https://coderblock.com/password/reset).)
* [Sign up](https://coderblock.com/it/signup):  If you don't have an account yet, simply follow the instructions and fill in all the required fields to register on the platform.
* Once you are logged in, you can start customizing your avatar directly from Coderblock Studio:

<figure><img src="https://1025404586-files.gitbook.io/~/files/v0/b/gitbook-x-prod.appspot.com/o/spaces%2FvALqBsUIqL1aZ2BmaieV%2Fuploads%2FTM0RQDFFtXmJQMQAy8nu%2FScreenshot%202024-06-28%20alle%2015.12.05.png?alt=media&amp;token=bddc584d-d195-498f-aa4c-b53ac7e350c3" alt=""><figcaption></figcaption></figure>

Want to know how? Read [here](/coderblock-world/user-experiences/photorealistic-avatar-coderblock-studio-x-ready-player-me).


# Virtual scene management

**Coderblock Studio** allows you to **manage your 360-degree virtual scenes** through a simple and intuitive web interface.

Whether you want to **increase brand awareness, boost lead generation, organize events or offer your customers a more immersive shopping experience**, your spaces in the metaverse provide a new touchpoint with your audience.

Based on your **business goals**, you can direct your team to create experiences with different styles and purposes, starting from scratch or using available catalogue templates. Alternatively, you can choose from a range of scenes created by our virtual creators and select those that best meet your objectives.

You can also create personalised adventures in the form of quests, engage your users with non-player characters (NPCs), broadcast live events on large screens, and (soon) add new team members to manage the environment and moderate experiences, ensuring a safe environment by excluding inappropriate users.

Find out more [here](/coderblock-studio/virtual-environment-management).


# Create

Creating a virtual experience for your business in Coderblock Studio allows you to **explore** the metaverse at an **affordable cost**. Using the Builder tool, you can create and share 3D experiences and entire worlds in just a few steps, without any technical expertise, to support your business objectives: from increasing brand awareness and lead generation to boosting direct sales.

All of this is enhanced by the application of **Artificial Intelligence** tools to metaverse functionalities, marking another step towards business innovation.

<table data-view="cards"><thead><tr><th></th><th></th><th></th><th data-hidden data-card-target data-type="content-ref"></th></tr></thead><tbody><tr><td></td><td>Builder Tool</td><td></td><td><a href="/coderblock-studio/business/create/builder-tool">Builder Tool</a></td></tr><tr><td></td><td>Virtual experiences</td><td></td><td><a href="/coderblock-studio/business/create/virtual-experiences">Virtual experiences</a></td></tr><tr><td></td><td>Case studies</td><td></td><td><a href="/coderblock-studio/business/create/workspaces-inside-the-virtual-world-and-case-studies">Workspaces inside the virtual world and case studies</a></td></tr></tbody></table>


# Builder Tool

The **Builder Tool** is the heart of Coderblock Studio: an online builder tool designed to be easy and intuitive to use for users at different levels of digitization.

{% embed url="<https://www.youtube.com/watch?v=f2inE11taX4>" %}

Within the tool, **you can start from a blank scene or use the extensive selection of 3D models in the library** (over 1,000 virtual objects). Alternatively, you can start with a pre-built template that we've provided to further streamline the creation process.

However, the **customization** options are extensive. You can make your branded virtual experiences even more unique and exclusive by uploading external 3D models in .glb format.

<figure><img src="https://content.gitbook.com/content/vALqBsUIqL1aZ2BmaieV/blobs/qgXkSu3spbbKoBGxxT3k/Screenshot%202024-06-28%20alle%2014.50.48.png" alt=""><figcaption><p>Il nostro Builder Tool!</p></figcaption></figure>

Consult the dedicated [guide](/coderblock-studio/builder-tool) to get direct help on all the features available in the Builder and get the most out of your Coderblock Studio experience.

**Prefer a turnkey virtual experience**? Explore the **Custom Plan** and request a consultation with our team to tailor the project to your goals.


# Virtual experiences

The **virtual experiences** in the metaverse can be potentially endless, each to be designed according to the type of business and the goals to be achieved. Here are a few examples. You can also view them all [here](https://www.coderblock.com/en/virtual-experiences/).


# Offices

A new way of **collaborating and networking** in the metaverse. Your virtual headquarters becomes a meeting place for team building, connecting geographically dispersed offices and meeting new customers and talent from all walks of life.

<figure><img src="https://content.gitbook.com/content/vALqBsUIqL1aZ2BmaieV/blobs/Tt5q4mWLYXz6ixOhpVSh/Office.webp" alt=""><figcaption></figcaption></figure>


# Events

Create new **networking and lead generation** opportunities in the metaverse through **virtual events and tradeshows**: it's possible to engage a broader audience, overcome geographical and logistical limitations, and create a more immersive experience for event attendees.

<figure><img src="https://content.gitbook.com/content/vALqBsUIqL1aZ2BmaieV/blobs/hdiSOsHYJVuiiPBIZq6u/event.webp" alt=""><figcaption></figcaption></figure>


# HR and Recruitment

The Metaverse is an innovative space where you can **streamline your company's HR processes**: from profiling candidates and recruiting new talent, to onboarding new employees and organizing team-building activities to increase employee engagement.

<figure><img src="https://content.gitbook.com/content/vALqBsUIqL1aZ2BmaieV/blobs/7nIwjL4enwxa2h5tw1F8/recruitment.webp" alt=""><figcaption></figcaption></figure>


# Training

**Train in a new way**: create an immersive world tailored to your online courses and offer your students and trainees gamification experiences designed to make learning more engaging.&#x20;

<figure><img src="https://content.gitbook.com/content/vALqBsUIqL1aZ2BmaieV/blobs/HffLPv1w9f5hjZKLaPud/learning.webp" alt=""><figcaption></figcaption></figure>


# E-commerce

Increase your online sales: by creating your **virtual store**, you can offer a less impersonal and increasingly immersive shopping experience to users of your e-commerce platform.

Virtual shops, product showcases, virtual shopping assistants, and live customer care are **just a few of the services** you will have access to, guiding your users through a **revolutionary shopping experience journey**.

<figure><img src="https://content.gitbook.com/content/vALqBsUIqL1aZ2BmaieV/blobs/LRDzhrWtPLW7HU790dPb/shop.webp" alt=""><figcaption></figcaption></figure>


# Workspaces inside the virtual world and case studies

Over the years, several companies have chosen Coderblock to increase their business opportunities. Below are some case studies from different industries that illustrate the potential of the Metaverse (discover them all [here](https://www.coderblock.com/en/clients/)).


# Flagship Station by Q8

A forward-looking digital twin.

**Q8** is one of the leading players in the fuel distribution scene in Italy. The project created is a **digital twin that captures the essence and modernity of Q8's flagship station in Paderno Dugnano** (MI).&#x20;

In its virtual version, the project tells a compelling story: the harmonious meeting of innovation and functionality, where every detail is designed to improve the user's life. It invites you to explore a world where fueling becomes an interactive and immersive journey, reflecting Q8's vision of a greener and more technologically integrated future.&#x20;

This state-of-the-art service center is designed to meet every mobility need, seamlessly combining advanced technology, cutting-edge design and sustainability principles.

<figure><img src="https://content.gitbook.com/content/vALqBsUIqL1aZ2BmaieV/blobs/tsho1LQJRY5N9YWxw7Ss/Q8_metaverse.jpg" alt=""><figcaption><p>Digital twin - <strong>Flagship Station di Q8 a Paderno Dugnano</strong> (MI).</p></figcaption></figure>


# LE VILLAGE by Crédit Agricole Triveneto

A digital twin for startups and corporates.

A perfect example of a **digital twin**: **a 3D hub that faithfully reproduces the environments of the Padua office**. This space offers co-working areas for startups, meeting rooms and branded spaces for companies, with the aim of improving networking opportunities and increasing audience engagement.

\
An immersive experience that allowed users to customize their avatar, explore the citadel, use the chat to communicate, interact with corners dedicated to the startups, and go to the main space, La Place, where they could watch events and live streams on the big screen.

<figure><img src="https://content.gitbook.com/content/vALqBsUIqL1aZ2BmaieV/blobs/HmFXRt22CBj2DbyJNpYv/screen-LeVillage8.jpg" alt=""><figcaption></figcaption></figure>


# SAVE THE CHILDREN - #bambinisottoattacco

A virtual awareness campaign inside the metaverse.

For Save the Children, we launched **a virtual space dedicated to the #childrenunderattack campaign**, an initiative aimed at raising awareness of the enormous difficulties millions of children face as a result of war. A virtual journey linked to gamification activities within the virtual environment, an exhibition of NFT artwork donated by artists was planned and linked to Web3 marketplaces. Proceeds from sales were donated to charity to support children affected by the war in Ukraine.&#x20;

By entering the virtual world, Save the Children Italy was able to **expand its financial support and integrate innovative communication channels to spread its messages to a wider and more diverse audience**.&#x20;

The Metaverse also became a **space for activism**, where every visitor could sign a petition to the Italian government to prosecute war crimes against children.

<figure><img src="https://content.gitbook.com/content/vALqBsUIqL1aZ2BmaieV/blobs/UTeK1rRuA8g14EpmPqki/screen-STC8.jpg" alt=""><figcaption></figcaption></figure>


# SACE JOB FAIR by Sace Group

Career day in the metaverse.

A perfect example of the **Career Day** in the Metaverse, dedicated to exploring opportunities in HR through virtual innovation, organized by SACE.

The event offered students, graduates and young professionals the opportunity to **discover career opportunities in the SACE Group** and be part of the ongoing transformation.&#x20;

The initiative offered a virtual exhibition environment and a gaming phase to actively engage participants, allowing them to understand SACE's mission through a unique online experience. Cognitive talks, networking sessions, gamification elements and thematic quiz challenges about SACE: the event harnessed the potential of the metaverse to overcome geographical limitations and offer full immersion in the virtual world.

<figure><img src="https://content.gitbook.com/content/vALqBsUIqL1aZ2BmaieV/blobs/h2fMBitQG0DvZwAv5RJR/screen-SACE1.jpg" alt=""><figcaption></figcaption></figure>


# Sharing

**Coderblock Studio** gives you the opportunity to **share your creations** and showcase your best scenes to the rest of the community.

Coderblock Studio gives you the ability to organise as many events as you like, expanding the reach of your experiences.

You can choose to share your scenes with your target audience by simply sending them a URL, or post them on **Coderblock Hub**, the public showcase that increases the visibility of your scenes and your brand.

<table data-view="cards"><thead><tr><th></th><th></th><th></th><th data-hidden data-card-target data-type="content-ref"></th></tr></thead><tbody><tr><td></td><td>Pubblicare una scena</td><td></td><td><a href="/coderblock-studio/business/sharing/how-to-publish-a-scene">How to: publish a scene</a></td></tr><tr><td></td><td>Condividere una scena</td><td></td><td><a href="/coderblock-studio/business/sharing/how-to-sharing-a-scene-coming-soon">How to: sharing a scene - COMING SOON</a></td></tr><tr><td></td><td>Pagina profilo Creator - COMING SOON</td><td></td><td><a href="/coderblock-studio/business/sharing/creator-profile-page-coming-soon">Creator profile page - COMING SOON</a></td></tr><tr><td></td><td>Coderblock Hub</td><td></td><td><a href="/coderblock-studio/business/sharing/coderblock-hub-coming-soon">Coderblock Hub - COMING SOON</a></td></tr></tbody></table>


# How to: publish a scene

Once you have created your virtual experience, you can publish it to make it visible and accessible to other users.

Once you have finished configuring your scene, you can publish it by simply clicking ***Publish*** in the top right hand menu within the Builder. Once published, click ***Jump to your virtual world*** to visit it yourself, and share the URL at the top with your contacts to invite others to explore!

<figure><img src="https://content.gitbook.com/content/vALqBsUIqL1aZ2BmaieV/blobs/s6fh9FqJwW5kqOeGq2Aa/Screenshot%202024-06-28%20alle%2016.21.54.png" alt=""><figcaption></figcaption></figure>


# How to: sharing a scene - COMING SOON

Coderblock Hub is the showcase where you can share your virtual experiences or buy your favourites from our community of creators.

Sharing a scene on Coderblock Hub is easy:

* Use the ***Experiences*** section to showcase your experience and increase its visibility. Coderblock users can visit and interact with the content inside.&#x20;
* Use the ***Marketplace*** section (link to documentation) to buy your favourite scenes created by our virtual Creators.


# Creator profile page - COMING SOON

Soon you will have access to a **dedicated page profile** page where you can tell the story of your brand and showcase your brand experiences. It will be a real showcase to gather all the virtual initiatives related to your company and attract more users.


# Coderblock Hub - COMING SOON

**Coderblock Hub** is a public space where you can showcase your creations. Not only will you be able to showcase your virtual scenes to the world, but you'll also have the opportunity to increase **awareness** and **lead generation**.

<figure><img src="https://1025404586-files.gitbook.io/~/files/v0/b/gitbook-x-prod.appspot.com/o/spaces%2FvALqBsUIqL1aZ2BmaieV%2Fuploads%2F14ms4Tx0o96yub92WX91%2FCoderblock-HUB-NL.jpg?alt=media&amp;token=9ab6f1af-d889-49d0-a6dd-fe830e9628a5" alt=""><figcaption></figcaption></figure>


# Marketplace

**Coderblock Hub - Marketplace** is where you can buy any creation you want. Coderblock Hub is the ideal showcase for our virtual creators to showcase and sell their best virtual experiences.


# Experiences

**Coderblock Hub - Experiences** allows you to share your scenes. This means you can use them in countless ways: create quests, use scenes for events, or recreate your virtual office. Each virtual experience is designed to be shared, providing a space for communication, connection and interaction with other users.

Your scene is easily accessible: you can share it via a URL.


# Business opportunities

Key objectives for doing business with Coderblock Studio include increasing brand awareness, enhancing reputation and fostering customer loyalty through custom virtual experiences, events and webinars.&#x20;

The platform facilitates lead generation through immersive events and live streaming webinars, increasing interaction and engagement. It also provides the opportunity to create a unique and personalised shopping experience to differentiate from the competition and increase sales. By creating engaging and realistic virtual environments for recruiting and networking, it optimises business processes and increases business opportunities.


# Goals

When creating your own virtual experiences, what are the main goals you want to achieve?


# Awareness

Increasing **brand awareness**, improving **reputation and fostering customer loyalty**: our personalised solutions are designed to be highly efficient and measurable, ensuring that every resource deployed contributes significantly to your business success.

Coderblock Studio gives you all the tools you need to create awareness-focused experiences: events, webinars, meetings and branded quests. We also offer the ability to create customised 3D scenes, allowing you to create unique and highly engaging virtual environments.

<figure><img src="https://content.gitbook.com/content/vALqBsUIqL1aZ2BmaieV/blobs/ikJ0vGlFobhqhB3wcz1q/awareness.jpg" alt=""><figcaption></figcaption></figure>


# Lead generation

Hosting events, creating live streaming webinars and increasing user engagement through gamification: **generating leads in the metaverse** has never been easier. With Coderblock Studio, you can deliver immersive experiences that foster a deeper and more meaningful connection with your brand. Manage experiences and events easily and effectively with high levels of participation and interaction.

<figure><img src="https://content.gitbook.com/content/vALqBsUIqL1aZ2BmaieV/blobs/34mIFUz9kgFeQRVitZdZ/Lead%20gen.jpg" alt=""><figcaption></figcaption></figure>


# Sales

In an ever-evolving digital landscape, delivering a unique and personalized shopping experience is critical to differentiating your business and building customer loyalty. Our innovative approach to **e-commerce** combines advanced technology and customization to create a virtual store that not only attracts customers, but also engages them in a memorable way.

By increasing conversion rates and customer satisfaction, our approach leads to sustainable and significant revenue growth.

<figure><img src="https://content.gitbook.com/content/vALqBsUIqL1aZ2BmaieV/blobs/IsFv1uROkcOvVYHYRZk0/vendite.jpg" alt=""><figcaption></figcaption></figure>


# Networking

Building a strong and diverse network is essential to creating **new business opportunities** and **achieving your goals**. Create new initiatives to connect with people who share similar interests, interact with industry leaders and stay on top of the latest trends - all in the virtual world.

<figure><img src="https://content.gitbook.com/content/vALqBsUIqL1aZ2BmaieV/blobs/lP3gMzlnj8BlwAS2yRIq/networking.jpg" alt=""><figcaption></figcaption></figure>


# Workflows optimization

The recruitment process determines the quality and effectiveness of the work team. By creating **Virtual Recruitment Experiences**, you can use immersive environments, realistic scenarios and gamification activities to deliver innovative recruitment activities to your candidates.

In Coderblock, you can create an immersive environment where candidates find themselves in realistic scenarios that replicate the day-to-day challenges they may face in their role. This allows them to demonstrate their skills, technical competencies, problem solving abilities and adaptability, providing a comprehensive view of their potential.

By identifying the strengths and weaknesses of each candidate, you can build a solid and competent team capable of meeting the challenges of the marketplace.

<figure><img src="https://content.gitbook.com/content/vALqBsUIqL1aZ2BmaieV/blobs/s7XFKKn4U2JehxjvZvqw/ottimizzazione%20flussi.jpg" alt=""><figcaption></figcaption></figure>


# Analytics Dashboard - COMING SOON

The **Analytics Dashboard**, available to every user, is the perfect place to monitor and analyse results to improve your company's user experience. Inside you will find Key Performance Indicators (KPIs) that are critical to analyzing user actions within your scene.

<figure><img src="https://1025404586-files.gitbook.io/~/files/v0/b/gitbook-x-prod.appspot.com/o/spaces%2FvALqBsUIqL1aZ2BmaieV%2Fuploads%2FxZiYqQffYVdGwmZy5QjJ%2FScreenshot%202024-07-02%20alle%2011.13.12.png?alt=media&amp;token=2bc2bbcd-5950-485b-b6f5-ad35f45a393a" alt=""><figcaption></figcaption></figure>


# CREATORS

Join **Coderblock Studio** and become a **virtual creator**: in just a few steps you can build unique 3D experiences and worlds, share them with the community, and unleash your creativity while earning rewards!

<figure><img src="https://1025404586-files.gitbook.io/~/files/v0/b/gitbook-x-prod.appspot.com/o/spaces%2FvALqBsUIqL1aZ2BmaieV%2Fuploads%2FnqmK3K3bDh0cbur53Qwr%2FScreenshot%202024-07-02%20alle%2011.15.06.png?alt=media&amp;token=d1d5d75f-a7be-47f5-b34e-b9334c16fa4b" alt=""><figcaption></figcaption></figure>


# Start

Become a **virtual Creator**: In just a few steps, you can build unique worlds, share them with your community and earn rewards for unleashing your creativity. No technical skills required, **just your imagination**!

<table data-view="cards"><thead><tr><th></th><th></th><th></th></tr></thead><tbody><tr><td></td><td>Plans in detail</td><td></td></tr><tr><td></td><td>Scene virtuali and Lands</td><td></td></tr><tr><td></td><td>Login/Sign up in Coderblock Studio</td><td></td></tr><tr><td></td><td>Virtual scene management</td><td></td></tr></tbody></table>


# Plans in detail

We have a plan for **every need and opportunity**. In Coderblock Studio, as a Creator, you can choose which of these three subscriptions you would like to subscribe to.

<figure><img src="https://1025404586-files.gitbook.io/~/files/v0/b/gitbook-x-prod.appspot.com/o/spaces%2FvALqBsUIqL1aZ2BmaieV%2Fuploads%2F8NuGs9Z3WD30B0eb5ufK%2FScreenshot%202024-07-02%20alle%2010.48.39.png?alt=media&amp;token=5f7d799c-4e0e-491a-b654-67a9a6550feb" alt=""><figcaption><p><a href="https://www.coderblock.com/en/creators/">Subscription plans</a></p></figcaption></figure>

<table data-view="cards"><thead><tr><th></th><th></th><th></th></tr></thead><tbody><tr><td></td><td>Free</td><td></td></tr><tr><td></td><td>Premium</td><td></td></tr><tr><td></td><td>Plus</td><td></td></tr></tbody></table>


# Free

You will have access to a **free virtual scene** where you can **start experimenting** by building scenarios and experiences. Just register with Coderblock and log in to Coderblock Studio to **discover all the possibilities of the Builder Tool**!

<figure><img src="https://content.gitbook.com/content/vALqBsUIqL1aZ2BmaieV/blobs/BwMnevKDWPQIlnDIABVn/FREE.png" alt=""><figcaption><p>Piano Free</p></figcaption></figure>


# Plus

An advanced plan that lets you **create unlimited scenes, share them** with your contacts and users, and **monetize** them! With the Plus plan, you'll have full access to **all the features of Coderblock Studio**, publish your scenes, organize events and sell your creations on the Coderblock Hub marketplace!

If you opt for the **annual plan**, you'll also benefit from a significant discount (**40% off!**) and have access to **15 catalogue templates** to use as models for building your experiences!

<figure><img src="https://1025404586-files.gitbook.io/~/files/v0/b/gitbook-x-prod.appspot.com/o/spaces%2FvALqBsUIqL1aZ2BmaieV%2Fuploads%2F5FbQS8M4TJxb9grtxjeE%2FScreenshot_2024-07-02_alle_10.40.38-removebg-preview.png?alt=media&amp;token=cbe40580-903d-4ed8-8211-298a4c11d8d1" alt=""><figcaption><p><a href="https://pay.coderblock.com/b/eVaaIa3nP0Jx9e828j?prefilled_promo_code=CBVL40&#x26;_gl=1*1bbl1z*_gcl_au*NTc2NzcwLjE3MTgxODMzOTc.">Plus Plan</a></p></figcaption></figure>


# Land

Unlike previous plans, the **Land plan does not involve a subscription**, but rather a one-time purchase of one or more lands within Coderblock's open world.

**Owning a land means acquiring ownership on the Blockchain**, as lands are NFTs registered via smart contracts. Your lands are located within a **shared world**, so rather than being separate microcosms, they can be accessed and visited by a potentially unlimited number of users exploring the Coderblock universe.

You'll also be able to **create** unique environments and experiences on your lands using the Builder tool. In addition to the benefits associated with the visibility of your experiences, a virtual land, as real estate, represents value that can be traded through sale or lease.

<figure><img src="https://1025404586-files.gitbook.io/~/files/v0/b/gitbook-x-prod.appspot.com/o/spaces%2FvALqBsUIqL1aZ2BmaieV%2Fuploads%2FDxZS50PKq9iSvhIZ4G1i%2Fland.png?alt=media&amp;token=ece4533b-74c1-48c3-b496-b6f376ab65b0" alt="" width="375"><figcaption><p><a href="https://www.coderblock.com/en/pricing/#contatti">Land Plan</a></p></figcaption></figure>


# Spaces and lands

Although the possibilities for creation and customisation are almost identical, there are, as expected, some differences between virtual scenes and land.

**Spaces are separate microcosms, not connected to each other** or to surrounding virtual worlds. They **can be shared** via a direct URL and are ideal for creating experiences and events tailored to a specific audience.

<figure><img src="https://content.gitbook.com/content/vALqBsUIqL1aZ2BmaieV/blobs/hUelnwJwZ7PIoVq0DceS/Coderblock%20Headquarter.png" alt=""><figcaption><p>Coderblock Headquarter.</p></figcaption></figure>

**Lands**, on the other hand, **are true virtual parcels of land on the blockchain**, with **ownership rights held through smart contracts**. Plots are located using coordinates within an open virtual map: the **Open World**. This world is accessible and explorable by any user on the platform: owning land within a shared space thus offers various opportunities in terms of visibility and awareness, as one's virtual terrain and the experiences it contains can be visited and enjoyed by a potentially infinite number of users. In addition, as property, land has a real value that can be increased, allowing it to be traded as a commodity for rent or sale to third parties.

<figure><img src="https://content.gitbook.com/content/vALqBsUIqL1aZ2BmaieV/blobs/t8poVYMRBZia7T1mOEyK/Screenshot%202024-06-29%20alle%2008.45.32.png" alt=""><figcaption><p>Open World!</p></figcaption></figure>

<figure><img src="https://content.gitbook.com/content/vALqBsUIqL1aZ2BmaieV/blobs/Zkj1jLWc20UYxv8IoCQn/Aura-35-7.jpg" alt=""><figcaption><p><em><strong>Lost Bungalow.</strong></em></p></figcaption></figure>


# Acess to Coderblock Studio

Once you have subscribed to your subscription plan, accessing **Coderblock Studio** is straightforward. You need to log in [here](https://coderblock.com/login) with your credentials (or create an account if you haven't registered on Coderblock yet).


---

[Next Page](/llms-full.txt/1)